
Getting Started
Transforming your space into a productive home recording studio doesn't require a fortune. This listicle provides a curated collection of home recording studio essentials, guiding you through key equipment and setup tips to capture professional-sounding audio without breaking the bank. Whether you're an aspiring music producer, songwriter, or independent artist, understanding these core components is crucial for maximizing your creative potential.
We'll cover everything from selecting the right audio interface and studio monitor speakers to choosing a Digital Audio Workstation (DAW) that fits your workflow. Learn how to capture pristine vocals with the appropriate condenser microphone and closed-back headphones, and discover the power of a MIDI keyboard controller for versatile musical expression.
This guide goes beyond simply listing equipment. We delve into practical usage advice, offering specific insights into optimizing your setup. Learn how acoustic treatment materials can dramatically improve your recordings, and understand why essential accessories like a pop filter and microphone stand are crucial for professional results.
This listicle isn't just a list – it's a carefully curated collection of fundamental building blocks tailored to help you build a practical and powerful home recording studio. Each item is explored with a focus on actionable advice and real-world application, ensuring you gain valuable knowledge and insight into home recording essentials.
1. Audio Interface
The audio interface is the core of your home recording studio essentials, acting as the bridge between your instruments and your computer. It converts analog audio signals from microphones and instruments into digital data your computer can understand. Conversely, it converts the digital audio from your computer back to analog for playback through your headphones or studio monitors. This bidirectional conversion is crucial for high-quality recording and monitoring. Without a dedicated audio interface, you're reliant on your computer's built-in sound card, which often lacks the fidelity and features needed for serious music production.
For example, the Focusrite Scarlett series has become a staple for bedroom producers, while professional home studios often feature Universal Audio Apollo interfaces renowned for their real-time processing capabilities. Budget-conscious creators find value in the PreSonus AudioBox series, and the portable RME Babyface Pro is favored by traveling musicians. These varied options highlight the importance of choosing an interface tailored to your specific needs.
Actionable Tips for Choosing an Interface
- Input Count: Determine how many instruments or microphones you plan to record simultaneously. This will dictate the minimum number of inputs you need.
- Low Latency: Prioritize an interface with low latency performance, which minimizes the delay between playing an instrument and hearing it back through your monitors. This is essential for real-time monitoring and overdubbing.
- Compatibility: Ensure the interface is compatible with your computer's operating system (macOS or Windows).
- Future Expansion: Consider your future needs. You might want to add more microphones or instruments down the line, so choose an interface with some room for growth.
- Direct Monitoring: Experiment with the direct monitoring feature, which routes the input signal directly to your headphones, bypassing the computer. This minimizes latency and reduces the load on your CPU.
For a quick reference on key audio interface features, see the summary box below:
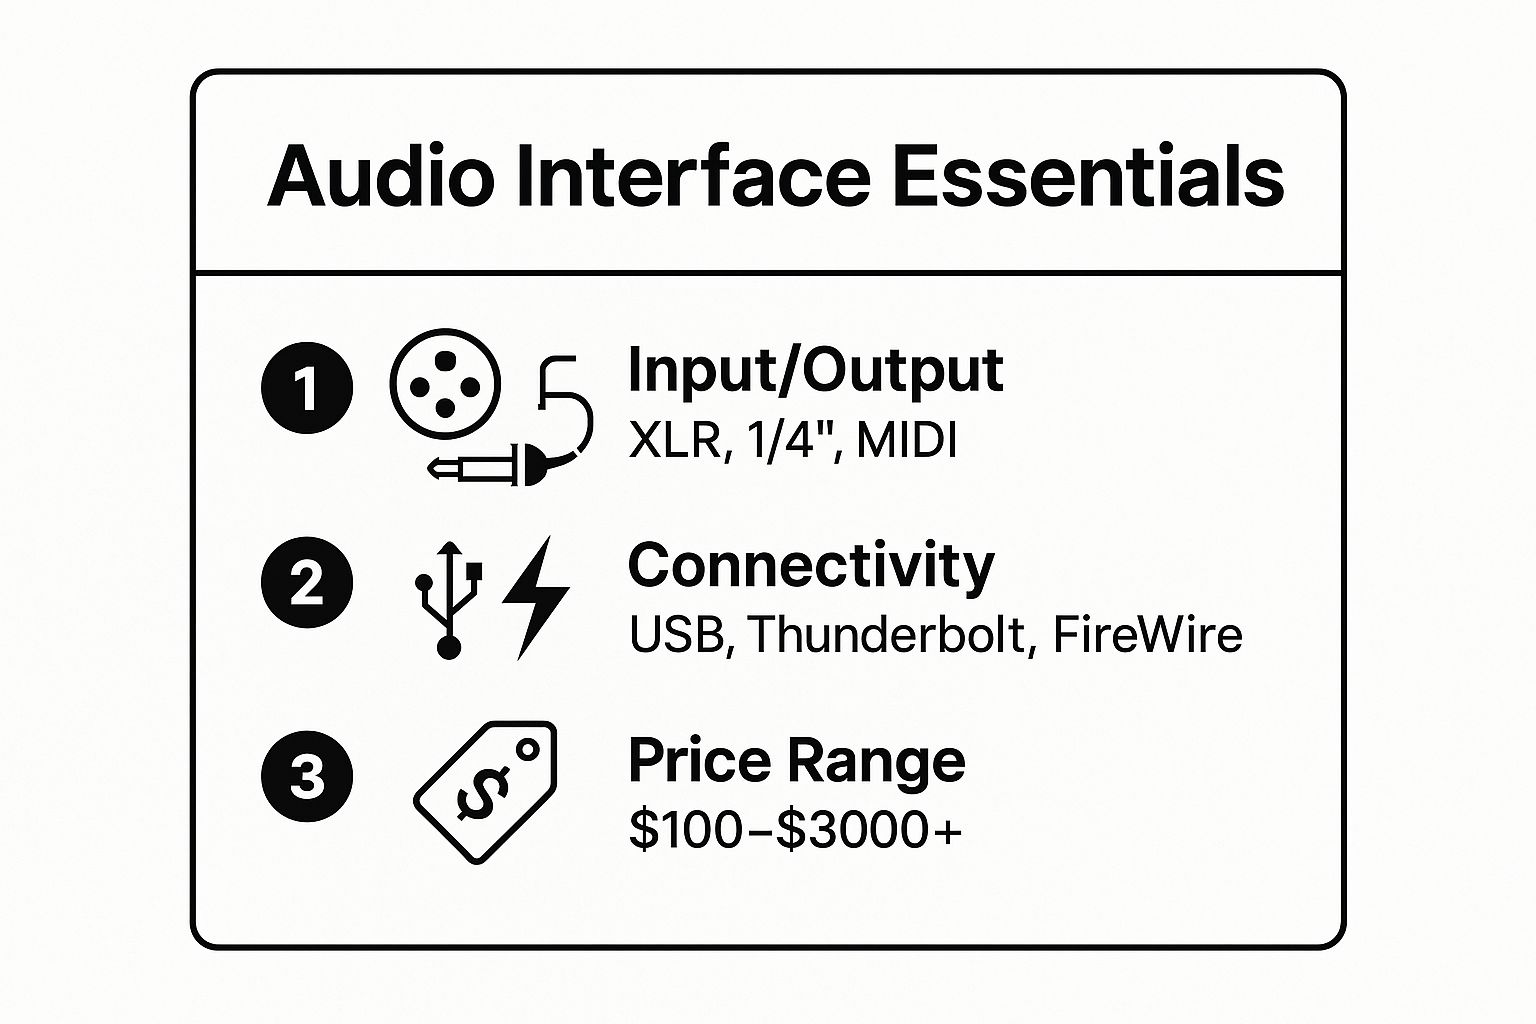
The infographic highlights the various connection types (XLR, 1/4 inch, MIDI), connectivity options (USB, Thunderbolt, FireWire), and price points ($100 – $3000+) to consider when choosing the right audio interface. Understanding these key aspects allows you to select an interface that aligns perfectly with your budget and technical requirements.
To further delve into selecting the right audio interface, especially for beginners, learn more about audio interfaces for beginners. This resource provides in-depth guidance and reviews to help you make an informed decision.
The video above offers a visual overview of audio interface functionality, further solidifying the crucial role this piece of equipment plays in a home recording setup. From capturing pristine audio to facilitating a seamless workflow, the right audio interface truly elevates your home recording experience.
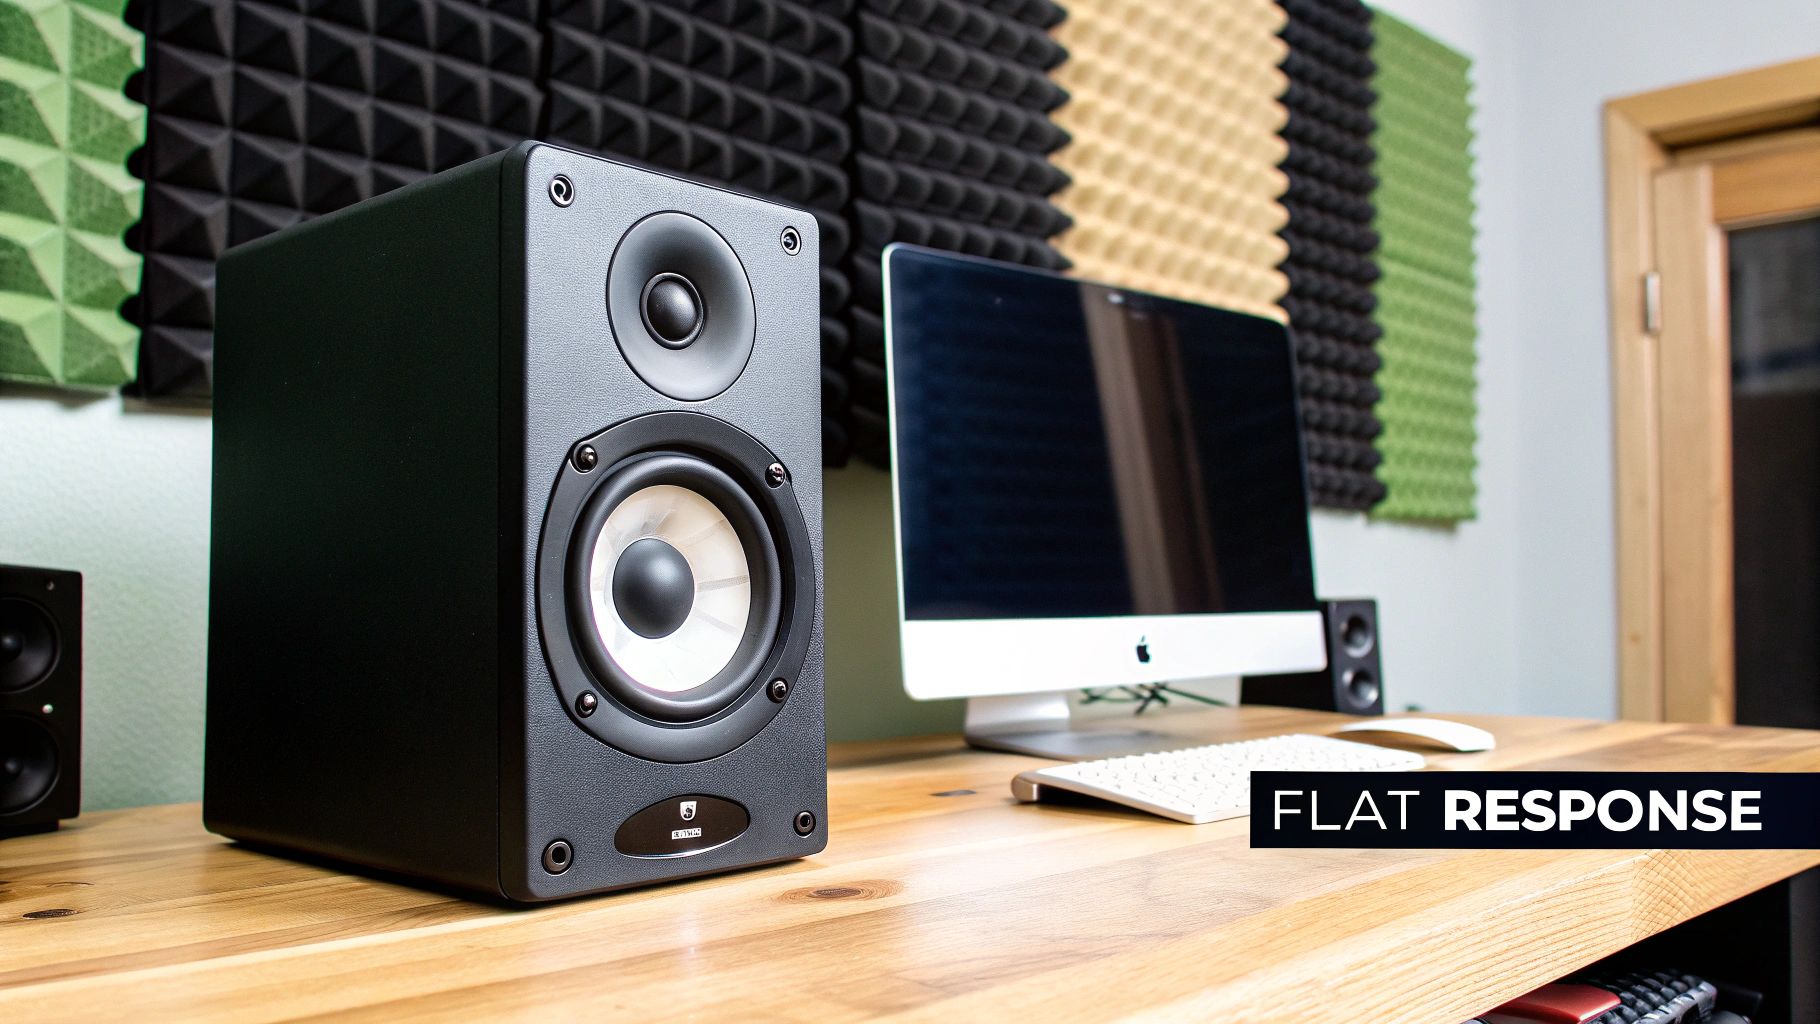
2. Studio Monitor Speakers
Studio monitor speakers are essential components of any home recording studio, designed for accurate sound reproduction, unlike consumer speakers that often color the sound. This accuracy is crucial for mixing and mastering, allowing you to hear the true character of your recordings, including any imperfections that need attention. Without a reliable set of studio monitors, you're essentially mixing in the dark, unable to make informed decisions about EQ, compression, and other crucial aspects of your production. Accurate monitoring reveals the nuances of your mix, ensuring your music translates well across different playback systems.
The Yamaha HS series has become a staple in countless home studios due to its balanced sound and affordability. The KRK Rokit series, known for its punchy low-end, remains popular among electronic music producers. For professional setups, Genelec monitors offer exceptional accuracy and detail. The widely-used JBL LSR series highlights the diverse range of monitors available to suit various needs and budgets.
Actionable Tips for Choosing and Using Studio Monitors
- Positioning: Position your monitors at ear level, forming an equilateral triangle with your listening position. This creates a balanced stereo image and an optimal listening experience.
- Acoustic Treatment: Investing in acoustic treatment for your room can significantly improve the accuracy of your monitoring environment. This minimizes reflections and standing waves, resulting in a cleaner, more defined sound.
- Woofer Size: For most home studios, 5-8 inch woofers provide a good balance between low-end extension and manageable size. Larger woofers might be necessary for genres heavily reliant on bass frequencies.
- Cross-Referencing: Compare your mixes on multiple playback systems, including headphones, car stereos, and other consumer speakers, to ensure your music translates well across various listening environments.
- Break-In Period: Allow proper break-in time for new monitors. The drivers will loosen up over time, leading to a more accurate and consistent sound reproduction.
The legendary Yamaha NS-10M studio standard, the KRK Rokit series favored by electronic music producers, the high-end precision of Genelec, and the innovative ribbon tweeter technology of Adam Audio all exemplify the evolution and importance of studio monitors in professional audio production. Choosing the right studio monitors and optimizing their placement are crucial steps in crafting professional-sounding mixes.
3. Digital Audio Workstation (DAW) Software
The Digital Audio Workstation (DAW) is the software heart of your home recording studio essentials. It's the central hub where all your recording, editing, mixing, and mastering takes place. Think of it as a virtual recording studio, consolidating all the tools you need within a single integrated environment. From recording audio and virtual instruments to applying effects and arranging compositions, the DAW orchestrates your entire workflow.
Industry-standard DAWs like Pro Tools, favored in professional studios worldwide, offer comprehensive functionality and advanced features. Logic Pro X is a popular choice for Mac-based producers, while Ableton Live has become a standard for electronic music production and live performance. Reaper is another excellent option gaining traction due to its affordability and flexible customization. Each DAW has its strengths and caters to specific workflows, so choosing the right one is crucial.
Actionable Tips for Utilizing Your DAW
- Keyboard Shortcuts: Mastering keyboard shortcuts will significantly speed up your workflow. Learn the essential commands for editing, navigation, and tool selection.
- Project Organization: Maintain organized project files with consistent naming conventions and folder structures. This saves you time and prevents frustration when revisiting older projects.
- Version Control: Save multiple versions of your projects before implementing major changes. This allows you to revert to earlier stages if needed.
- Templates: Create templates for common recording setups to streamline your workflow. Pre-configured tracks, effects, and routing save valuable setup time.
- Explore Built-in Plugins: Before investing in third-party plugins, thoroughly explore your DAW's built-in effects and instruments. You might discover hidden gems that meet your needs perfectly.
When choosing a DAW, consider your specific needs and budget. Some DAWs excel at audio recording and editing, while others specialize in MIDI sequencing and electronic music production. Research different options and try out demo versions to find the best fit. Learn more about Digital Audio Workstation (DAW) Software. This resource provides detailed insights into various DAWs and helps you make an informed choice.
From capturing initial ideas to finalizing polished tracks, a powerful DAW is essential for any serious home recording setup. By mastering its features and optimizing your workflow, you unlock the full potential of your home studio and bring your musical visions to life.
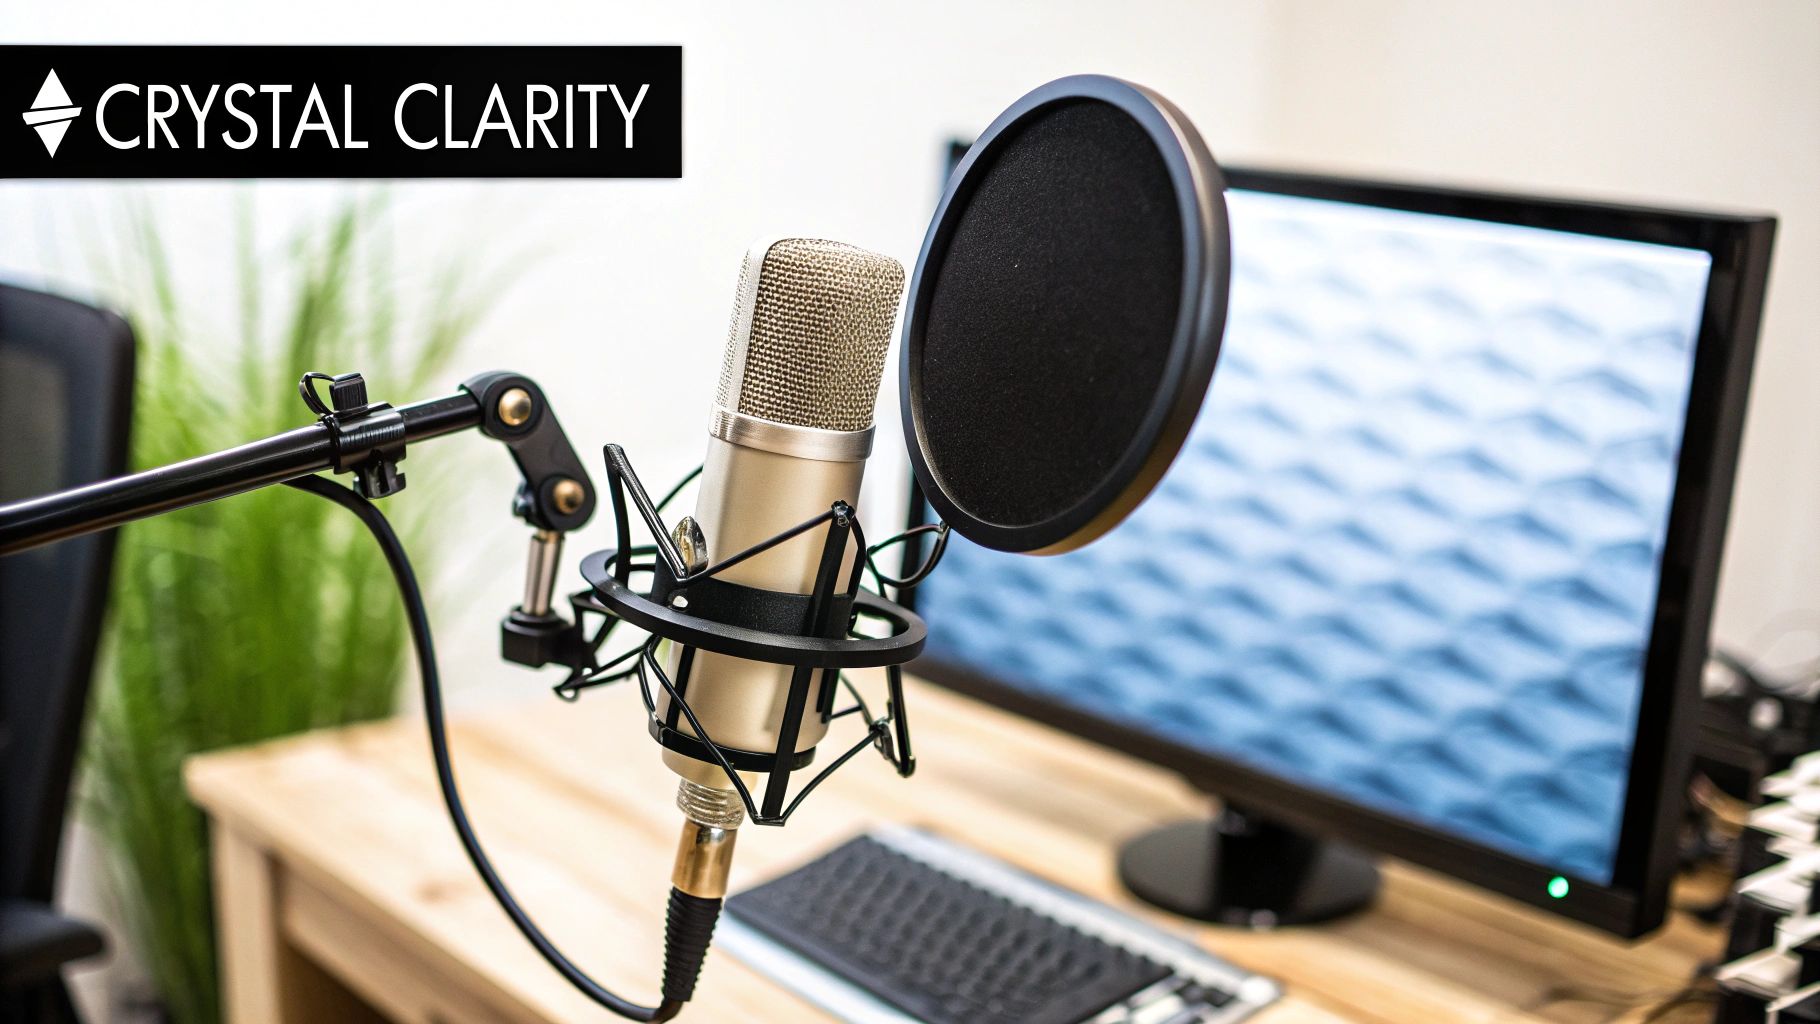
4. Condenser Microphone
Condenser microphones are essential for capturing nuanced audio in a home recording studio. Their sensitivity and wide frequency response make them ideal for recording vocals, acoustic instruments, and even the subtle ambience of your room. Unlike dynamic microphones, condensers use a capacitor-based design, requiring phantom power (typically 48V) supplied by your audio interface. This power source enables the diaphragm to capture intricate sonic details, resulting in richer, more detailed recordings. Choosing the right condenser microphone significantly impacts the overall quality of your productions.
The Audio-Technica AT2020 is a popular entry-level choice known for its clarity and affordability, while the legendary Neumann U87 remains an industry standard for professional vocal recordings. For podcasting and streaming, the versatile Blue Yeti offers excellent performance. The Rode NT1-A, praised for its exceptionally low self-noise, is another excellent option for home studio enthusiasts. These varied options demonstrate the breadth of condenser microphone choices available, catering to diverse needs and budgets.
Actionable Tips for Using Condenser Microphones
- Shock Mount: Use a shock mount to isolate the microphone from vibrations, preventing unwanted rumble and noise in your recordings.
- Positioning: Experiment with microphone placement. Start by positioning the microphone 6-12 inches from the sound source and adjust as needed to achieve the desired sound.
- Pop Filter: When recording vocals, use a pop filter to reduce plosives (harsh sounds from "p" and "b" consonants). This ensures a cleaner recording.
- Phantom Power: Double-check that phantom power is enabled on your audio interface. Without it, your condenser microphone will not function.
- Room Treatment: Consider adding acoustic treatment to your recording space. This helps minimize reflections and create a more controlled recording environment.
Condenser microphones are pivotal in a home recording setup because of their ability to capture a wider range of frequencies with greater accuracy and detail. They bring recordings to life, adding depth and clarity to vocals, acoustic instruments, and even subtle room sounds. By understanding how these microphones work and implementing these practical tips, you can significantly enhance the quality of your home recordings and unlock their full potential.
5. Closed-Back Headphones
Closed-back headphones are indispensable home recording studio essentials, providing crucial audio isolation for recording and critical listening. Their closed design prevents sound leakage from the headphones, ensuring clean recordings free from unwanted bleed-through from your monitoring. This isolation also blocks external noise, creating a focused listening environment for detailed editing and mixing decisions. While the closed design can slightly alter the perceived soundstage compared to open-back headphones, the benefits for recording and focused work outweigh this consideration.
For example, the Sony MDR-7506 headphones have remained an industry standard for decades, favored for their accurate sound reproduction and durability. The Audio-Technica ATH-M50x headphones have gained popularity for their balanced sound profile, making them a versatile option for mixing and general listening. Beyerdynamic's DT 770 PRO headphones are praised for their comfort during long sessions, and Sennheiser's HD 280 PRO offers reliable professional-grade performance. These varied choices highlight the importance of finding a pair that meets your specific comfort and sonic preferences.
Actionable Tips for Using Closed-Back Headphones
- Prevent Ear Fatigue: Take regular breaks during long listening sessions to prevent ear fatigue and maintain accurate perception.
- Cross-Reference with Speakers: Always compare your headphone mixes on studio monitors or other speakers before finalizing a track, as the closed-back design can subtly color the sound.
- Impedance Matching: Ensure your headphones' impedance is appropriate for your audio interface's headphone amplifier for optimal performance.
- Maintenance: Keep your ear pads clean and replace them when worn to maintain hygiene and sound quality.
- Dedicated Use: Primarily use closed-back headphones for recording and detailed editing tasks where isolation is paramount.
Closed-back headphones play a vital role in a home recording studio setup. From ensuring pristine recordings free from external noise to providing a controlled environment for detailed audio work, these headphones are essential tools for any serious home recording enthusiast. Choosing the right pair significantly impacts your workflow and the quality of your final product.
6. MIDI Keyboard Controller
A MIDI keyboard controller is a crucial tool for any home recording studio, bridging the gap between your creative ideas and your digital audio workstation (DAW). Unlike a traditional keyboard, a MIDI controller doesn't produce sound itself. Instead, it sends MIDI data to your computer, triggering virtual instruments, controlling parameters, and navigating your recording software. This makes it an essential tool for composers and producers working with the vast world of virtual instruments. It allows for expressive performances and intricate control over software synthesizers, drum machines, and samplers.
For example, the Akai MPK series is a popular choice among hip-hop producers, renowned for its responsive pads and intuitive workflow. Native Instruments' Komplete Kontrol line seamlessly integrates with their extensive sound libraries, offering a streamlined experience for browsing and manipulating sounds. The Arturia KeyLab series is praised for its robust build quality and vintage-inspired design, while the M-Audio Keystation provides an affordable entry point for beginners. These diverse options cater to various needs and budgets, emphasizing the versatility of MIDI controllers in modern music production.
Actionable Tips for Choosing a MIDI Controller
- Key Count: Consider your playing style and available space. A 25-key controller is compact and portable, while an 88-key controller provides the full range of a traditional piano.
- Control Mapping: Maximize efficiency by mapping frequently used controls, such as volume, pan, and effects parameters, to the knobs and faders on your controller.
- DAW Integration: Learn your DAW's MIDI mapping capabilities to customize your workflow and create personalized control schemes.
- Key Feel: Experiment with different keybed types. Semi-weighted keys offer a more responsive playing experience compared to synth-action keys, particularly for piano-focused productions.
- Templates: Create templates for different virtual instruments to quickly recall your preferred settings and streamline your creative process. This saves time and allows for a more focused workflow.
A MIDI keyboard controller unlocks the potential of virtual instruments, offering unparalleled control and flexibility within your home recording studio. From composing intricate melodies to shaping dynamic soundscapes, the right MIDI controller can significantly enhance your creative process. Choosing the right controller, based on your needs and workflow, is a key step in building a productive and inspiring home studio setup.
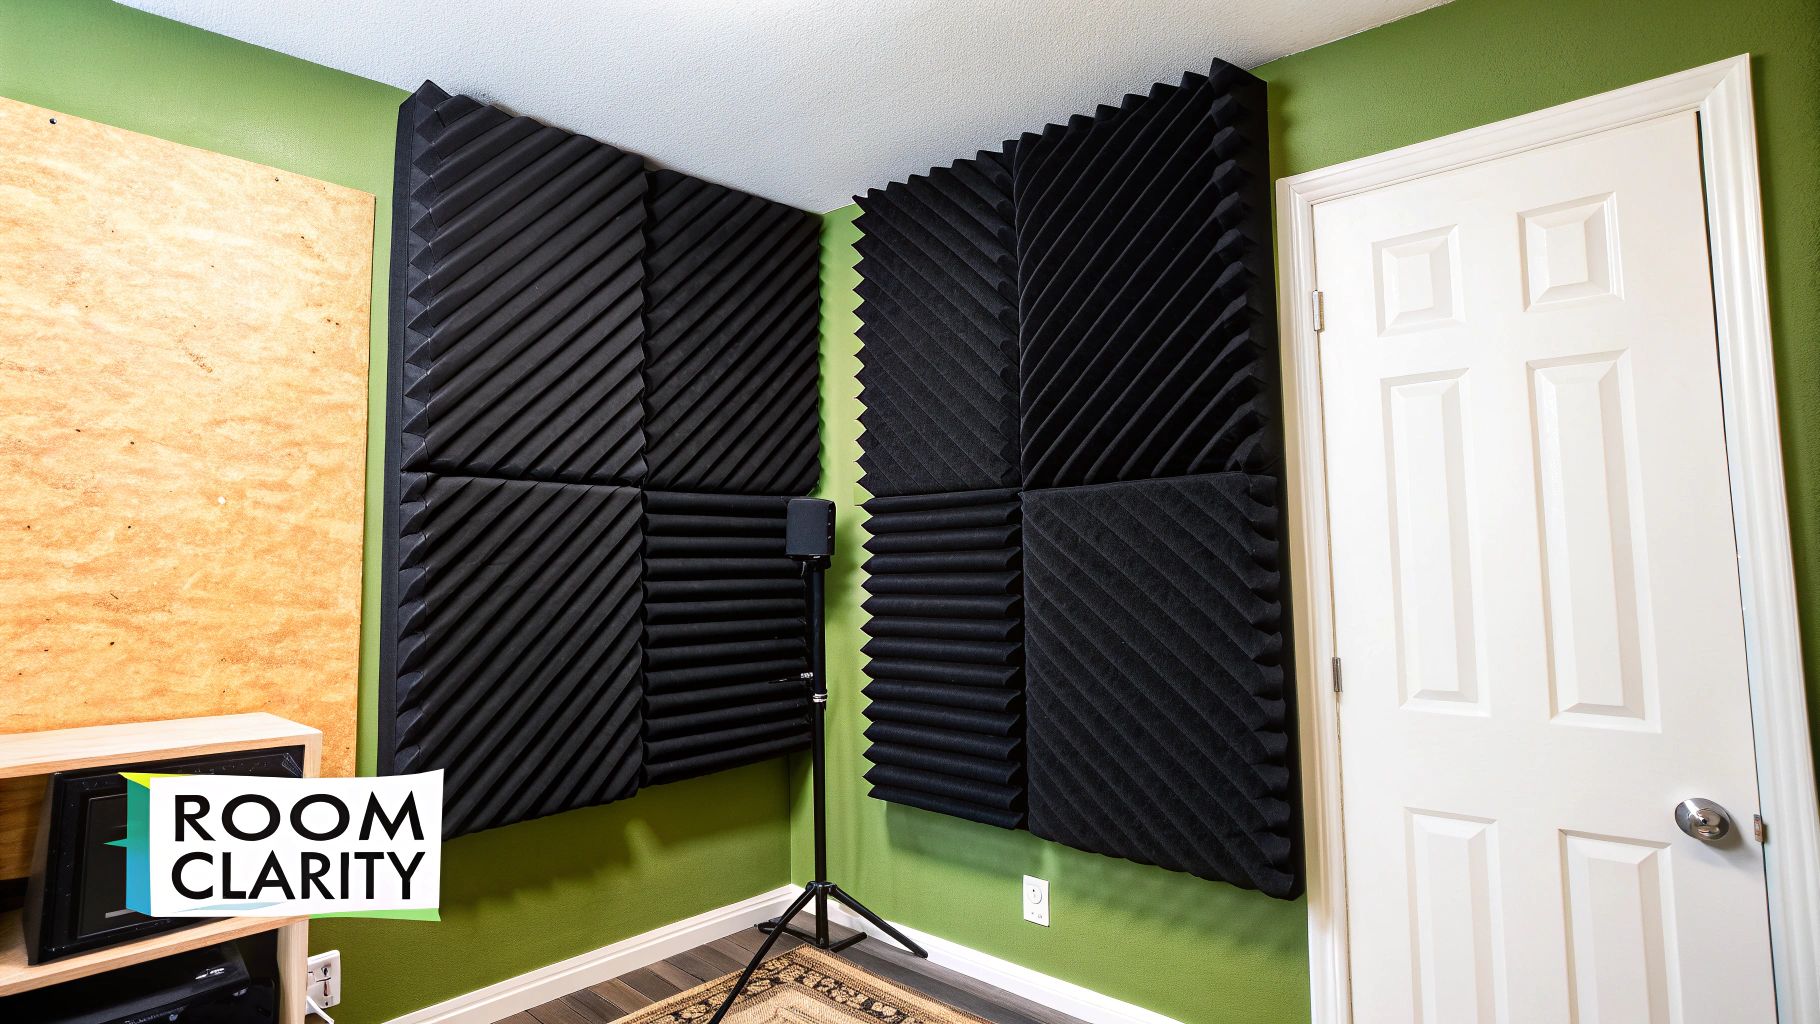
7. Acoustic Treatment Materials
Acoustic treatment materials are essential for any home recording studio, controlling sound reflections and reducing unwanted resonances. This creates a more accurate monitoring environment, unlike soundproofing, which aims to block sound transmission. Acoustic treatment optimizes the sound within your room, enabling better mixing and recording decisions. It allows you to hear your audio more clearly, revealing subtle details that might otherwise be masked by room acoustics.
From ubiquitous Auralex foam panels in countless home studios to the professional Primacoustic London series and high-end custom Acoustic Solutions panels, there's an acoustic treatment solution for every budget and need. Budget-conscious producers often utilize DIY rockwool panels, demonstrating the accessibility of this crucial element. These diverse solutions underscore the wide range of options available for optimizing your recording space.
Actionable Tips for Acoustic Treatment
- First Reflection Points: Start by treating the first reflection points between your monitors and your listening position. These are the areas where sound first bounces off the walls, ceiling, and floor before reaching your ears.
- Bass Traps: Place bass traps in the corners of your room to control low-frequency buildup. Corners are notorious for accumulating bass frequencies, leading to muddy and inaccurate sound.
- Avoid Over-Treatment: Don't over-treat your room. Maintaining some natural room sound can be beneficial, preventing an overly dead or unnatural listening environment.
- Measurement Tools: Use acoustic measurement tools, such as room analysis software or a sound level meter, to identify specific problem frequencies in your room. This targeted approach ensures effective treatment placement.
- Portable Solutions: Consider portable acoustic treatment solutions if you're working in a multi-use room. This allows you to easily set up and remove the treatment as needed.
If you’re also concerned about sound leaving or entering your room, learn more about how to soundproof a room for music. Effective acoustic treatment, coupled with the appropriate level of soundproofing, transforms your space into a professional and accurate sonic environment, taking your home recordings to the next level.
8. Pop Filter and Microphone Stand
A pop filter and microphone stand are essential home recording studio accessories that drastically improve the quality and consistency of your audio recordings. The pop filter, a thin mesh screen, mitigates plosives – those bursts of air produced when pronouncing "p" and "b" sounds. These plosives can overload the microphone's diaphragm, creating unwanted low-frequency pops and clicks in your recordings. A sturdy microphone stand, on the other hand, ensures proper microphone placement, allowing you to capture the best possible sound from your vocals or instruments.
Products like the Aokeo Professional pop filters are a common sight in podcasting setups and home studios alike, demonstrating the widespread recognition of their effectiveness. For microphone stands, the Rode PSA1 boom arm is a popular choice for its flexibility and build quality, while On-Stage offers reliable boom stand options for those on a budget. For professional-grade boom arms, the Heil Sound PL-2T is a legendary choice frequently used in broadcast settings. These examples illustrate the range of options available, from affordable essentials to high-end studio gear.
Actionable Tips for Using Pop Filters and Mic Stands
- Pop Filter Placement: Position the pop filter 4-6 inches from the microphone. This distance allows the filter to effectively diffuse plosives without affecting the overall tone.
- Angle Adjustment: Slightly angle the pop filter to avoid direct sound reflections back into the microphone. This minimizes potential interference and further improves recording clarity.
- Stand Stability: Choose a boom arm or stand that can adequately support the weight of your microphone. This prevents unwanted movement and ensures consistent recording quality.
- Cable Management: Use the cable management system integrated into many stands to keep your cables organized and prevent clutter. This improves workflow efficiency and overall studio organization.
- Distance Optimization: Experiment with different microphone distances to find the optimal tone for your vocals or instrument. Slight adjustments can significantly impact the recorded sound.
Having a quality pop filter and microphone stand contributes significantly to a professional-sounding recording. They are fundamental tools for capturing clean audio and maintaining consistent microphone placement, both crucial for achieving a polished final product in your home recording studio. Investing in these seemingly simple accessories can drastically enhance your recording workflow and elevate the overall quality of your recordings.
Home Studio Essentials Comparison
| Item | Implementation Complexity 🔄 | Resource Requirements ⚡ | Expected Outcomes 📊 | Ideal Use Cases 💡 | Key Advantages ⭐ |
|---|---|---|---|---|---|
| Audio Interface | Moderate: Requires drivers and setup | Medium: Hardware device, power needed | High-quality digital audio conversion | Home recording, multichannel recording | Superior audio quality, low latency monitoring |
| Studio Monitor Speakers | Moderate: Room placement & treatment needed | High: Investment in quality speakers | Accurate audio reproduction for mixing | Mixing, mastering, critical listening | Flat frequency response, reveal mix imperfections |
| DAW Software | High: Steep learning curve | High: CPU and RAM intensive | Comprehensive recording and editing platform | Recording, editing, mixing, mastering | Unlimited tracks, non-destructive editing |
| Condenser Microphone | Moderate: Phantom power required | Medium: Requires interface with phantom power | Detailed and clear sound capture | Vocals, acoustic instruments, studio recording | Exceptional clarity, wide frequency response |
| Closed-Back Headphones | Low: Plug-and-play but proper fit important | Low: Requires compatible output device | Isolated, focused listening | Recording, tracking in noisy environments | Excellent isolation, no sound leakage |
| MIDI Keyboard Controller | Moderate: Setup MIDI mappings | Low to Medium: Hardware controller | Expressive virtual instrument control | Composing, producing with virtual instruments | Real-time control, intuitive musical interface |
| Acoustic Treatment | High: Requires planning and installation | Medium to High: Material costs | Improved room acoustics and mix accuracy | Studio rooms, mixing/mastering environments | Reduces reflections, improves monitoring accuracy |
| Pop Filter & Mic Stand | Low: Simple setup and adjustment | Low: Affordable accessories | Cleaner vocal recordings, stable mic positioning | Vocal recording, podcasting | Eliminates plosives, reduces handling noise |
Final Thoughts
Building a productive and inspiring home recording studio doesn't require a fortune. By focusing on these home recording studio essentials, you can create a space where your musical ideas can flourish. From capturing pristine vocals with the right microphone and interface to shaping your sound with a powerful DAW and MIDI controller, each element plays a crucial role.
Key Takeaways for Your Home Studio Setup
Remember, the quality of your recordings isn't solely determined by expensive gear. It's about understanding how each component contributes to the final product and how to maximize its potential. Let's recap the essential elements we've covered:
- Foundation: A solid audio interface and studio monitors form the backbone of your setup, providing clear and accurate sound reproduction.
- Capture: Investing in a quality condenser microphone, paired with a pop filter and sturdy stand, ensures professional-sounding vocal and instrument recordings.
- Control and Creation: Your DAW software and MIDI keyboard controller unlock a world of creative possibilities, enabling you to compose, arrange, and produce your music.
- Environment: Addressing acoustics with proper treatment transforms your space into a controlled recording environment, minimizing unwanted reflections and maximizing clarity.
- Monitoring: High-quality closed-back headphones are critical for detailed monitoring and mixing, especially in less-than-ideal acoustic spaces.
Taking the Next Steps in Your Recording Journey
Now that you have a grasp of the home recording studio essentials, it's time to put this knowledge into action. Start by prioritizing the core components: your audio interface, DAW, microphone, and headphones. As your budget allows, gradually incorporate acoustic treatment, studio monitors, and a MIDI controller. Experiment with different microphone placements, explore your DAW's features, and practice mixing techniques.
The Power of a Well-Equipped Home Studio
Mastering these concepts empowers you to take control of your creative process. You'll be able to capture your musical vision with precision, develop your unique sound, and share your work with the world. Remember, the most important element in your home studio is you – your creativity, passion, and dedication to your craft.
Ready to take your songwriting and music production to the next level? Explore ChordX, a powerful AI tool designed to enhance your workflow and unlock new creative possibilities within your home recording studio. Visit ChordX to learn more and discover how it can revolutionize your music creation process.


