
Before you can lay down a single note, you need a control center for your music. That's your Digital Audio Workstation, or DAW. Think of it as your virtual studio—it’s where you’ll arrange drums, chop up samples, record melodies, and mix everything together into a finished track. The best part? You can get started without spending a dime.
Setting Up Your Zero-Cost Studio with Free Software
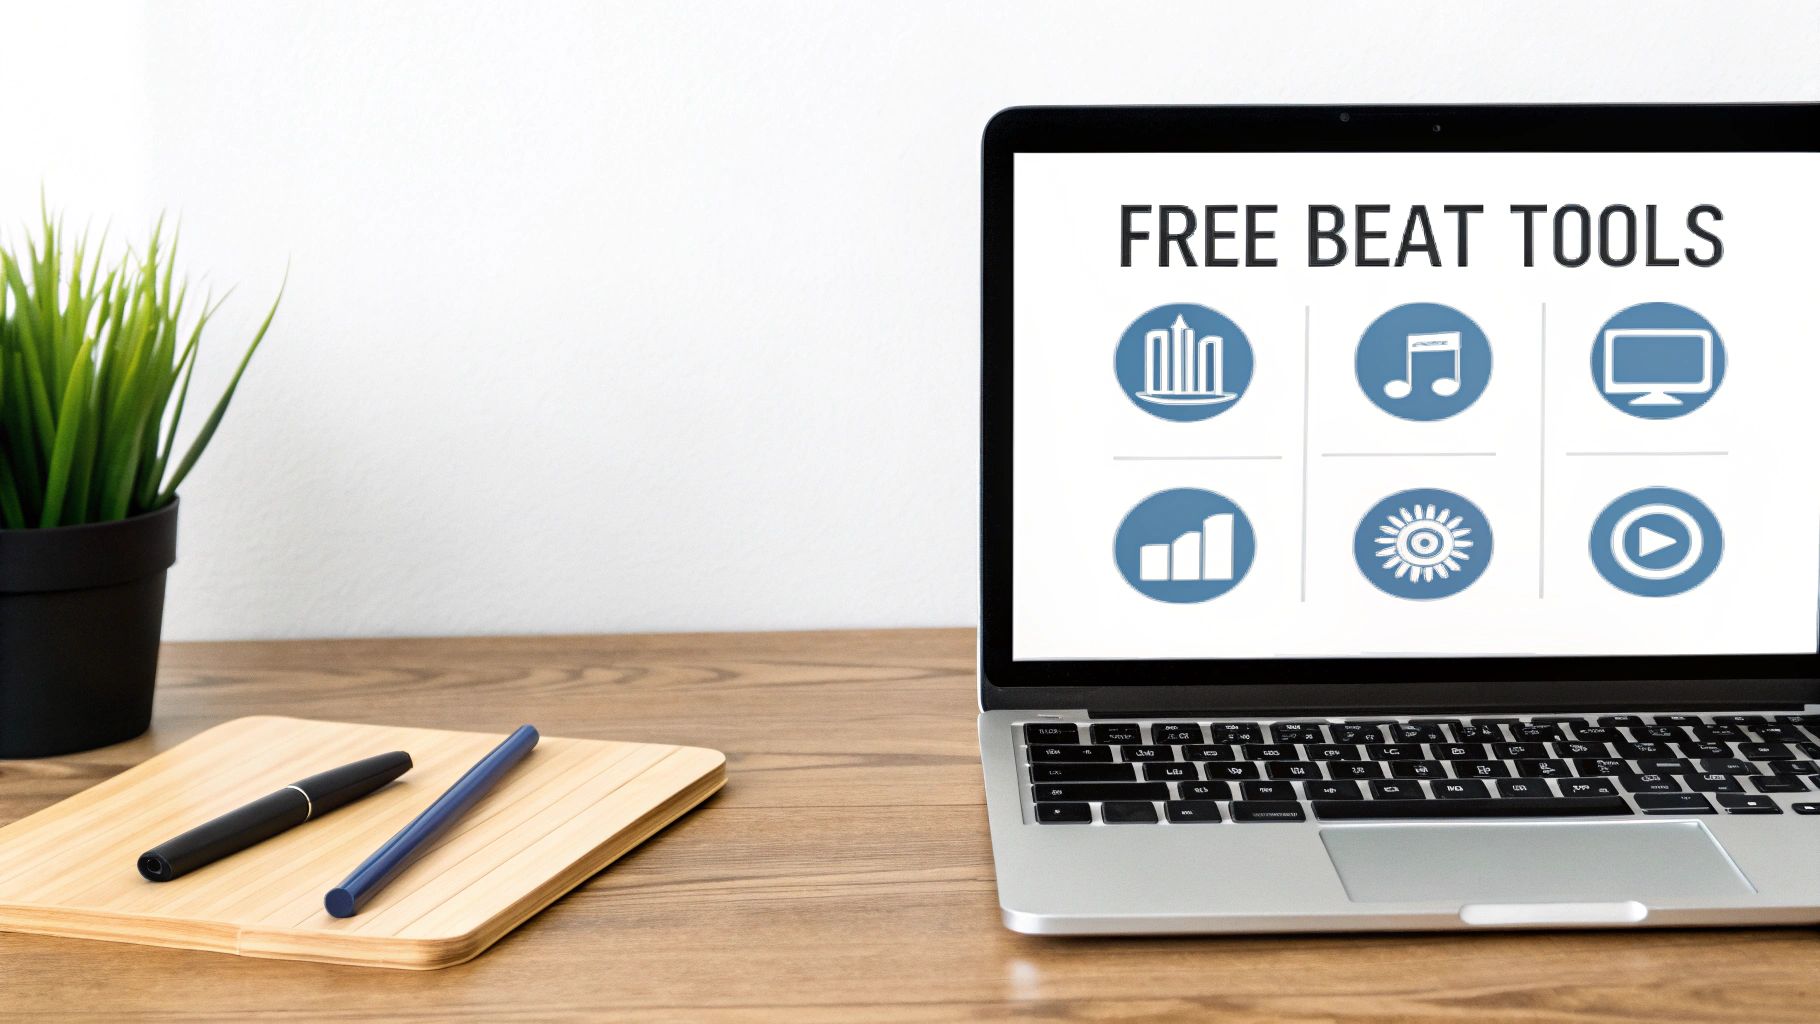
Let's bust a myth right now: you don't need a huge budget to make professional-sounding music. The line between expensive and free music software has blurred dramatically. Today, you can download incredibly powerful tools that give you everything you need to build killer beats right from your computer.
Your DAW is the heart of your entire setup. It’s the application that functions as your multitrack recorder, mixing board, and instrument rack all in one. Every sound, every pattern, and every effect you use will live inside this program.
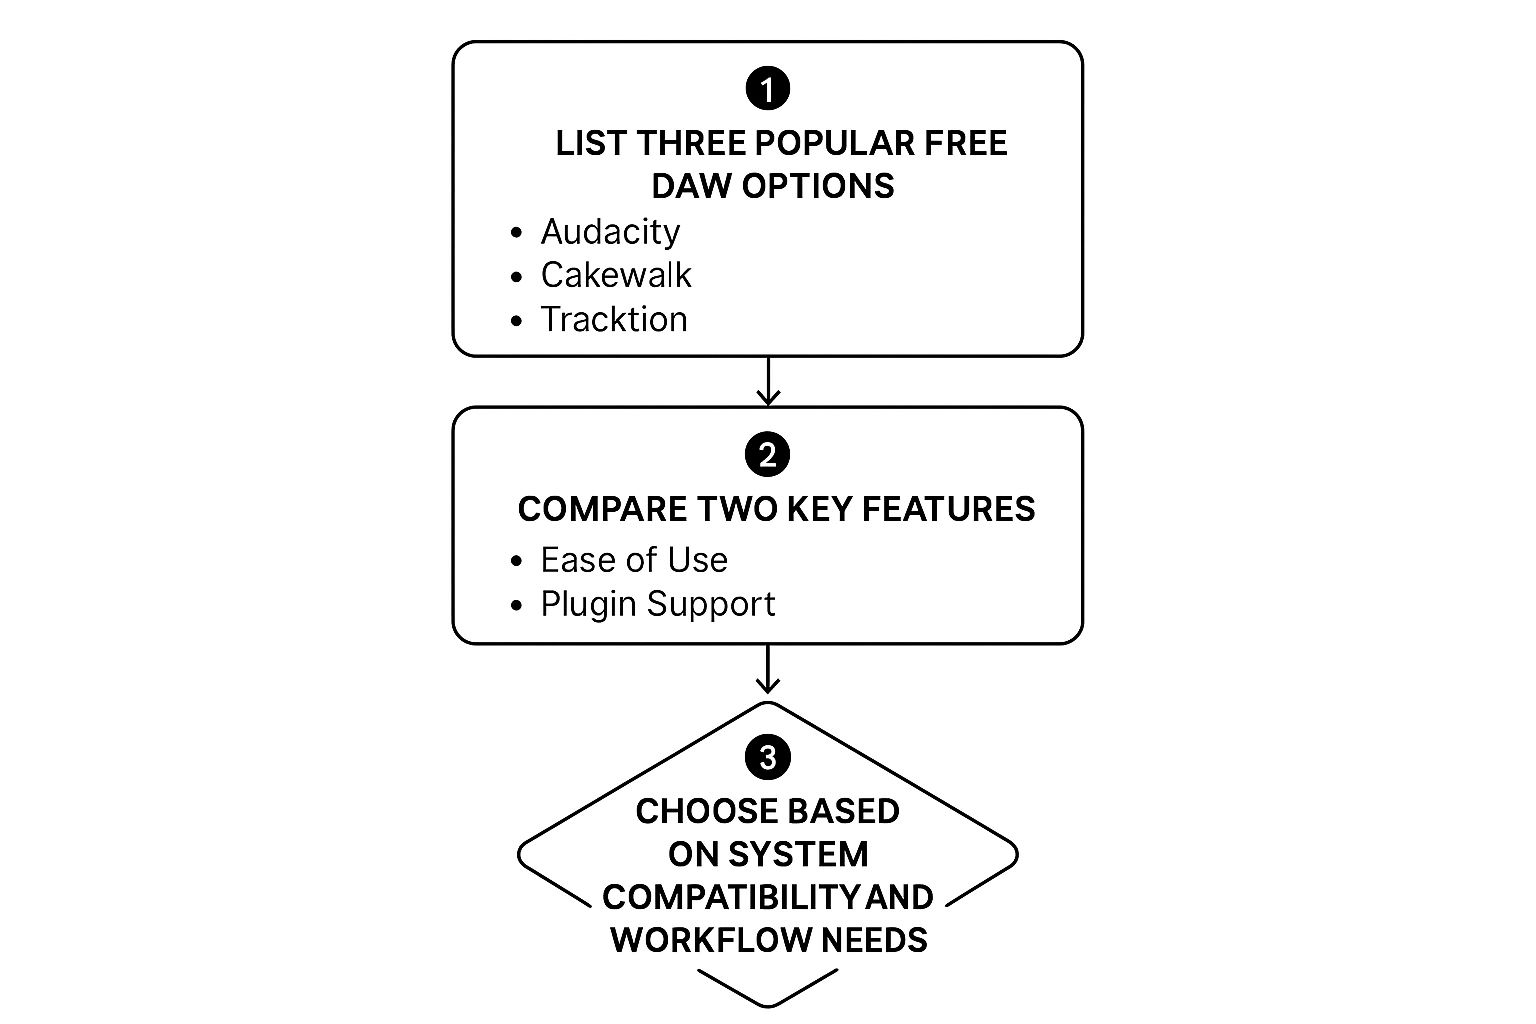
Finding the Right Free DAW for You
While there are many free DAWs out there, not all are built the same. Some of the most exciting developments have come from established hardware companies releasing free software versions of their legendary gear.
A huge win for new producers is the rise of free DAWs that genuinely compete with paid software. Take Akai's MPC Beats, which gives you an 8-track MIDI sequencer and 2GB of sounds. Or consider Waveform Free, offering unlimited tracks and serious editing power right out of the box.
This means you’re not just getting a "lite" or beginner-only tool. You're starting with software that can grow with you as your skills develop. The best way to choose is to try a couple and see what feels natural. For a deeper dive, you can explore a great breakdown of free music production software for beginners to see even more options.
To make the choice a bit easier, here’s a quick look at some top contenders.
Choosing Your Free Digital Audio Workstation
A quick look at the top free DAWs to help you pick the right one for your production style and technical needs.
| Software | Best For | Key Features |
|---|---|---|
| MPC Beats | Classic hip-hop and sample-based workflows | Legendary MPC-style workflow, 16 pads for drum programming, 2GB of included samples and loops. |
| Waveform Free | Traditional, linear music production | Unlimited audio and MIDI tracks, full-featured mixing environment, advanced MIDI editing. |
| Cakewalk by BandLab | A complete, all-in-one studio experience (Windows only) | Previously a premium DAW, now 100% free. Unlimited tracks, high-quality effects, and a pro-level interface. |
| GarageBand | Apple users looking for an intuitive start | Easy-to-use interface, great built-in sounds and loops, seamless integration with the Apple ecosystem. |
Ultimately, the goal is to find a DAW that feels like an extension of your creativity, not a technical roadblock.
Key Players in Free Beat Making
If I had to recommend two to start with, it would be MPC Beats and Waveform Free. They represent two different, but equally powerful, approaches to making music.
- MPC Beats: This one is for anyone who loves the hands-on feel of classic hip-hop production. It's built to mimic the workflow of the iconic MPC hardware, so it’s perfect for chopping samples and banging out drum patterns on its 16 virtual pads.
- Waveform Free: If you prefer a more traditional, linear approach, this is your DAW. Getting unlimited audio and MIDI tracks for free is a massive plus, as it means you’ll never hit a wall when building complex arrangements.
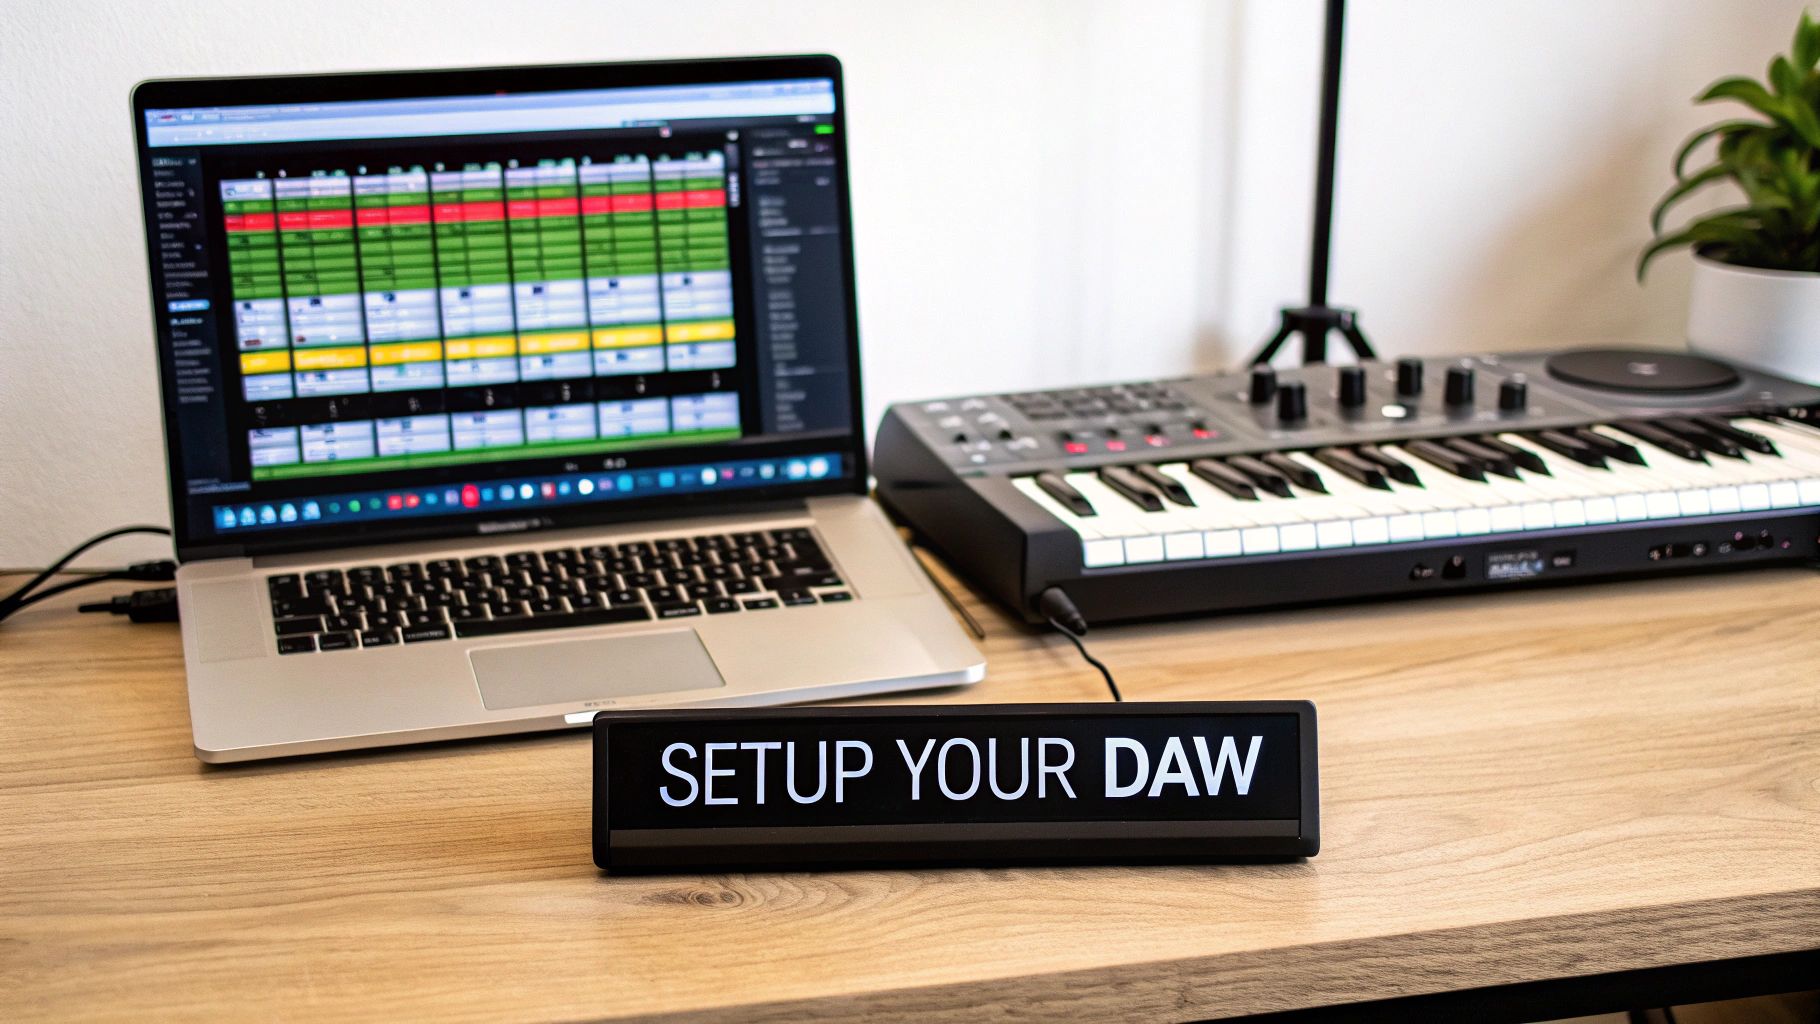
The image you see above shows a typical DAW interface. That timeline view, with different tracks for drums, bass, and synths, is where the magic happens. It’s how you visualize all the pieces of your beat and make them work together over time.
Both of these programs provide the core tools you need—sequencing, effects, and mixing—to take a track from an idea to a finished product. The fact that this level of functionality is available for free has completely changed the game for aspiring producers.
Building Your First Beat from the Ground Up
Alright, you've got your software open and you're staring at a blank screen. Don't sweat it. That empty project is pure potential, and every hit track you've ever heard started exactly this way. We're going to dive right in and start with the most important part of any beat: the drums.
The drum groove is the pulse, the backbone of your entire track. You'll likely be working in a piano roll or a step sequencer inside your DAW. Let's get a simple four-bar drum loop going.
First, find a kick drum sample you like. Place it on the first and third beats of every bar. This is your classic "four-on-the-floor" pattern. It's simple, but it instantly gives your track a sense of momentum. Now, find a snare and drop it on the second and fourth beats. Just like that, you've got a backbeat—the fundamental rhythm that drives countless songs.
Laying Down the Groove
Time to add some energy with hi-hats. These are what really define the rhythmic feel. A great place to start is with straight eighth notes—just place a hi-hat hit on every single beat and every "and" in between.
If you're aiming for more of a modern trap or lo-fi vibe, you can get more creative. Try programming faster sixteenth-note hi-hats, or throw in some quick 32nd-note "rolls" at the end of a bar for a little flair. I also highly recommend playing with the velocity (how hard each note hits). Varying the velocity makes your pattern breathe and feel like a real person played it.
Pro Tip: Don't be afraid to push your drums off the grid. Seriously. Nudging a snare just a hair before or after the beat can inject a human "swing" or "groove." Most DAWs have a swing knob that does this automatically, creating a subtle push-and-pull that makes a world of difference.
Once you’re happy with that basic loop, copy and paste it a few times. Now you have a solid foundation to build the rest of your track on.
Adding Bass and Melody
With your drums on a loop, it's time for the bassline. A good bassline should lock in tight with the kick drum, creating a powerful low-end that you can feel.
Pull up a new instrument track and load a simple bass sound. You don't need anything fancy; a basic sine wave or a simple electric bass sample is perfect for this. Try to write a pattern that follows the kick drum's rhythm. If your kick hits on beats one and three, have your bass play a note on those same beats. This glues the whole rhythm section together. A simple two or three-note bassline is often all it takes.
This visual shows how choosing the right free software—a critical decision before you even get to this point—comes down to your personal priorities.
As you can see, you're often balancing ease of use against plugin support. This helps you figure out which tool is the right fit for your creative style and technical needs.
Finally, let's add some melody. This can be anything from a simple synth lead or a pad playing some chords to a chopped-up vocal sample. Open another instrument track and find a sound that inspires you.
Try creating a simple two-chord progression. For a classic hip-hop feel, something like a minor seventh chord going to a major seventh chord works beautifully. Loop that over your drums and bass.
And there you have it—all the core elements of a beat: drums, bass, and harmony. This simple 4 or 8-bar loop is the DNA of your entire song. From here, you can start arranging, adding, and taking away elements to build a full track.
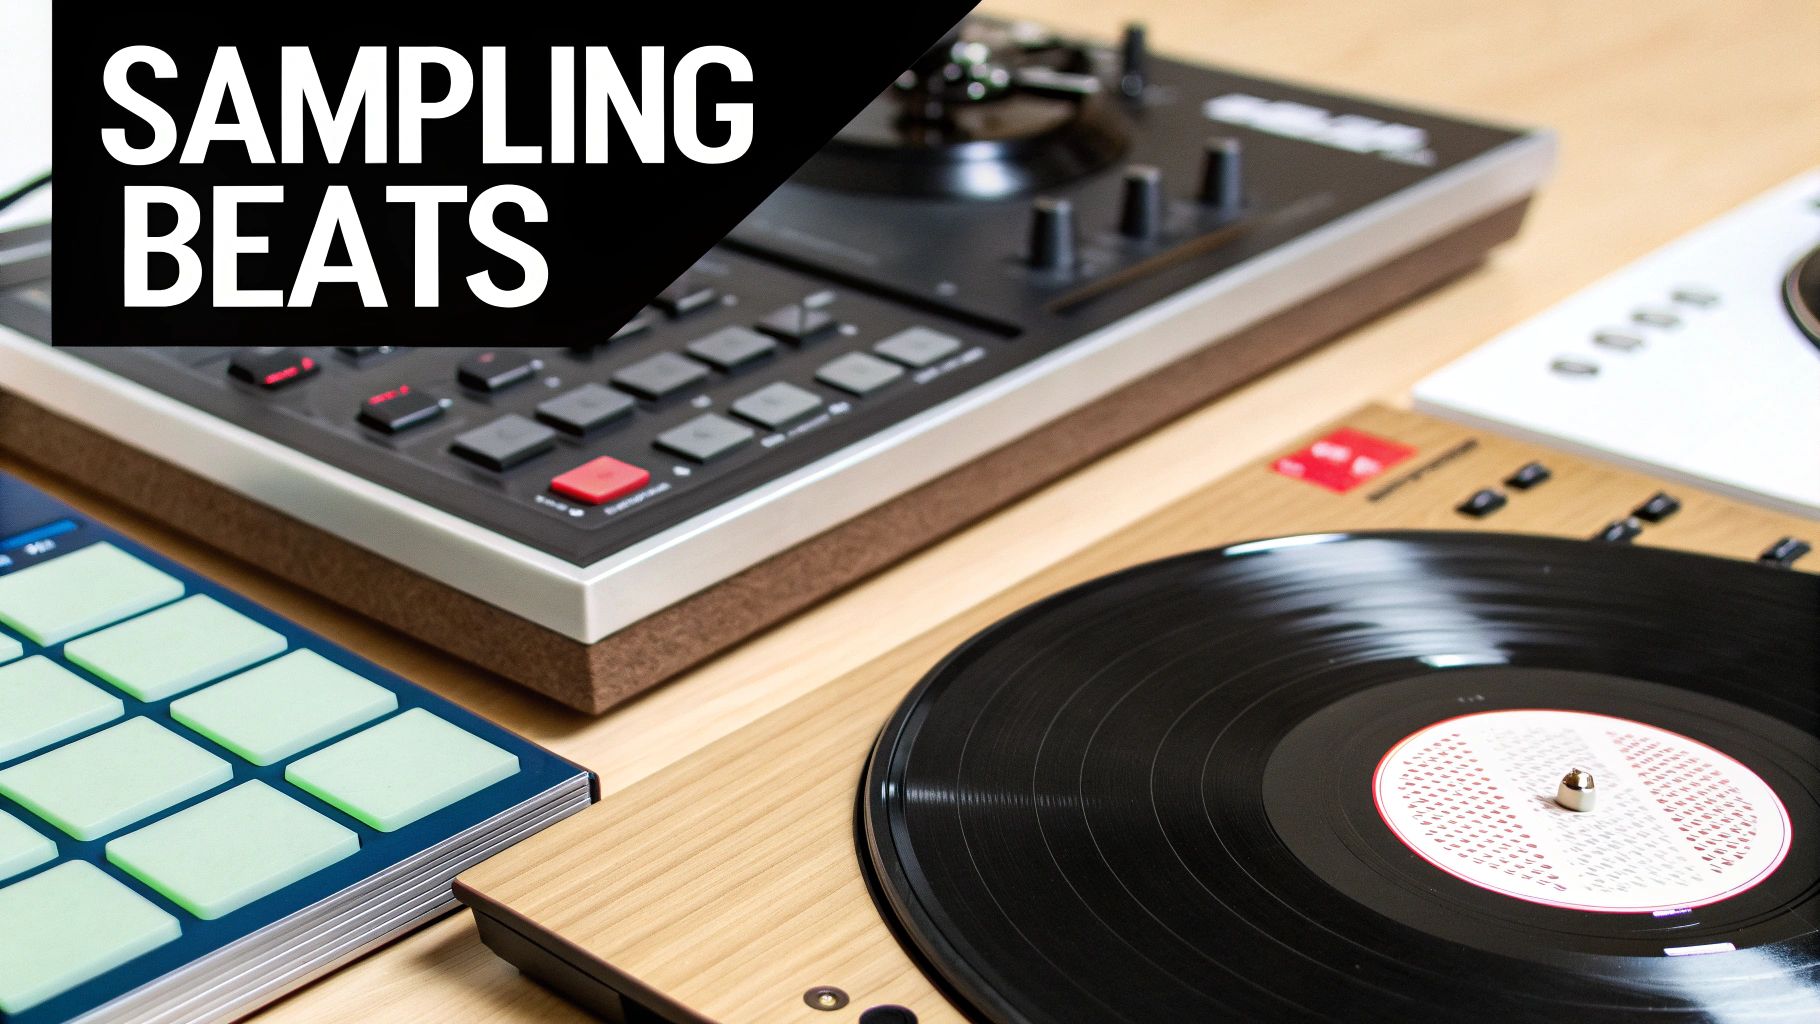
Building a Professional Sound Library for Free
Any great beat starts with great sounds. It's as simple as that. While the stock sounds that come with your free DAW are a decent launchpad, the real magic happens when you start building your own unique sound library. This is what will make your music stand out, and believe it or not, you can curate an incredible collection without ever opening your wallet.
The internet is absolutely packed with high-quality, royalty-free samples if you just know where to look. Using royalty-free sounds means you can use them in your own tracks—even commercial releases—without getting tangled up in copyright problems. Sites like Cymatics, Looperman, and Splice (which drops free packs all the time) are gold mines for producers.
Finding Your Core Sounds
When you're starting out, don't fall into the trap of downloading every single sound you find. That's a fast track to overwhelming yourself. Instead, be selective and focus on building a solid foundation.
- Drum Kits: Start here. Look for kits that match the genres you're into, like "lo-fi drum kit" or "trap essentials." A well-made kit gives you a set of kicks, snares, claps, and hi-hats that are already designed to work together, which saves a ton of time.
- Melody Loops: These pre-made musical ideas are perfect for sparking creativity when you're feeling stuck. You can drop them right into your project or, even better, chop them up and flip them into something completely new.
- One-Shots: These are single instrumental hits—think of a single piano chord, a guitar pluck, or a synth stab. They're incredibly flexible and perfect for building your own custom melodies from the ground up.
Think of your sound library as your sonic identity, like a painter's palette. The more unique and high-quality colors (sounds) you collect, the more expressive and original your art (music) will become.
Building this library is a journey, not a destination. I highly recommend creating a dedicated "Samples" folder right now. Inside that, make subfolders for "Drums," "Loops," and "One-Shots." Staying organized from day one will save you countless headaches later.
Expanding Your Arsenal with Free VSTs
Samples are amazing, but the real game-changer is Virtual Studio Technology (VST). These are free instrument and effect plugins that you can load directly into your DAW. Instead of working with static audio files, VSTs give you fully playable instruments and powerful effects processors.
You can find breathtakingly realistic pianos, cinematic strings, and face-melting synthesizers—all completely free. Websites like KVR Audio and Plugin Boutique are fantastic directories. Just filter by "free" and prepare to be amazed. Installation is usually just a matter of running an installer and telling your DAW where to find the new plugin.
This is the point where you truly go beyond the basics. You stop just learning how to make beats for free and start crafting a signature sound. The world of free music tools has gotten incredibly competitive, with many free options offering advanced features that rival paid software. If you're curious, you can learn more about these market dynamics in the beat-making software space.
By blending top-tier samples with a powerhouse collection of free VSTs, you unlock a nearly infinite sonic universe. This approach empowers you to create beats that sound polished, professional, and uniquely you—all without spending a dime.
From Loop to Anthem: Arranging Your Beat into a Full Song
Alright, you've got a solid 8-bar loop. It’s got the groove, the feel, and the core idea. Honestly, this is where so many new producers get stuck. They have an amazing loop but have no idea how to turn it into a full, dynamic song that keeps someone listening.
This next step is called arrangement, and it's less about music theory and more about storytelling. You're taking your listener on a journey. The good news is that most of the music you hear follows a pretty standard map, and once you learn it, arranging your loops into complete beats becomes second nature.
The Basic Song Map
Think of your track in sections, like chapters in a book. You'll build out your entire song just by copying, pasting, and tweaking that main loop you created. The trick is to make each section feel a little different to build and release tension.
Here's a look at a classic structure that just works:
- Intro (4-8 bars): This is your first impression. Don't throw everything at the listener at once. Maybe start with just the melody with a filter effect, or a simple, stripped-back version of your drum pattern. You're just setting the mood.
- Verse (16 bars): Time to build some energy. This is usually where the full bass and drum groove comes in. It creates a solid foundation and moves the story forward, but it's typically a bit more laid-back than the chorus.
- Chorus (8 bars): This is the peak. The most energetic, memorable part of your track. Every key element you've created should be playing here. This is the part people will remember.
- Bridge (8 bars): A bridge is your chance to break the pattern and give the listener's ear a rest. It should feel distinct. Try dropping out the drums entirely or introducing a completely new synth sound. It makes the return to the chorus feel fresh.
- Outro (4-8 bars): This is how you gently land the plane. A classic move is to start taking elements away one by one, fading the track out until just a single sound is left.
Arrangement is what separates a repetitive loop from a compelling song. It's the art of creating tension and release by strategically adding and removing elements, which keeps the listener engaged from the first beat to the last.
Making It Move: Variation is Everything
A great arrangement is all about evolution. If you just copy and paste sections back-to-back, your track will sound robotic and, frankly, boring. The magic is in the small, subtle changes you make along the way.
This is where you can really get creative. A classic producer trick is to pull the kick drum out for the last two bars of a verse, right before the chorus smacks. That little moment of silence creates a huge sense of anticipation and makes the chorus feel massive when it finally hits.
Here are a few practical ways to create that movement:
- Think Subtraction First: One of the most powerful arrangement tools is the mute button. Seriously. Start your intro with only one or two sounds. Bring in the drums and bass for the verse. Then, for the chorus, unleash everything.
- Use Fills and Transitions: Use little drum fills, cymbal crashes, or sound effects (like risers and reverse cymbals) to signal that a new section is coming. Think of them as signposts for the listener.
- Get Hands-On with Automation: Automation is your best friend. It lets you change settings over time. You could automate a filter to slowly open up on a synth pad during the intro, or automate the panning of your hi-hats to create a cool stereo effect that keeps the listener's ears guessing.
Getting a handle on these concepts will take your beats from sounding like sketches to finished tracks. If you want to go deeper, our detailed guide on how to arrange a song is packed with more advanced tips and structural examples. By putting these ideas into practice, you'll be turning those simple loops into fully-realized instrumentals in no time.
Mixing and Exporting Your Finished Beat
Alright, so you've arranged your track and it's starting to feel like a real beat. Getting the structure right is a huge win, but now it’s time for the final polish. This is the stage that separates a decent beat from a professional-sounding one.
We’re talking about mixing. This is where you take all your individual tracks—your drums, bass, melodies—and make them sit together perfectly. You don't need a bunch of expensive plugins for this; the tools that come with your free DAW are more than capable of getting the job done. The goal is to avoid that "muddy" sound where everything fights for attention, and instead create a clean, powerful track where every element has its own space to breathe.
The Art of Balancing Your Sounds
The very first thing you should do in any mix is leveling. It’s as simple as adjusting the volume fader for each track. I see so many beginners make the mistake of pushing every fader up, thinking louder is better. It’s not. A great mix is about balance, not volume.
Here's a pro tip: pull all your faders down to zero. Then, bring up the most important element first. This is usually your kick drum or maybe a core vocal sample. Once that's set at a good level, start bringing in your other sounds and mix them around that central element.
Next up is panning. This is just the fancy term for deciding where a sound sits in the stereo field—left, right, or center. If everything is panned dead center, your beat will sound narrow and crowded. Start experimenting. Try panning your hi-hats just a little bit to the right and maybe a percussion loop to the left. It’s a simple trick, but it instantly creates a much wider and more immersive sound.
Mixing isn’t about making things louder; it's about making things clearer. By giving each sound its own pocket in terms of volume (leveling), stereo placement (panning), and frequency (EQ), you create a professional track where every element can be heard.
Carving Out Space with EQ
Your most powerful mixing tool is the Equalizer, or EQ. Think of it as a sonic scalpel that lets you cut or boost specific frequencies in any sound. This is how you fix instruments that are clashing with each other. For example, a common problem is when your kick drum and your bassline sound muddy together. That’s because they're both competing for the same low-frequency range.
To fix this, pull up the built-in EQ on your bass track. Find the main frequency where your kick drum hits and make a small cut in the bass at that exact spot. This tiny adjustment gives the kick its own space to punch through, making your low-end sound instantly tighter and cleaner. You can do the same for your synth pads or melodies by gently rolling off some of their low frequencies so they don't get in the way of the bass. Mastering these small moves is what mixing is all about. For a deeper dive, there are some great music production tips out there that cover more advanced EQ and compression techniques.
Exporting Your Final Masterpiece
Once you're happy with how your mix sounds, it’s time to get it out of your DAW and share it with the world. This final step is called exporting, where you bounce your entire project down to a single audio file.
Your software will give you a couple of key format options:
- WAV: This is your high-quality, uncompressed audio file. It’s the professional standard. Always export a WAV file for uploading to platforms like SoundCloud or for sending to other artists for collaborations.
- MP3: This is a compressed format, which means a smaller file size. It's perfect for emailing or posting on most social media. Just make sure you export at a high-quality setting, like 320 kbps, to keep it from sounding crunchy.
And that's it! Once you have that exported file, your beat is officially done. You've gone from a blank slate to a finished, mixed track using nothing but free tools.
Of course! Here is the rewritten section, designed to sound like it was written by an experienced human expert.
Got Questions About Making Beats for Free? I've Got Answers.
Diving into music production for the first time is exciting, but let's be real—it also comes with a ton of questions. As you start figuring out how to make beats without spending a dime, you'll probably run into some common hurdles. I've been there. This is where I'll clear up some of the most frequent sticking points so you can get back to what matters: making music.
One of the first things people worry about is their gear. Do you really need a beast of a computer to run a free DAW? Honestly, no. Most of the good free options, like MPC Beats or Waveform Free, are built to be light on resources. Your average modern laptop or desktop will handle them just fine. You definitely don’t need a top-spec machine just to get started.
Another big question that always comes up is about the sounds themselves. Can you actually use free samples without getting into legal trouble? It’s a smart question to ask. The last thing you want is a copyright strike after you've poured your heart into a track.
The magic phrase you're looking for is "royalty-free." When a sample pack or loop is labeled royalty-free, it means you can use it in your music—even for commercial releases—without owing anyone a single cent later on. Good sound sites are always upfront about this, so you can build your sound library without any stress.
Can You Really Make Professional Music with Free Tools?
Yes, 100%. The line between paid and free software has become incredibly blurry over the years. What truly determines the quality of your music isn't your software's price tag; it's your skill, your creativity, and your ear for what sounds good.
Many free DAWs give you everything you need to cook up a professional-sounding beat, including unlimited tracks, solid built-in effects, and VST support. Don't let anyone tell you otherwise.
The idea that you need expensive gear is one of the biggest myths that holds new producers back. The reality? A talented producer with a basic laptop and some free software can craft a banger. Meanwhile, someone with a million-dollar studio but no vision will just make expensive noise. Your creativity is the most valuable tool you will ever own.
Quick Answers to Common Beat Making Questions
I get asked these questions all the time. Here are some quick solutions and insights for the most common hang-ups people face when producing music with free tools.
| Question | Answer |
|---|---|
| Are free beats truly free to use? | As long as you're downloading royalty-free samples and loops, yes. They are licensed specifically for you to use in your own tracks without any future payments. |
| Do I need a MIDI keyboard to start? | Nope. It's a nice tool to have, but it's not a must. You can click in all your notes with a mouse using your DAW's piano roll. Plenty of pro producers still work this way. |
| How do I stop my beats from sounding so repetitive? | It all comes down to arrangement. Try using automation to tweak filters over time, drop instruments in and out of the mix to build tension, and add little drum fills or risers to signal a change is coming. |
At the end of the day, the best way to get answers is just by doing. Get in there and experiment. Try out weird drum patterns, learn every single feature of your DAW, and don't be afraid to ask for feedback in online producer communities. Making music is a journey of constant learning, and every question you find an answer to makes you that much better.
Ready to turn your musical ideas into professional-sounding tracks? ChordX is your ultimate resource for expert tutorials, software reviews, and production techniques. Explore our in-depth guides at https://chordx.io and start creating your best music today.


