
Having your own recording space isn't just a luxury—it's a massive strategic advantage. It gives you the power to create on your own terms, giving you total freedom over your sound and your schedule. Building a home studio is really about investing in your own creativity, putting professional tools right at your fingertips for whenever inspiration hits.
Why a Home Studio Is Your Secret Weapon
For anyone serious about audio—musicians, podcasters, voice actors—a personal studio space is a total game-changer. The old days of being locked into expensive commercial studios with their ticking clocks and rigid booking times are over. Now, you can have a dedicated space that works for you, not the other way around.
This isn't just about saving a few bucks. It's about gaining an incredible creative edge. When a killer melody or a perfect line for your podcast pops into your head at 2 AM, you can lay it down immediately with professional quality. You're no longer a slave to a studio's schedule.
This very accessibility has completely leveled the playing field. It's what allows independent creators to produce polished, release-ready work that can stand toe-to-toe with anything coming out of a major label.
The Real Magic is in the Reps
I can tell you from experience, the true power of a home studio is having everything ready to go, all the time. My own setup started small, but the simple fact that I could jump in and record whenever I wanted transformed my music from a planned event into a daily habit.
The constant access you get with a home studio is the single fastest way to get better. It gives you unlimited time to experiment, to mess up, to hone your engineering chops, and to nail that perfect take without any outside pressure.
You can see this shift reflected across the entire industry. The audio production studio market in the US is now worth around $1.8 billion, and that growth is driven by the exact same tech accessibility we're talking about. For a deeper dive, IBISWorld has a full report on this trend.
Ultimately, building your own studio is an investment in your craft. It really boils down to a few key advantages:
- Creative Freedom: Record when you want, how you want. No more waiting for permission.
- Skill Development: With endless studio time, you can really master the arts of mixing, mic placement, and mastering.
- Long-Term Savings: You eliminate those recurring studio rental fees, which adds up fast.
- Total Sonic Control: Every decision, from the mic you choose to the final reverb on a vocal, is yours.
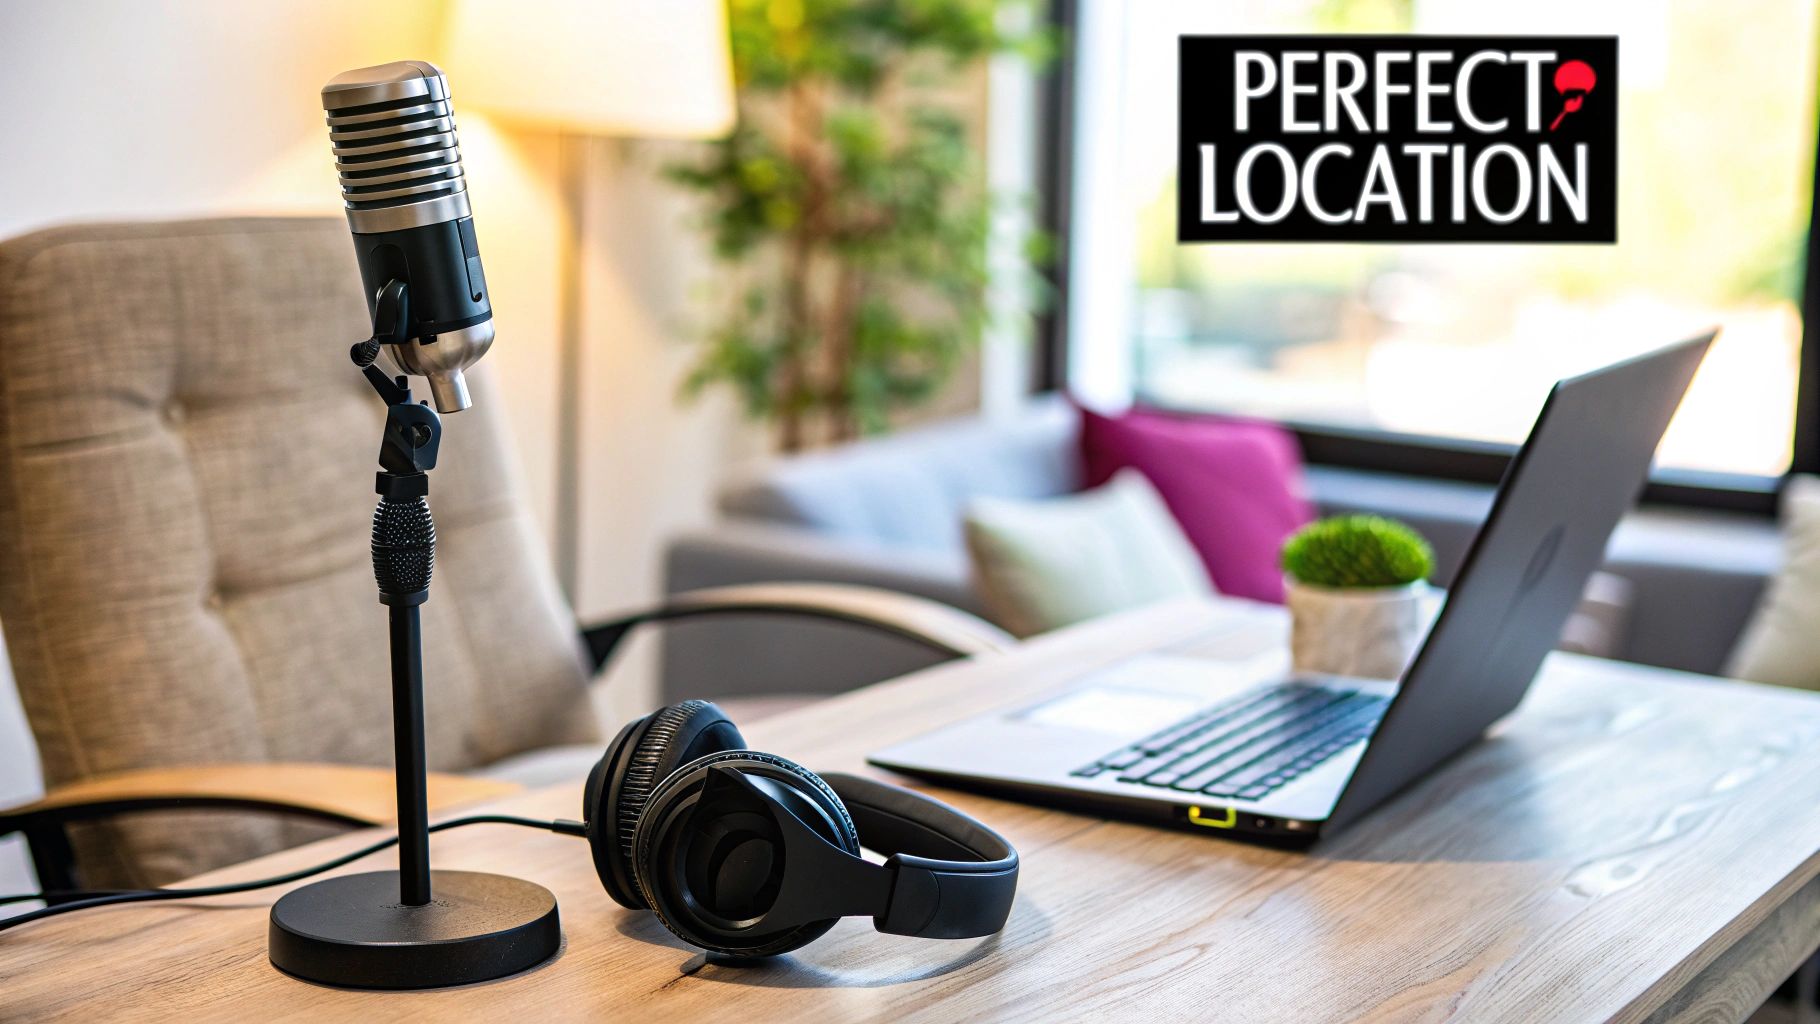
Choosing Your Space and Mastering Acoustics
Before you even think about buying a single piece of gear for your home recording studio setup, we need to talk about the most important instrument you have: the room itself. I can't stress this enough—the acoustics of your space will shape your final sound far more than any microphone or preamp ever could. Getting this right from the start is the bedrock of professional-sounding audio.
When you're scouting for a room, try to avoid anything that's a perfect square. Square rooms are an acoustic nightmare. Sound waves bounce back and forth between the parallel walls, creating what we call standing waves. These nasty things will either amplify or completely cancel out certain bass frequencies, making it impossible to get a true, balanced mix.
What you're looking for is a rectangular room, ideally with high ceilings and a good mix of surfaces. Spaces with irregular features like closets, little alcoves, or even just non-parallel walls are a huge bonus, as they naturally break up and diffuse sound waves.
Taming Your Room on a Budget
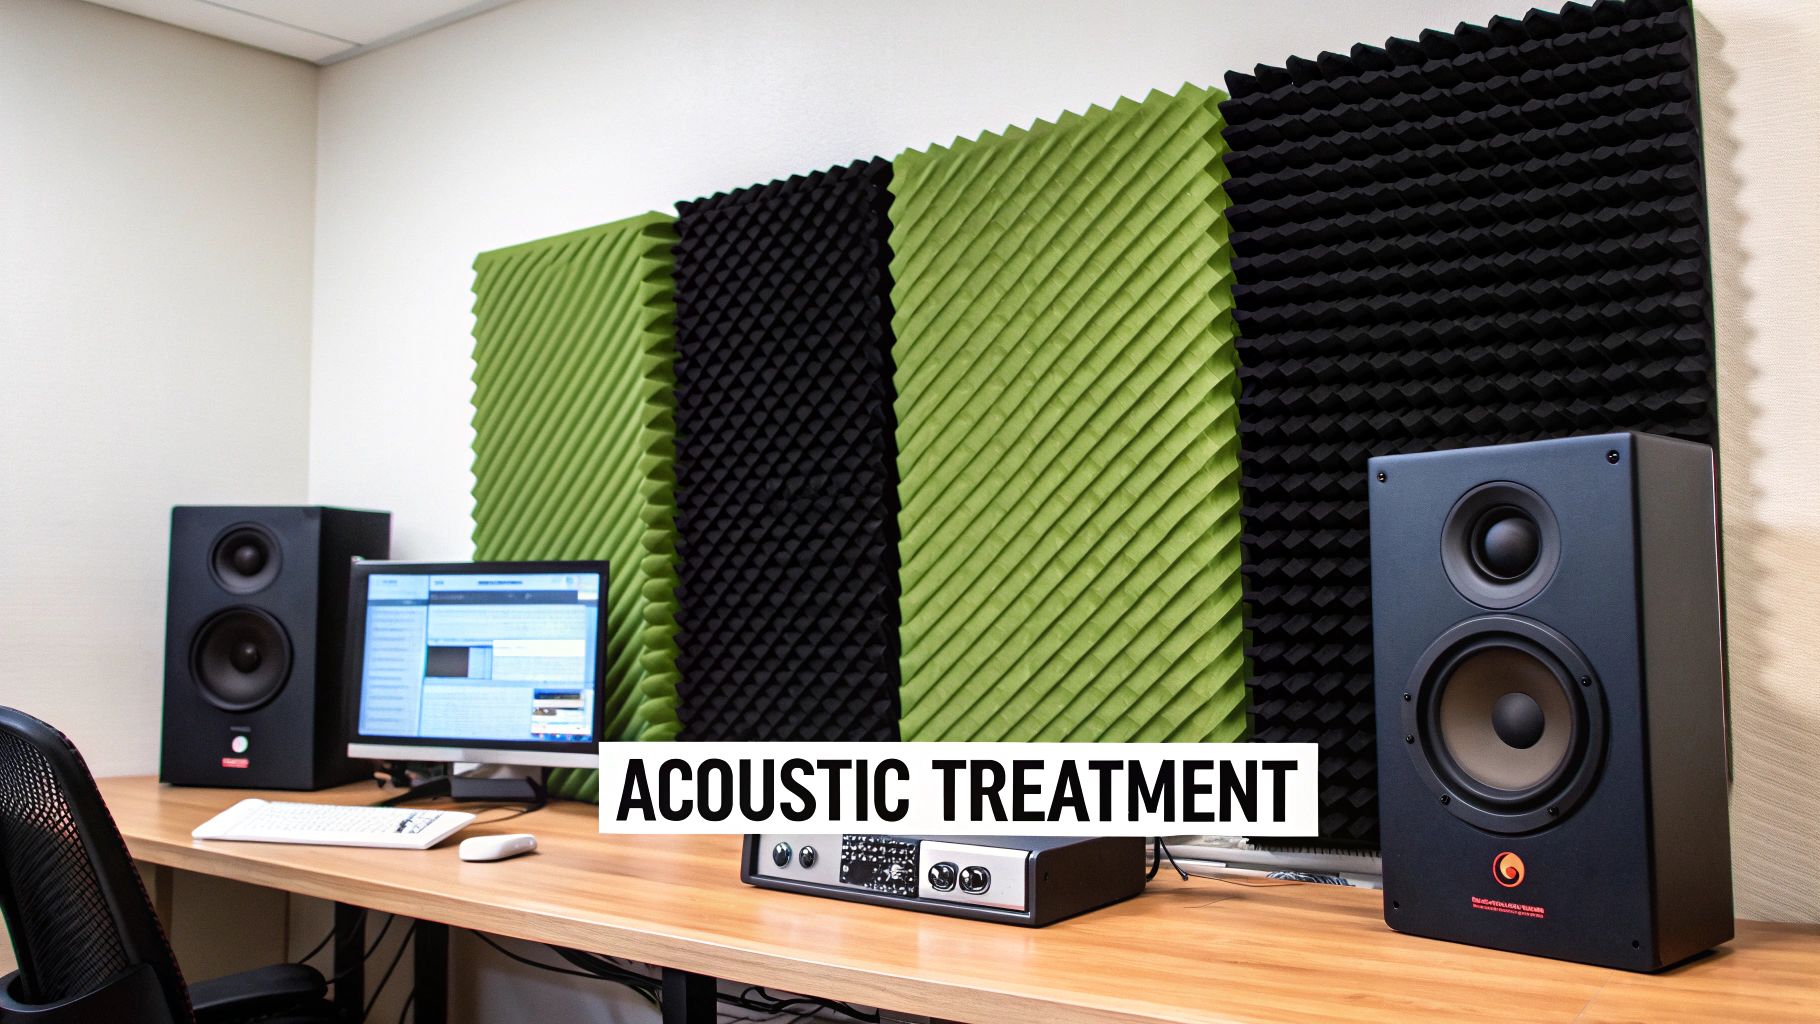
Once you've picked your spot, the real work begins: controlling the sound reflections. This is where acoustic treatment comes into play, and you don't need a massive budget to make a huge difference. The goal is simple: absorb unwanted echoes to create a more honest and neutral listening environment.
Think of it this way: a hard, empty room acts like an echo chamber. Every sound is sharp and rings out. By adding furniture and treatment, you're essentially adding soft surfaces that soak up that sound instead of letting it bounce around.
Start with what you already have. A plush couch, a thick rug on the floor, and some well-stocked bookshelves are surprisingly effective (and free!) diffusers and absorbers. They do a great job of breaking up sound before it gets out of control.
Pro Tip: It's easy to confuse acoustic treatment with soundproofing, but they're two different beasts. Treatment is all about controlling the sound inside your room for better recordings. Soundproofing is about stopping sound from getting in or out. If traffic noise or loud neighbors are a problem, you might need to learn how to soundproof a room for music.
Acoustic Panels vs. Bass Traps
As you get more serious, you'll run into two main tools for taming a room: acoustic panels and bass traps. Knowing what each one does is absolutely crucial for getting your space dialed in.
-
Acoustic Panels: These are usually made from dense foam or fiberglass and are built to absorb mid-to-high frequencies. They are your best defense against problems like flutter echo—that tinny, zinging sound you hear when you clap your hands in an empty hallway. You'll want to place these at the "first reflection points" on the walls to your sides, on the ceiling above you, and on the wall behind your monitors.
-
Bass Traps: Bass is powerful, and its energy loves to build up in the corners of a room. Bass traps are thicker, denser panels made specifically to absorb that low-frequency rumble. Honestly, placing bass traps in every vertical corner of your room is probably the single biggest improvement you can make for a tighter, clearer low end.
Even if your budget is tight, focus on getting at least four bass traps for the corners and a couple of panels for your main reflection points. This will make a night-and-day difference. In a pinch, even hanging some heavy blankets an inch or two from the walls can work as a temporary fix. Getting your acoustics handled first ensures that every piece of gear you buy down the line can actually perform its best.
Selecting Your Core Recording Equipment
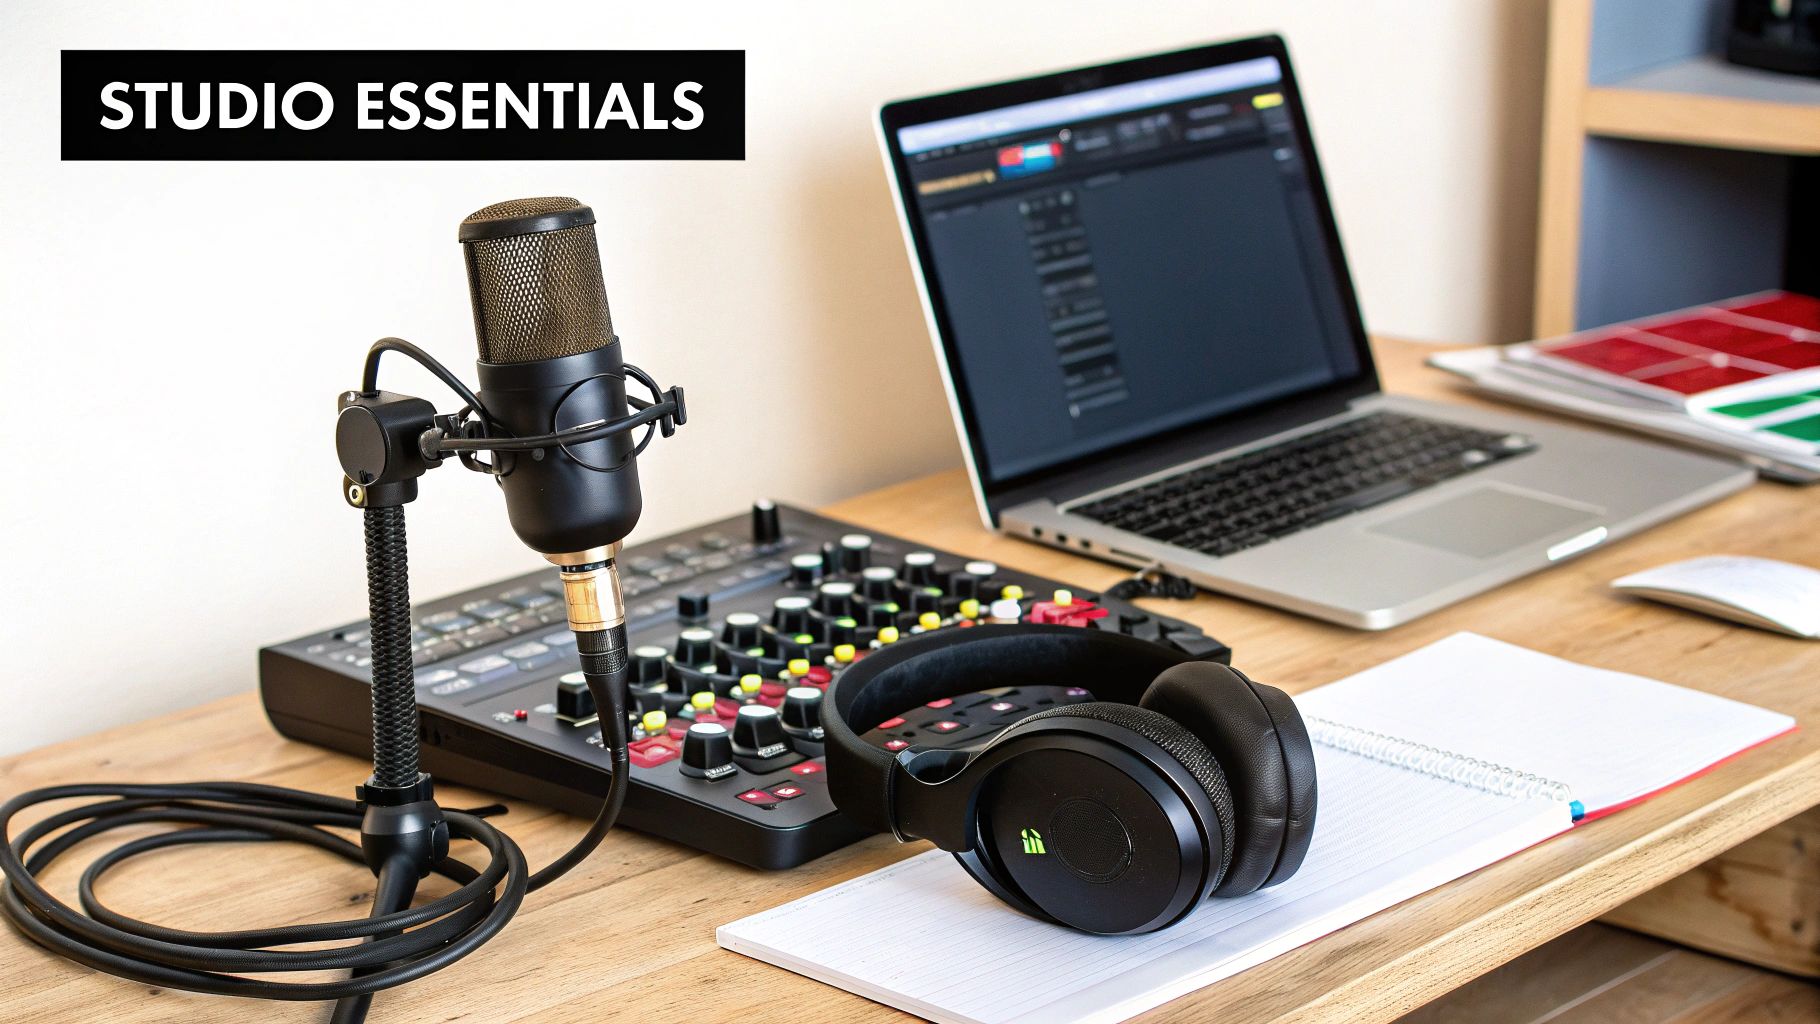
Alright, with your room treated and ready to go, we can get to the fun part: picking out the gear. Walking into this world can feel like navigating a minefield of options and clever marketing. But here's the secret I've learned over years of building studios: it's not about buying the most expensive toys. It's about choosing the right tools for your goals and budget.
To keep things simple, we'll focus on the three foundational pillars of any modern studio. Think of it as the brain (your computer and software), the ears (your interface and speakers), and the voice (your microphones). Nailing these three core components from the start will save you a ton of headaches and money down the road, letting you get straight to making music.
The Brain: Computer and DAW
Your computer is the command center of the entire operation. You don't need a top-of-the-line supercomputer, but you do need something that won't buckle under pressure. A solid starting point is a machine with a decent multi-core processor (an Intel i5/i7 or Apple M-series chip is perfect), at least 16 GB of RAM, and a solid-state drive (SSD). Seriously, don't skip the SSD—it makes a night-and-day difference when loading big project files and sample libraries.
The Digital Audio Workstation (DAW) is the software where you'll spend all your time recording, editing, and mixing. It's your digital canvas. A few of the most popular options out there are:
- Ableton Live: A massive favorite for electronic music producers and anyone who wants to take their tracks to a live stage.
- Logic Pro: Exclusive to Apple, this is a powerhouse known for its intuitive workflow and an insane amount of included sounds and plugins.
- FL Studio: If you're into hip-hop or EDM, you've seen this one. Its pattern-based system is legendary for getting ideas down fast.
- Pro Tools: This has been the industry standard in major commercial studios for decades for a reason.
My best advice? Most DAWs offer free trials or light versions. Download a few and see which one clicks with your brain. The "best" one is the one that feels the most natural to you.
Before we dive into the hardware, let's talk budget. Gear costs can range from a few hundred dollars to tens of thousands. Here’s a table to give you a realistic idea of what to expect at different levels.
Essential Home Studio Gear Budget Breakdown
| Equipment Category | Entry-Level (Beginner) | Mid-Range (Prosumer) | Professional (High-End) |
|---|---|---|---|
| Audio Interface | $100 – $250 | $300 – $800 | $1,000+ |
| Microphone(s) | $100 – $300 | $400 – $1,000 | $1,200+ |
| Studio Monitors (Pair) | $250 – $400 | $500 – $1,200 | $1,500+ |
| Headphones | $50 – $100 | $150 – $300 | $350+ |
| DAW Software | $0 – $200 (Lite/Intro) | $300 – $600 (Full) | $600+ (Suite) |
| Cables & Stand | $50 – $100 | $100 – $200 | $250+ |
| Total Estimated Cost | $550 – $1,350 | $1,750 – $4,100 | $4,900+ |
This breakdown shows you don't need to break the bank to get started, but also illustrates where your money can go as you grow. The key is to invest strategically in the pieces that will make the biggest impact on your sound.
The Ears: Audio Interface and Monitors
Your audio interface is the unsung hero of your studio. It's the translator that converts the analog sound from your microphone into digital information your computer can use. It also does the reverse, turning digital audio back into sound for your speakers. A quality interface from a brand like Focusrite or Universal Audio will give you clean microphone preamps and low-latency performance, which is absolutely essential for a professional workflow.
Then you have your studio monitors. These are your source of truth. Unlike typical consumer speakers that are designed to sweeten the sound, monitors aim for a flat, brutally honest frequency response. This honesty is what allows you to make mixing decisions that sound good everywhere—from a car stereo to cheap earbuds. For most home studios, monitors with 5-inch or 7-inch woofers are the sweet spot; they provide enough low-end information without overwhelming a small room.
Choosing to build a personalized setup puts you in good company. The global market for personalized music studios was valued at $8.2 billion in 2024 and is on track to hit $16.3 billion by 2033. This explosion shows just how many creators are investing in spaces tailored perfectly to their needs. You can dig into more of this data on Reports and Insights.
The Voice: Choosing Your Microphones
The microphone is where sound capture begins, and your choice here has a massive impact on the final product. The two main flavors you'll be working with are condenser and dynamic microphones.
A condenser microphone, like an Aston Origin or Rode NT1, is your detail-oriented specialist. It’s incredibly sensitive and captures every nuance, which is why it's the go-to for vocals and acoustic instruments in a well-treated room. That sensitivity is a double-edged sword, though—it will pick up every bird chirp and refrigerator hum if your space isn't quiet.
On the other hand, a dynamic microphone, like the legendary Shure SM57 or SM7B, is a rugged workhorse. It's less sensitive, which makes it perfect for loud sources like guitar cabinets and snare drums. This also makes it much more forgiving in rooms that have less-than-perfect acoustics. If the budget allows, I always tell people to start with one of each. You’ll be surprised how much ground you can cover. For a more detailed breakdown, our guide to microphone types for recording has you covered.
Connecting Your Gear for a Flawless Workflow
So, you've got your gear. That’s a huge first step, but it’s only half the story. The real magic happens when you connect everything in a way that just works. A clean, logical wiring setup isn't just about avoiding technical nightmares like hiss and signal loss; it's about making your studio an extension of your creative mind, so you can lay down an idea the second it hits.
The journey your sound takes from the instrument to your ears is called the signal flow. Getting this right is everything. It starts with your voice or instrument, moves through your gear, and ends up in your headphones or speakers.
Here’s a great visual of what that path typically looks like in a home studio.
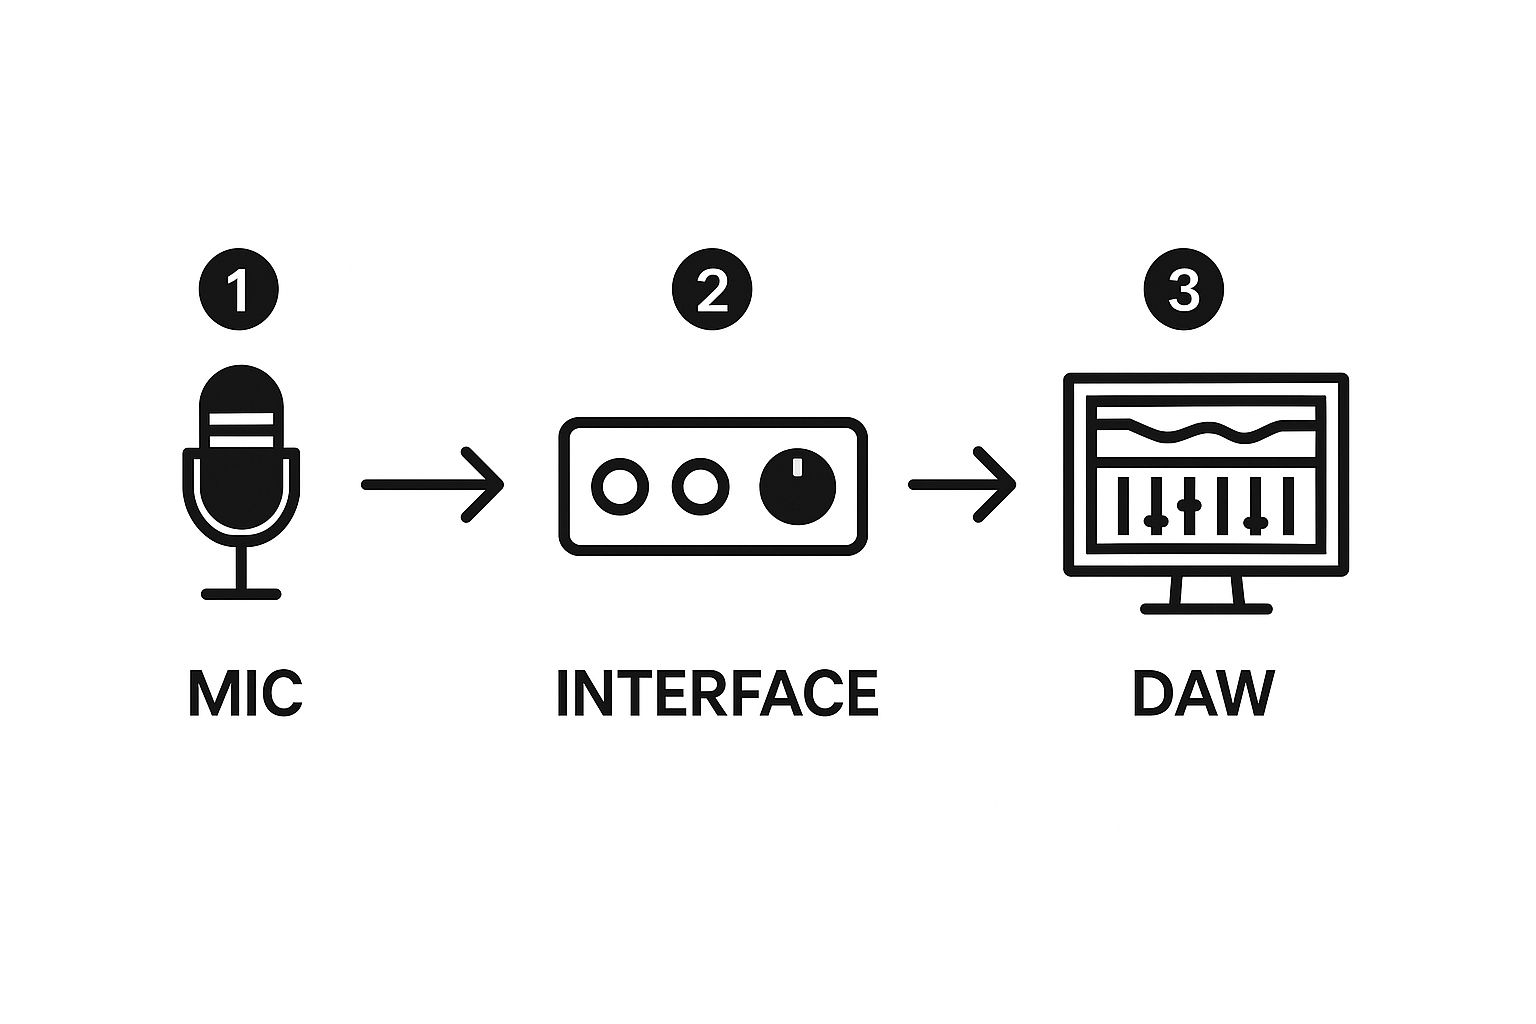
As you can see, it's a straightforward trip: your microphone captures the sound, the audio interface converts it into digital information your computer understands, and your DAW records it. Once you grasp this basic flow, the whole recording process feels much less intimidating.
The Right Cables for the Job
Believe it or not, choosing the right cable is about more than just finding one that fits the plug. The wrong cable can genuinely ruin your sound quality by introducing noise or weakening the signal before it even gets recorded.
Let’s break down the three main audio cables you'll be working with:
- XLR Cables: These are your go-to for microphones. They have a distinct three-pin connector and are balanced, meaning they have a clever internal design that cancels out interference. This is essential for getting that clean, professional sound from your mics.
- TRS (Tip-Ring-Sleeve) Cables: These look a lot like a standard 1/4" guitar cable, but they have two little black rings on the plug instead of one. They can carry either a balanced mono signal (perfect for connecting your interface to your monitors) or a stereo signal (for your headphones).
- TS (Tip-Sleeve) Cables: This is the classic instrument cable for guitars and keyboards. With just one black ring on the plug, they are unbalanced. They work great for short runs from your instrument to your interface but are much more likely to pick up hum and buzz over longer distances.
A rookie mistake I see all the time is connecting studio monitors with a pair of cheap guitar (TS) cables. This is asking for trouble. An unbalanced connection is an open invitation for hum and electrical noise to contaminate your mix, making it impossible to judge your sound accurately. Always, always use balanced XLR or TRS cables for your monitors.
Putting It All Together
Okay, let's connect the dots. The most standard setup is actually pretty simple.
First, your microphone connects to an input on your audio interface using an XLR cable. If you're using a condenser mic, don't forget to press the 48V phantom power button on your interface—it needs this juice to work.
Next, your audio interface plugs into your computer, usually with a USB or Thunderbolt cable. This is the digital superhighway that carries audio back and forth.
Finally, you need to hear what you're doing. Connect the main outputs of your interface to your studio monitors using two TRS cables—one for the left speaker, one for the right. This balanced connection gives you a clean, noise-free signal for precise mixing.
Once everything is wired up, a few cheap velcro straps or zip ties will do wonders for cable management. It keeps your workspace clean, safe, and ready for creativity.
Getting Your Software Ready for That First Recording
https://www.youtube.com/embed/_shjd4GBILo
Alright, with all your gear plugged in, it's time for the magic to happen inside your computer. This is the moment you stop building a studio and start using one. Let's fire up your Digital Audio Workstation (DAW) and get it talking to your new audio interface.
When you open your DAW, the very first thing you need to do is dive into the audio preferences or settings menu. You're looking for the spot to select your audio interface as the main input and output device. This simple but crucial step tells your software, "Hey, listen to the mic plugged into this box, and send the sound back out through these headphones." If you miss this, your DAW will just use your computer's built-in mic and speakers, completely bypassing all the great equipment you just set up.
Dialing in Professional-Quality Project Settings
With your interface selected, you now need to set the audio quality for your project. You'll find options for sample rate and bit depth. Think of these as the resolution of your audio, just like pixel count for a photo.
- Sample Rate: This is how many times per second your interface takes a "snapshot" of the sound. More snapshots mean more detail. For music, 44.1kHz has been the standard for decades (think CDs), while 48kHz is common for video work. Either one is a fantastic place to start.
- Bit Depth: This determines your dynamic range—the space between the quietest whisper and the loudest shout. You should always, always choose 24-bit. It gives you tons of headroom and keeps noise out of your recordings, which will make your life a whole lot easier when it comes time to mix.
Locking in your project at 48kHz and 24-bit is a solid, professional move. It ensures your recordings are clean, detailed, and ready for whatever you throw at them.
Creating a Track and Setting Your Levels
Now for the hands-on part. Inside your DAW, create a new audio track. This is your digital channel strip, ready to capture sound. Before you even think about hitting that record button, you have to set your input level, a skill we call gain staging. Honestly, getting this right from the start is one of the most important habits you can build.
Grab your instrument or step up to the mic and perform at the volume you plan to record. As you do, watch the meter on your track and slowly turn up the gain knob on your audio interface. The goal is a strong, healthy signal that never, ever hits the red.
A Quick Word of Advice: The most common rookie mistake is recording too "hot" (too loud). This causes digital clipping—a nasty, harsh distortion that's impossible to remove later. Aim for your signal to bounce around -12dBFS on your DAW's meter. This leaves plenty of room for dynamics and guarantees a pristine recording.
Once your level is looking good, arm the track for recording (look for a little "R" button that will likely start flashing) and press the main record button. That’s it! You're officially capturing your first take.
This is the moment that bridges all the technical setup with pure creativity, which is what having a home studio is all about. Our complete guide to setting up a home studio dives even deeper into getting you up and running smoothly.
By following these steps, you're not just making noise; you're joining a global community of creators. The music recording market was valued at an incredible $60.73 billion in 2024, and it's powered by people just like you. You can check out these music recording market findings to see how technology is putting more power into the hands of independent artists than ever before.
Answering Your Biggest Home Studio Setup Questions
As you start piecing together your studio, you'll inevitably run into those specific, practical questions that most guides gloss over. These are the little details that can make or break your workflow. I've been there, and I want to help you sidestep some of the common hurdles I faced.
Think of this as a quick chat with someone who's already made all the beginner mistakes. Let's clear up a few of the most frequent debates so you can get back to making music.
Do I Really Need Studio Monitors?
This is probably the number one question I hear. You've got a great pair of headphones, so are monitors strictly necessary? While headphones are indispensable for tracking vocals (no mic bleed!) and catching tiny imperfections, mixing only on them is a classic rookie mistake that leads to weird-sounding tracks.
Here’s why: headphones create an exaggerated stereo field—that "super-wide" sound that just doesn't translate to speakers. They also tend to either hype or hide bass frequencies, which means your mix might sound boomy on a car stereo or thin and weak on a laptop.
My Pro Workflow Tip: Use both! Do about 80% of your mixing on your studio monitors to nail the overall balance, stereo image, and low end. Then, put on your headphones to hunt for those tiny clicks, pops, and reverb tails. This dual-reference method is the key to creating mixes that sound great everywhere.
What Is the Single Most Important Piece of Gear?
Assuming you've already started treating your room's acoustics, the most critical piece of gear you'll buy is your audio interface. It's the heart of your studio, the central nervous system connecting your microphones, instruments, and computer.
Its primary role is converting your analog signal (from a mic or guitar) into digital information your computer understands. The quality of this A/D (analog-to-digital) conversion is everything. A cheap interface with noisy preamps or high latency will sabotage every single thing you record. You can have a world-class microphone, but if the interface is junk, your recordings will be too. Start with a solid interface—it's the foundation you'll build everything else on.
How Do I Avoid That Amateur "Home Demo" Sound?
We've all heard it: that muddy, boxy sound that screams "recorded in a bedroom." This usually boils down to two main culprits: an untreated room and poor gain staging. First and foremost, you have to get a handle on your room's reflections with the acoustic treatment methods we talked about earlier. Seriously, even a few well-placed DIY panels will make a night-and-day difference.
The second part is mastering your recording levels, a process called gain staging. Your goal isn't to record as loud as possible. Instead, you want a strong, clean signal with plenty of room before it distorts (or "clips"). A great rule of thumb is to set your levels so the signal in your DAW peaks at around -12dBFS. This gives you a clean, dynamic recording that's a joy to mix, instantly elevating your sound from amateur to professional.
At ChordX, we're passionate about showing you that incredible sound quality is achievable for everyone. Our guides are built from real-world experience to help you navigate every part of your music production journey. To dive deeper, explore more expert advice at ChordX and start building the studio of your dreams.


