
Why Your Home Studio Needs Proper Acoustic Treatment
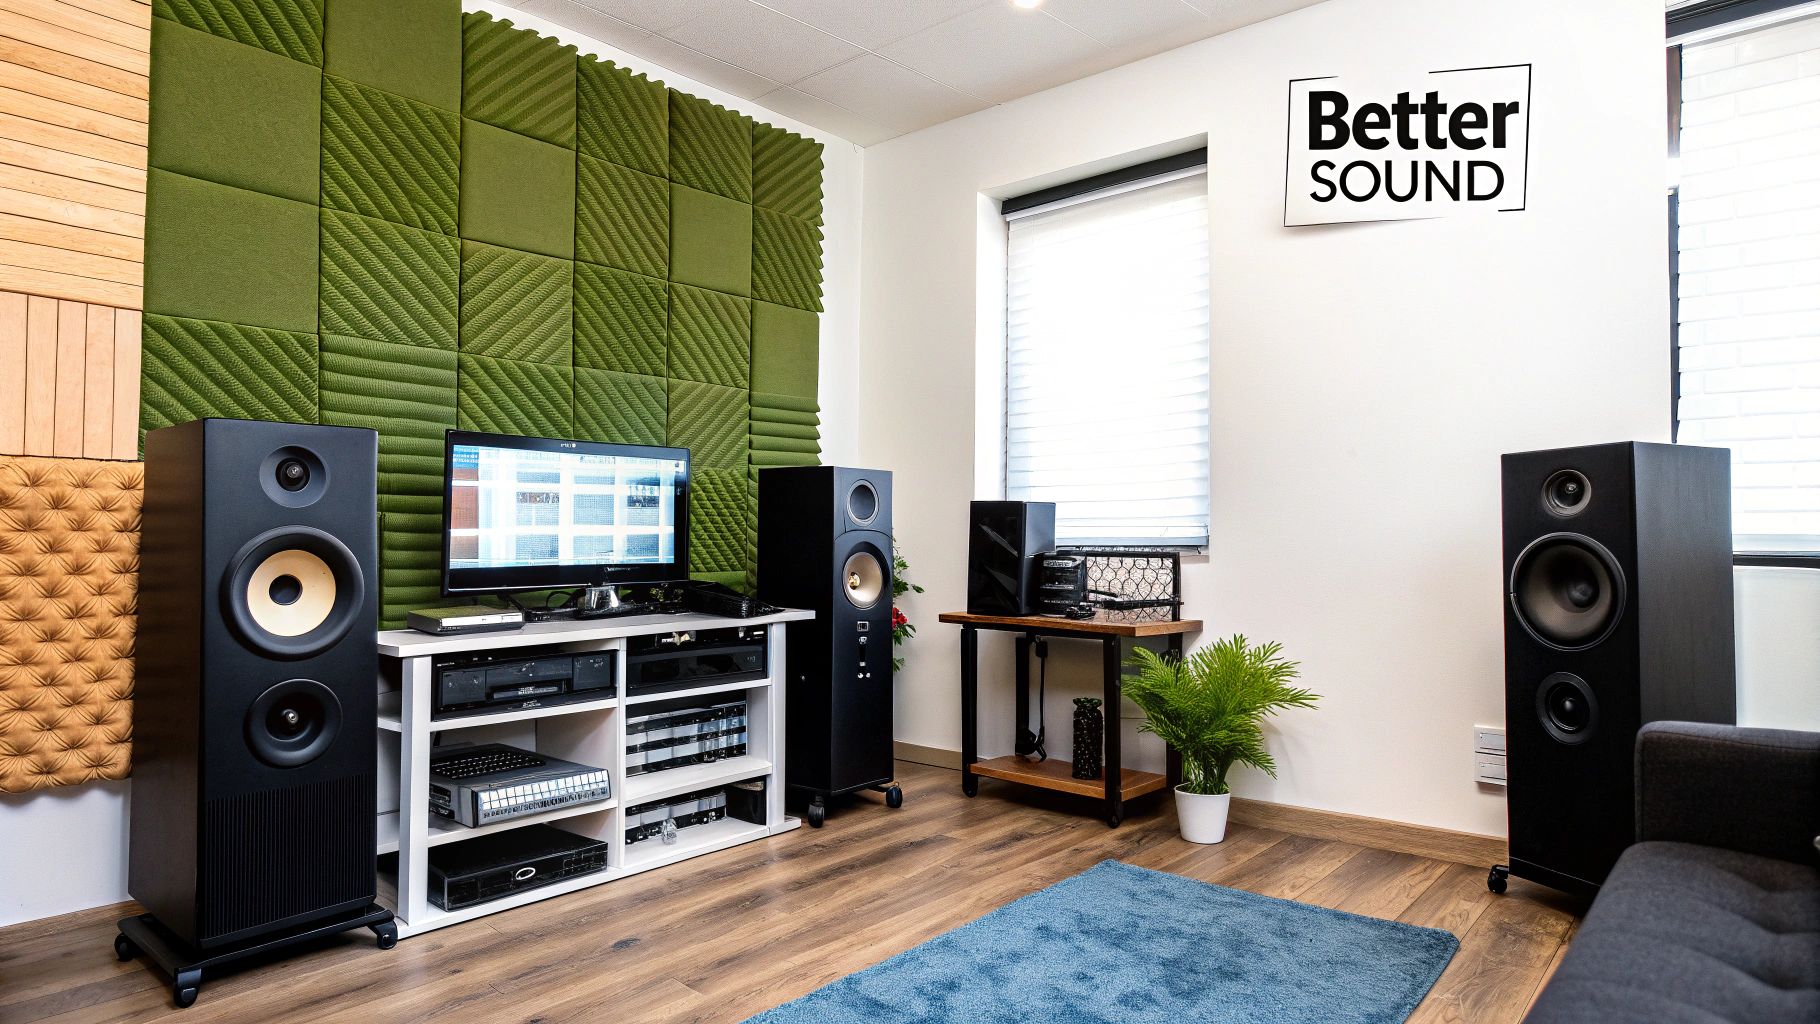
Even with the best microphones and audio interfaces, a poorly designed recording space can severely impact your sound. Untreated rooms create various acoustic issues that can undermine your efforts, potentially making your recordings sound less professional. This section explains why acoustic treatment is essential for a home studio, and why it's more than just soundproofing.
Understanding the Problem: How Untreated Rooms Affect Sound
Untreated rooms are often plagued by problems such as unwanted reflections, disruptive standing waves, and distracting frequency buildup. Reflections happen when sound waves bounce off hard surfaces, leading to a muddy or unclear recording. Think of clapping your hands in an empty bathroom. The sharp echo is a result of those strong reflections. Standing waves occur when sound waves reflect between parallel surfaces, causing certain frequencies to be amplified or cancelled out in specific areas of the room. This creates an uneven frequency response, meaning some notes will sound louder or softer depending on your position in the room.
Soundproofing vs. Acoustic Treatment: Two Different Goals
Soundproofing and acoustic treatment are often confused, but they serve different purposes. Soundproofing focuses on blocking sound from entering or leaving a room. This is useful for keeping outside noise out of recordings and preventing your music from disturbing others. However, it doesn't improve the sound quality inside the room. You might be interested in learning more about recording at home: How to master recording at home. Acoustic treatment, on the other hand, manages the sound within the room by absorbing or diffusing reflections, resulting in a cleaner and more balanced recording environment.
The Benefits of Proper Acoustic Treatment
Acoustic treatment transforms your home studio into a controlled space where your equipment can reach its full potential. By mitigating reflections and other acoustic problems, treatment helps create a flatter frequency response. This ensures the sound you hear is a more accurate representation of the actual audio, enabling more precise mixing and mastering. A treated room also minimizes unwanted resonances and coloration, leading to recordings with improved clarity and definition, essential for capturing the true essence of instruments and vocals.
Targeting Specific Frequencies: A Tailored Approach
Effective acoustic treatment requires addressing specific frequency ranges using appropriate materials and techniques. For example, bass traps absorb low-frequency energy, often the most challenging aspect of smaller rooms. Acoustic panels and diffusers manage mid and high frequencies, leading to a more balanced and natural sound. Understanding these principles and how they interact within your specific room is key to achieving professional-quality results.
Choosing The Right Materials For Your Space And Budget

The sheer variety of acoustic treatment materials can make selecting the right ones a daunting task. This section offers guidance on navigating this complex landscape, covering everything from affordable options to professional-grade materials. We'll delve into their performance characteristics and help you pinpoint the best fit for your home studio's needs and budget.
Understanding Acoustic Material Properties
Each material interacts with sound waves differently. The absorption coefficient quantifies how effectively a material absorbs sound energy, represented by a value between 0 and 1, with 1 indicating complete absorption. Frequency response is another crucial factor. Certain materials absorb specific frequencies better than others. For example, thick, porous materials are generally more effective at absorbing lower frequencies, while thinner materials might excel at higher frequencies. Material durability is also important, especially if your setup needs to be portable or you're looking for a long-term solution.
Exploring Common Acoustic Treatment Materials
Several materials are commonly used for acoustic treatment, each with its own set of advantages and disadvantages.
-
Acoustic Foam: A readily available and often the most budget-friendly choice, acoustic foam comes in various shapes and thicknesses. While effective at absorbing mid and high frequencies, it's less effective with lower frequencies.
-
Fiberglass Panels: Offering excellent absorption across a wider frequency spectrum, including lower frequencies, fiberglass panels are a popular choice in professional studios. They typically outperform foam but come with a higher price tag.
-
Mineral Wool (Rockwool): Similar in performance to fiberglass, mineral wool provides excellent sound absorption and is also fire-resistant. While it can be slightly more expensive than fiberglass, it's often preferred for its enhanced safety properties.
-
Acoustic Fabric: Specialized acoustic fabrics can contribute to sound absorption, particularly in the higher frequency range. These fabrics can be used to cover other acoustic materials or incorporated into DIY solutions.
The growing demand for effective sound management is reflected in the expanding market for acoustic solutions. The interior acoustic panels market, valued at USD 6141 million in 2023, is projected to reach USD 7200 million by 2030. This growth highlights the increasing need for quality acoustic treatment across various spaces, including home studios. Learn more about this market here: Interior Acoustic Panels Market Research
Combining Materials for Optimal Results
Relying on a single material rarely solves all acoustic issues. Combining different materials often leads to the best outcomes. For example, using bass traps in corners to manage low-frequency buildup, along with acoustic panels on walls to address mid and high frequencies, creates a more balanced acoustic environment. This targeted approach allows you to address specific problem areas for a more accurate listening space. You might also be interested in learning more about monitor speakers: Choosing the best monitor speakers for music production.
Balancing Cost and Performance
Effective acoustic treatment doesn't always necessitate a large investment, despite the high cost of some high-end options. Carefully evaluate your budget and prioritize areas where treatment will have the most impact. Strategically placed, budget-friendly materials can deliver surprisingly effective results, especially when combined with DIY approaches. Understanding the balance between cost and performance is crucial for informed decision-making.
Analyzing Your Room And Creating A Treatment Plan
A proper acoustic treatment plan begins with analyzing your room. This means understanding its unique acoustic signature—how sound behaves within its boundaries. This is essential for effective acoustic treatment in a home studio. A targeted approach based on your room's specific characteristics yields much better results than generic solutions.
Identifying Problem Frequencies and Reflection Points
The first step is identifying problem frequencies and reflection points. Simple DIY methods, like the clap test, can help. Clap your hands in different areas and listen for echoes or prolonged reverberation. This helps pinpoint areas with prominent sound reflections. For more detailed insights, consider using smartphone apps for acoustic analysis. These apps can measure reverberation time and identify problematic frequencies.
Understanding Room Dimensions and Acoustic Problems
Room dimensions significantly impact sound behavior. Parallel walls, for example, often create standing waves, causing uneven frequency responses. Low ceilings can worsen bass buildup. This means copying someone else's acoustic treatment setup probably won’t work well in your space. The solution must be tailored to your room's specific dimensions and acoustic properties.
Prioritizing Treatment Areas for Maximum Impact
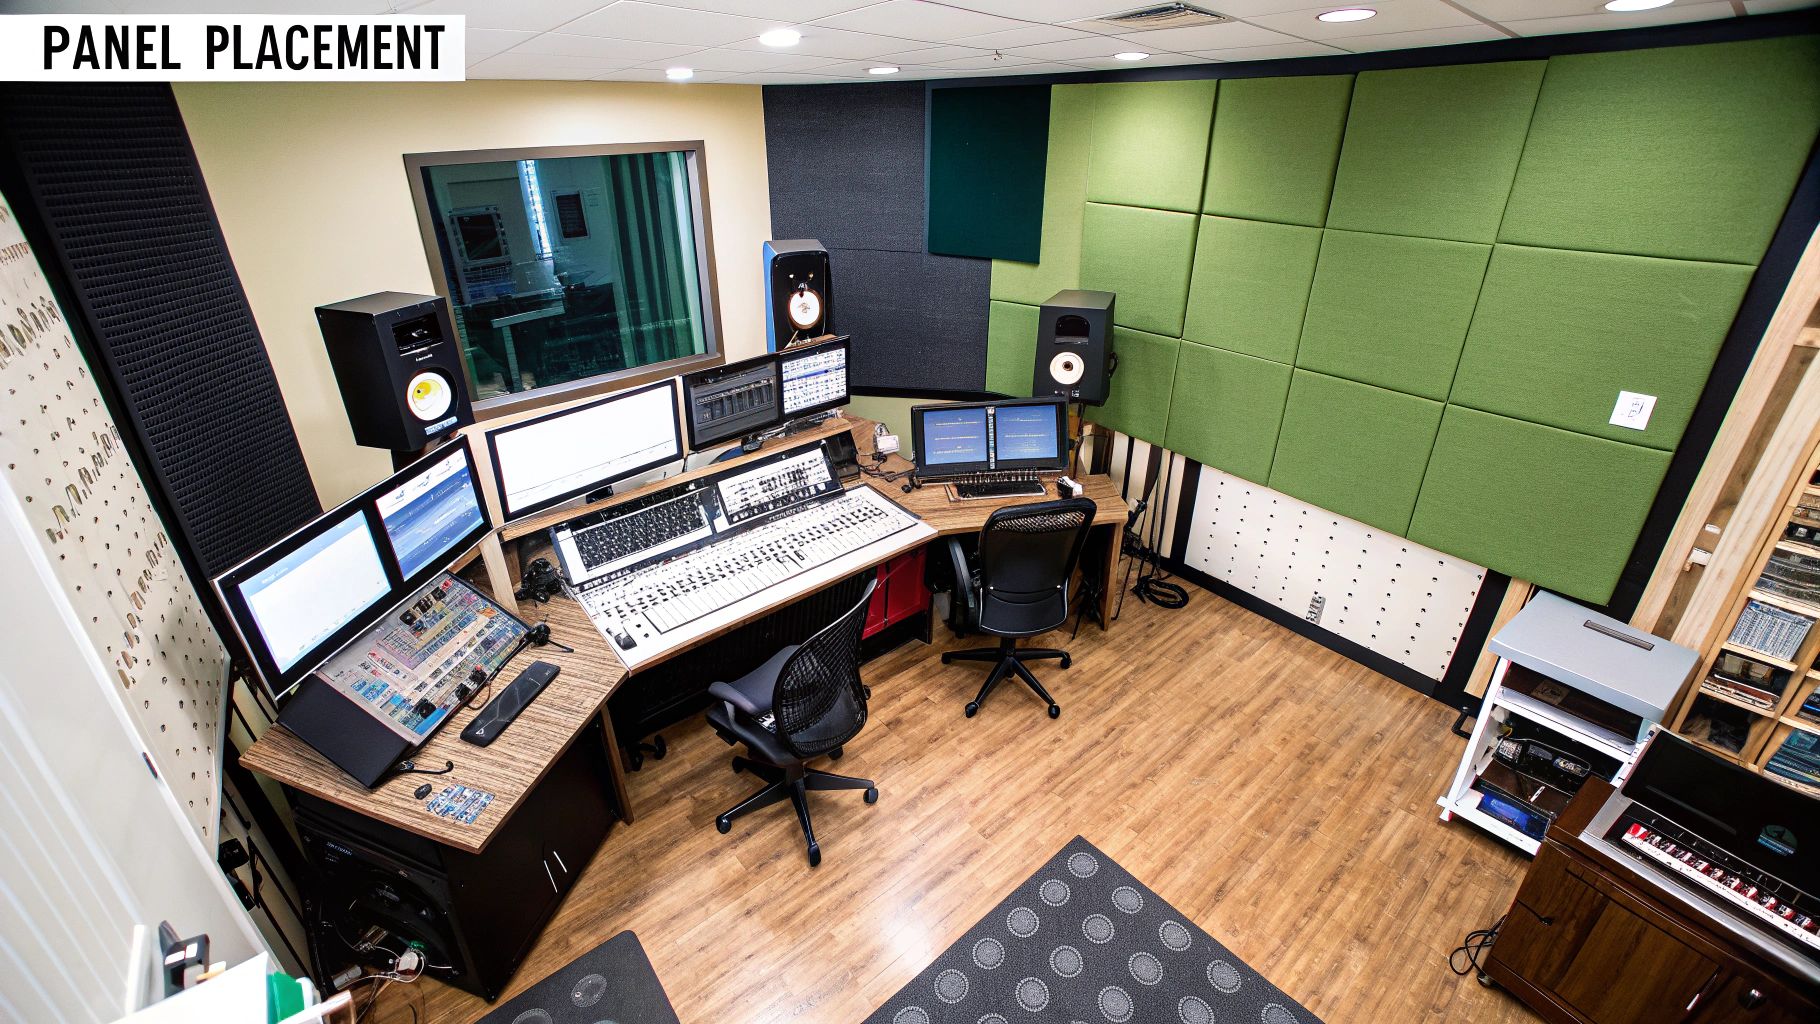
Understanding your room's acoustic profile allows you to prioritize treatment areas. Address the most problematic spots first. This might be corners where bass frequencies accumulate, or first reflection points on the walls and ceiling. Focusing on these key areas maximizes the benefits, especially with a limited budget.
Creating a Phased Implementation Plan
Acoustic treatment doesn't need to be implemented all at once. A phased approach addresses the most critical issues first, gradually adding more treatment as your budget allows. This approach lets you assess each phase's impact and make adjustments. By listening critically and measuring your progress, you can fine-tune your setup for optimal sound.
DIY Solutions Versus Professional Treatment Options
Acoustic treatment is essential for any home studio, but the options can seem overwhelming. From simple DIY projects to full-scale professional installations, finding the right balance for your needs and budget is key. This section explores the spectrum of solutions, helping you make informed decisions about your home studio's acoustics. We'll cover cost-effective DIY methods, discuss when professional help is warranted, and explain how to combine both approaches for optimal results.
Exploring DIY Acoustic Treatment
Many acoustic problems can be effectively addressed without professional assistance. DIY solutions offer a cost-effective way to improve your studio's sound. Some popular DIY approaches include:
- Fabric-Wrapped Panels: These panels involve wrapping absorptive materials, such as Rockwool or fiberglass insulation, with breathable fabric. This method allows for custom sizing and placement.
- Moving Blanket Installations: Strategically placed moving blankets can temporarily absorb sound reflections. This is a particularly useful technique for quick fixes or temporary setups.
- Strategic Furniture Placement: Existing furniture, like bookshelves and couches, can diffuse and absorb sound, contributing to a more balanced acoustic environment.
These DIY methods vary in complexity. Building fabric-wrapped panels, for example, involves measuring, cutting, and assembling materials. Simpler solutions, like using moving blankets, still require careful placement for maximum effectiveness. Remember to prioritize safety, especially when working with materials like fiberglass, which requires proper protective gear.
The infographic below visualizes the absorption coefficients (NRC) of common DIY panel materials: foam, Rockwool, and fiberglass.

Fiberglass offers the highest NRC rating at 0.9, followed by Rockwool at 0.85, and foam at 0.6. This highlights the effectiveness of denser materials, like fiberglass and Rockwool, for sound absorption compared to lighter materials like foam.
To help you better understand the different approaches, let's take a look at a comparison table. This table outlines the cost, effectiveness, and installation difficulty for both DIY and professional solutions.
DIY vs Professional Acoustic Treatment Comparison:
| Treatment Type | DIY Cost | Professional Cost | Effectiveness Rating | Installation Difficulty |
|---|---|---|---|---|
| Fabric-Wrapped Panels | $50 – $150 per panel | $150 – $300+ per panel | Medium-High | Medium |
| Moving Blanket Installation | $10 – $30 per blanket | N/A | Low-Medium | Easy |
| Strategic Furniture Placement | $0 | N/A | Low | Easy |
| Bass Traps (DIY) | $100 – $250 per trap | $300 – $600+ per trap | Medium | Medium-High |
| Bass Traps (Professional) | N/A | $500 – $1000+ per trap | High | Professional Required |
| Acoustic Diffusers (DIY) | $50 – $150 per diffuser | $200 – $400+ per diffuser | Medium | Medium-High |
| Acoustic Diffusers (Professional) | N/A | $400 – $800+ per diffuser | High | Professional Required |
| Room Measurement & Analysis | $50 – $150 for software | $500 – $1500+ | N/A | Varies |
As you can see, DIY options are generally more affordable but can be less effective and more challenging to install than professional solutions, particularly for more complex treatments like bass traps and diffusers.
When Professional Treatment Makes Sense
While DIY methods can be effective for many situations, certain circumstances require professional acoustic treatment. Complex room designs with unusual shapes or severe acoustic issues often benefit from professional expertise. Professionals can utilize precise measurements and specialized materials, like custom-built bass traps or diffusers, to address specific acoustic challenges. They also typically have access to higher-grade materials and equipment, potentially leading to better overall results. This is particularly important when precise tuning of a room's acoustics is required.
Combining DIY and Professional Approaches
A hybrid approach, combining DIY and professional solutions, can optimize both cost and performance. You could, for instance, build your own broadband absorbers for wall coverage and then hire professionals to install strategically placed bass traps to control low-frequency issues. This balanced strategy helps ensure efficient spending while effectively addressing specific acoustic problems. The ideal approach depends on your individual needs, budget, and desired level of acoustic performance.
What's Working In Today's Acoustic Treatment Market
The market for acoustic treatment solutions, especially for home studios, is constantly changing. Staying up-to-date on the latest advancements is essential for creating an optimal recording space. This section explores current trends and effective products improving home studio acoustics. We'll examine popular products, discuss new technologies, and highlight the qualities of leading brands.
Top-Performing Acoustic Panels, Bass Traps, and Diffusers
Choosing the right acoustic treatment can be challenging. Performance data and user reviews are invaluable resources. Top-rated products typically use high-quality materials and smart designs. Some panels, for example, offer better absorption across a wider frequency range. Effective bass traps are essential for managing low-frequency problems. Check out our guide on setting up a home studio: Music Production for Beginners. Well-designed diffusers, meanwhile, scatter sound waves evenly, reducing unwanted reflections and creating a more natural sound.
Innovative Materials and Design Trends
The acoustic treatment market is experiencing a surge of innovation in materials and designs. Eco-friendly panels made from sustainable materials are gaining popularity, giving environmentally conscious studio owners more options. There's also a growing trend toward visually appealing solutions that integrate with home decor. This means achieving great acoustics doesn't have to clash with your room's style. The acoustic treatment market is growing rapidly, with high demand for effective solutions. The global acoustic panel market, valued at USD 1.76 billion in 2024, is projected to reach USD 2.58 billion by 2034. For more detailed statistics, see: Acoustic Panel Market Growth.
Emerging Technologies and Hybrid Solutions
New technologies are shaping the future of acoustic treatment, including modular systems and smart acoustic panels. Modular systems offer flexibility in arrangement, allowing adjustments for different needs or room layouts. Smart acoustic panels use technology to analyze room acoustics and automatically optimize their performance. Hybrid solutions combine absorption and diffusion, streamlining the treatment process. These advancements provide exciting opportunities for precise acoustic control.
Identifying Quality Brands and Avoiding Common Pitfalls
When purchasing acoustic treatment, look beyond marketing claims. Choose brands known for quality and customer satisfaction. Key indicators include high-quality materials, transparent performance data, and strong warranties. For further reading, see: How to master music production. Avoid products with exaggerated claims or those promising unrealistic results without supporting evidence. Research product specifications carefully, and seek independent reviews when possible.
Making Acoustic Foam Work For Your Home Studio
Despite some drawbacks, acoustic foam remains a popular choice for home studio acoustic treatment. Its affordability and easy availability make it attractive to many. This section explores how to get the most out of acoustic foam through careful selection, placement, and realistic expectations. Learn how to turn this budget-friendly material into a powerful tool for improving your recordings.
Understanding Acoustic Foam Types and Their Uses
Acoustic foam comes in a variety of shapes and sizes, each designed with specific acoustic properties. Pyramid foam, with its textured surface, effectively scatters sound waves. This helps reduce flutter echo and control mid-to-high frequency reflections. Wedge foam features a beveled design and offers similar benefits. It often provides slightly better low-frequency absorption. For managing bass frequencies, specialized bass traps are essential. These are often made of thicker, denser foam, or a combination of materials. Choosing the right foam type for different areas in your studio is the first step towards balanced sound absorption.
Strategic Placement: Maximizing Foam's Effectiveness
Where you place your acoustic foam significantly impacts its performance. Here are some common placement areas:
-
First Reflection Points: These are the points on your walls and ceiling where sound from your speakers first bounces before reaching your ears. Covering these spots with foam minimizes early reflections, which improves clarity and stereo imaging.
-
Corners: Bass frequencies tend to build up in corners. Placing bass traps in these areas helps control this low-frequency buildup. This results in a tighter low end and prevents muddy mixes.
-
Back Wall: Treating the back wall with foam absorbs sound reflecting from the rear of the room. This reduces unwanted reflections and improves the accuracy of your monitoring environment.
Consider overall coverage as well. While covering every surface isn't necessary, insufficient coverage can create uneven absorption and an unbalanced acoustic response. The key is to strike a balance between adequate treatment and avoiding over-treatment.
Integrating Foam into a Comprehensive Treatment Strategy
Acoustic foam, while helpful, is rarely a complete solution on its own. Combining it with other materials often yields better results. For example, using foam panels alongside thicker, denser absorbers like Rockwool or Fiberglass can effectively address a wider range of frequencies. This layered approach helps manage both low and high-frequency issues, leading to a more balanced acoustic environment. Adding diffusers, which scatter sound waves instead of absorbing them, can help maintain a sense of spaciousness while preventing flutter echo. The acoustic foam market itself is growing rapidly. Projected to reach $2.7 billion by 2033, this market expansion highlights the increasing need for acoustic solutions, particularly in home studios. Learn more about this growth: Acoustic Foam Market Growth.
Practical Tips for Installation and Safety
Proper installation is crucial for maximizing acoustic foam's effectiveness. Securely mount panels using appropriate adhesives or mechanical fasteners. This prevents them from coming loose and ensures optimal absorption. Avoid mounting foam directly against walls using rigid methods. This can reduce its low-frequency absorption capabilities. Fire safety is also important. Choose foam with appropriate fire-retardant properties to minimize potential hazards.
Testing Results And Fine-Tuning Your Acoustic Setup
After installing your acoustic treatment, evaluating its effectiveness and making necessary adjustments is crucial. This process distinguishes a good acoustic environment from a truly great one. It involves subjective listening tests and more objective measurements using affordable tools and readily available smartphone apps.
Conducting Before-and-After Testing
Before installing any acoustic treatment, record audio in your room. This serves as your baseline. After installing the treatment, record the same audio using identical settings. Compare the recordings, noting any changes in clarity, reverberation, and overall balance. This simple before-and-after test reveals the immediate improvements.
Using Measurement Tools and Apps
While listening tests are valuable, objective measurements offer more specific insights. Smartphone apps designed for acoustic analysis can measure Reverberation Time (RT60), a key room acoustic property. RT60 is the time it takes for sound to decay by 60 decibels. These apps often measure frequency response, which identifies problematic frequencies. For example, a build-up at 100 Hz might indicate a need for more bass traps. Using these apps is more cost-effective than professional equipment. Room EQ Wizard is a popular software for room acoustic analysis.
Identifying Remaining Problem Areas
Even with careful planning, some issues may remain after the initial treatment. Use your measurement tools and listening skills to pinpoint these. Perhaps there’s excessive reverberation in certain frequency ranges, or a flutter echo between parallel surfaces. These findings will inform further adjustments. Adding diffusers, for instance, can disperse reflections without over-dampening the room.
Making Strategic Adjustments
Fine-tuning is iterative. Address the most obvious issues first. This might involve adding absorption or experimenting with diffuser placement. If measurements reveal a midrange dip, strategic absorber placement may help. Small changes can have noticeable effects, so work incrementally and reassess after each adjustment.
Understanding Relevant Metrics
Not all acoustic metrics are equally important. Focus on those most relevant to your needs. If you mainly record vocals, prioritize clarity and minimize reflections in the vocal range. For mixing and mastering, a flatter frequency response across the spectrum is critical. A balanced acoustic environment is key for professional recordings.
To help you understand the effectiveness of your acoustic treatment, let's look at some key metrics. The table below provides a general guideline, but remember that specific targets may vary based on room size, intended use, and personal preference.
Acoustic Treatment Effectiveness Metrics: Key measurements and benchmarks for evaluating your home studio's acoustic treatment success
| Measurement Type | Before Treatment Range | Target After Treatment | Testing Method | Frequency of Assessment |
|---|---|---|---|---|
| Reverberation Time (RT60) | 0.5 – 1.5 seconds (dependent on room size and use) | 0.2 – 0.5 seconds for control rooms | Acoustic Measurement App / Room EQ Wizard | After initial treatment and adjustments |
| Frequency Response | Significant peaks and dips across the spectrum | Relatively flat frequency response | Acoustic Measurement App / Room EQ Wizard | After initial treatment and adjustments |
| Flutter Echo | Audible repetitions of sound | Minimal to no audible echoes | Clap test, Acoustic Measurement App | After treating parallel surfaces |
As you can see, achieving the target values for these metrics will significantly improve the acoustics of your home studio. This will translate to clearer recordings, a more accurate mixing environment, and an overall improvement in the quality of your audio work. Remember to re-evaluate your room's acoustics after each adjustment to track your progress and fine-tune your setup for optimal sound quality.


