
Getting Started Without Overwhelming Yourself
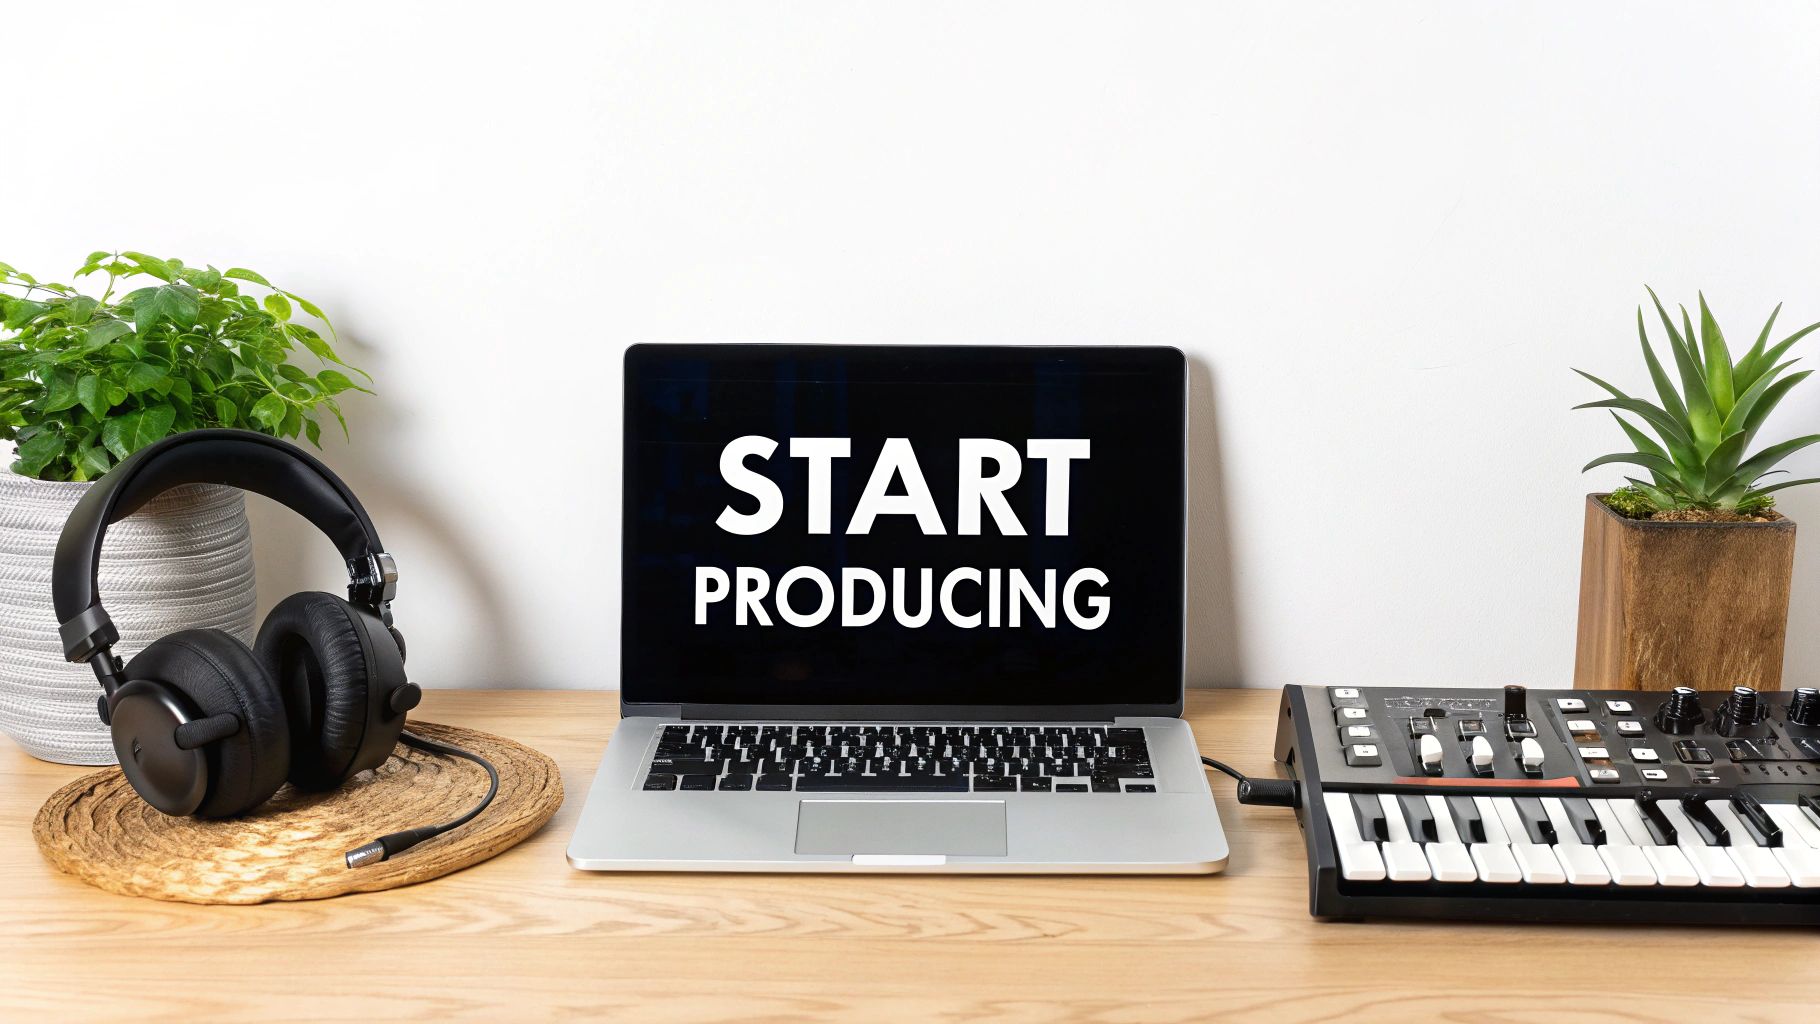
So, you’re ready to embark on your music production journey? It’s an exciting world, full of creative possibilities. However, it’s also easy to feel overwhelmed by the sheer amount of software, hardware, and technical terms. This section aims to simplify the process, guiding you through those first essential steps.
Understanding the Core Components
Music production can be broken down into key stages. Think of it like building a house. You begin with a foundation (your initial musical idea), frame the structure (arrange the song), add the walls and roof (record the instruments and vocals), and finally, paint and furnish (mix and master).
- Idea Generation: This is the starting point. It could be a melody, a rhythm, a chord progression, or even just a feeling. Capture those initial sparks of inspiration – these are the foundations of your future tracks.
- Arrangement: Similar to constructing the frame of a house, arranging your song involves structuring your ideas. This includes deciding the order of verses, choruses, and bridges. A solid arrangement keeps listeners engaged and lets your musical ideas shine.
- Recording: This stage brings your arranged song to life. Recording captures the performance of instruments (real or virtual) and vocals. It’s the equivalent of adding walls and a roof to your musical house.
- Mixing: Now it’s time to blend the individual recorded tracks. Mixing involves balancing levels and applying effects to create a polished, cohesive sound. This is where you add the paint and furnishings.
- Mastering: This is the final polish, ensuring your track is optimized for playback across various platforms and sound systems. Mastering adds that professional touch.
Prioritizing Your First Skills
As a beginner, trying to learn everything at once can be overwhelming. It’s important to prioritize. Focus on these core skills initially:
- Basic DAW Operation: Your Digital Audio Workstation (DAW) is your command center. Learn the basics of Ableton Live (or whichever DAW you choose) such as recording audio, arranging MIDI, and navigating the interface.
- Understanding Rhythm and Timing: A solid grasp of rhythm and timing is fundamental for compelling music.
- Basic Music Theory: Even a basic understanding of chords, scales, and melody can greatly enhance your songwriting and production skills.
Embracing Simplicity and Avoiding Overwhelm
While advanced software and hardware offer immense possibilities, they can also be distracting. Start small. Begin with a basic setup and gradually expand as your skills and needs evolve. The accessibility of music production tools has democratized the industry, leading to significant growth. The global music production software market is projected to reach USD 466.9 million in 2025, with a projected CAGR of 7.7% through 2029. Find more detailed statistics here. Focus on your core skills and avoid the temptation to buy every new plugin. Your journey is about developing your creativity, not accumulating gear.
Building Your Home Studio on Any Budget
Creating a functional home studio doesn’t have to be expensive, especially when you’re just starting out. With careful planning and prioritization, you can assemble a great setup without emptying your wallet. This guide will walk you through building an affordable home studio, explaining the essential equipment and helping you avoid unnecessary costs.
Essential Gear and Budget Breakdowns
Even a small budget can get you started with quality equipment. Here are three budget-friendly setups to consider:
- $200 Setup: This covers the absolute basics. You’ll need a USB audio interface (the Focusrite Scarlett Solo is a popular choice), a good pair of studio headphones (like the Audio-Technica ATH-M20x), and a free DAW (Digital Audio Workstation) such as Cakewalk by BandLab. This basic setup is perfect for recording vocals, simple instruments, and getting comfortable with your DAW software.
- $500 Setup: With a slightly bigger budget, you can add a condenser microphone (the Rode NT1-A is a good option) for significantly better vocal and instrument recordings. A basic MIDI keyboard controller will also allow you to explore virtual instruments.
- $1000 Setup: This budget allows for higher quality components across the board. Investing in studio monitor speakers is a significant upgrade for accurate sound and mixing. You might also consider higher-end headphones, a more feature-rich audio interface, and some paid plugins.
Acoustic Treatment on a Dime
Professional studios spend significant money on acoustic treatment. Luckily, beginners can achieve decent sound quality with readily available household items. Thick blankets or curtains can help absorb sound reflections, and bookshelves can diffuse sound waves. Thoughtful placement of these items can drastically improve your recording and mixing environment, ensuring your recordings are as clean as possible.
Monitoring: Headphones vs. Speakers
Both headphones and speakers are important tools for music production. Headphones are excellent for detailed listening and recording, allowing you to isolate individual sounds. Speakers, on the other hand, give you a more realistic sense of how your music will sound on various playback systems, which is crucial for mixing. The ideal workflow incorporates both.
When to Upgrade Your Gear
It’s tempting to always chase the latest equipment, but focus on mastering your current setup before investing in new gear. An upgrade is justified only when your current tools are holding back your creativity or technical abilities. For example, if your audio interface is causing noticeable latency issues during recording, or your microphone is introducing too much noise, then it’s time to upgrade. Remember, developing your skills is more important than acquiring gear, especially in the early stages.
Building Your Setup Step-by-Step
Building your home studio doesn’t need to happen all at once. It can be a gradual process:
- Start with the Core: Begin with an audio interface, headphones, and a DAW. These are the foundational elements of any studio.
- Prioritize Monitoring: If possible, add monitor speakers early on for a more accurate mixing experience.
- Microphone Choice: Choose a microphone that’s suited to your primary recording needs, whether it’s vocals or instruments.
- Gradual Expansion: As your skills and budget grow, add new gear strategically, focusing on what will have the most impact on your music production.
This incremental approach allows you to learn the ropes while building a studio that fits your individual needs and creative style. Remember, every producer starts somewhere, and with dedication, you can create a professional-sounding home studio.
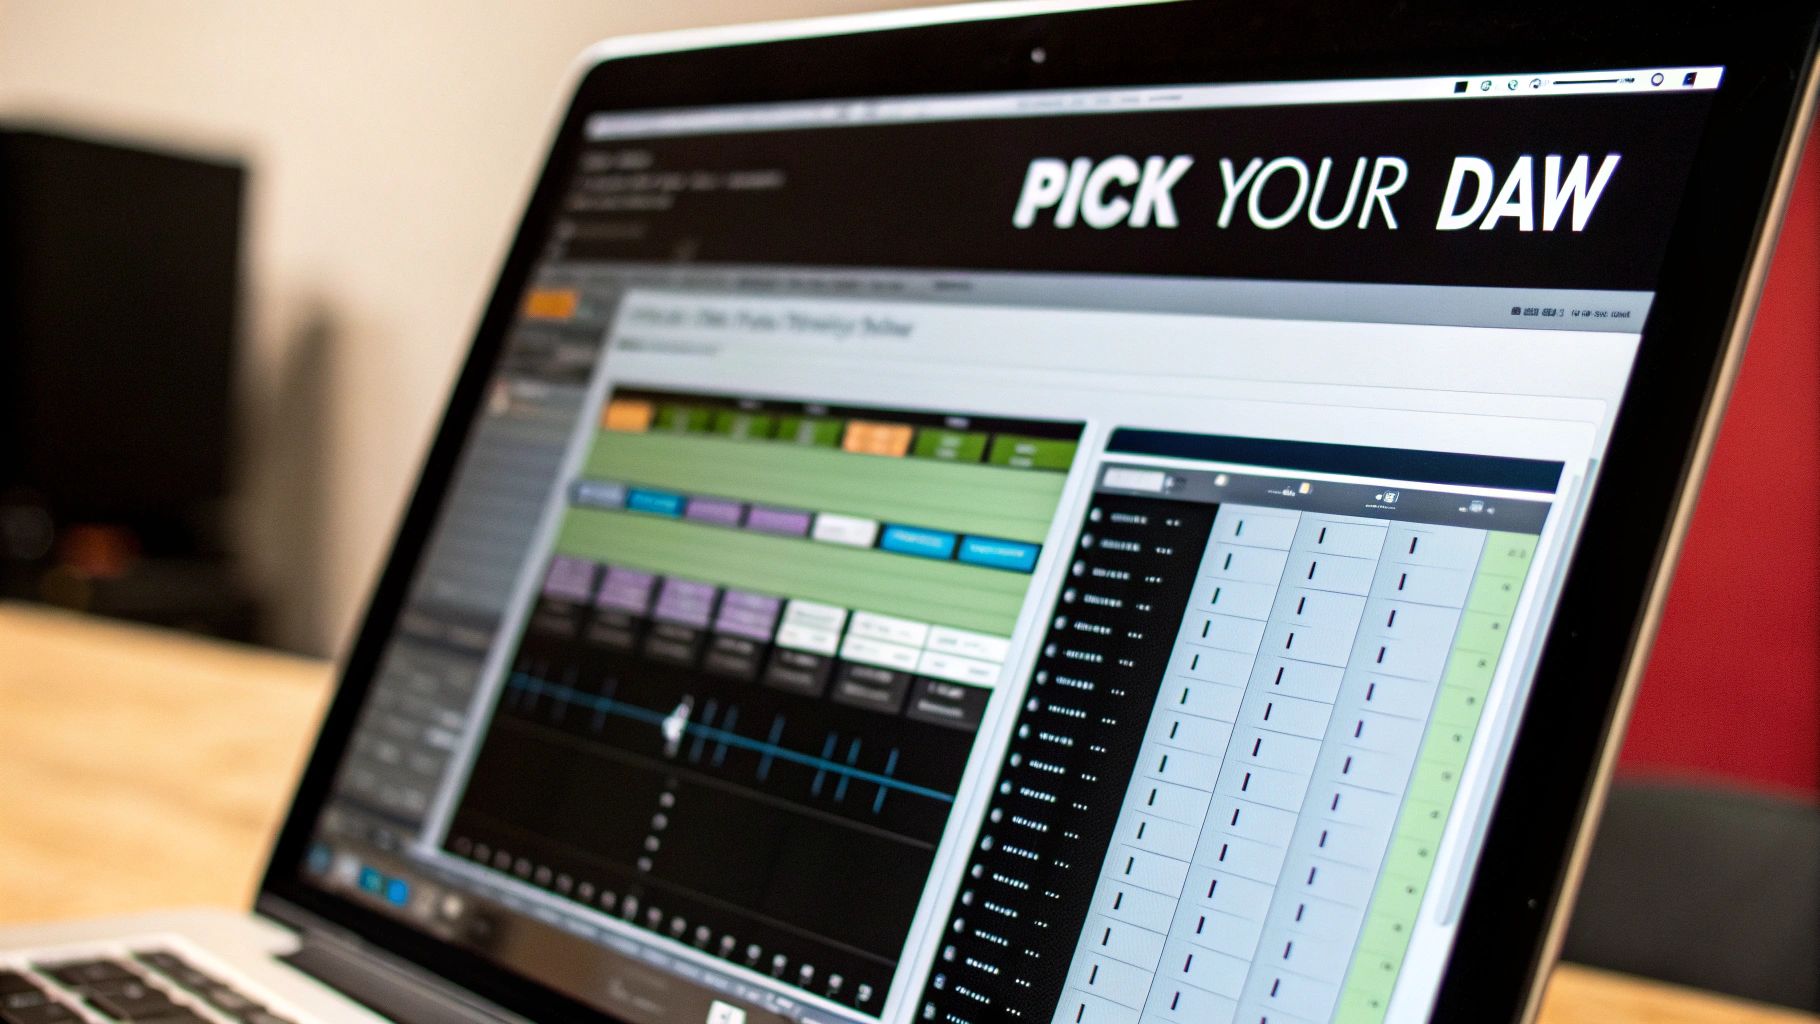
Choosing Your First DAW That You’ll Actually Use
Navigating the world of Digital Audio Workstations (DAWs) can be overwhelming for beginners. With a plethora of options, each with unique features, choosing the right one can be a challenge. This section provides practical advice for selecting a DAW that fits your needs.
Understanding Your Needs and Goals
Before exploring specific DAWs, consider your musical goals, technical skills, and budget. Are you focused on electronic music, recording live instruments, or songwriting? Your focus will influence your DAW choice. Also, consider your technical comfort level. Some DAWs have simpler interfaces than others.
Beginner-Friendly DAWs
Several DAWs are particularly well-suited for beginners:
- GarageBand (Mac): Free and pre-installed on Macs, GarageBand is a great starting point. It offers a streamlined interface, a good selection of virtual instruments, and an intuitive workflow.
- Cakewalk by BandLab (Windows): Free and full-featured, Cakewalk by BandLab is a powerful option for Windows users. While slightly more complex than GarageBand, it provides excellent value.
- Ableton Live (Mac/Windows): Known for its loop-based workflow, Ableton Live is popular for electronic music and live performance. It offers a free trial and various pricing tiers.
- FL Studio (Windows/Mac): FL Studio is a pattern-based DAW popular for hip-hop and electronic music. It offers a user-friendly interface and is available as paid software with a free demo.
To help you compare these options, take a look at the table below:
Beginner-Friendly DAW Comparison: This table compares popular Digital Audio Workstations based on price, ease of use, and key features for beginners.
| DAW Name | Price | Learning Curve | Best For | Key Features |
|---|---|---|---|---|
| GarageBand | Free | Easy | Beginners, Songwriting, Mac Users | Streamlined interface, virtual instruments |
| Cakewalk by BandLab | Free | Medium | Beginners, Recording, Windows Users | Powerful tools, full-featured |
| Ableton Live | Paid (Free Trial) | Medium | Electronic Music, Live Performance | Loop-based workflow, intuitive interface |
| FL Studio | Paid (Free Demo) | Medium | Hip-Hop, Electronic Music | Pattern-based sequencing, user-friendly |
This comparison highlights the variety of options available for beginners. Free options like GarageBand and Cakewalk by BandLab offer excellent starting points, while paid DAWs like Ableton Live and FL Studio provide more advanced features for specialized genres.
Considering Hidden Costs
The initial price isn’t the only cost. Some DAWs require specific hardware or offer extensive free resources. Factor these into your decision. For example, some DAWs may require a powerful computer for smooth operation.
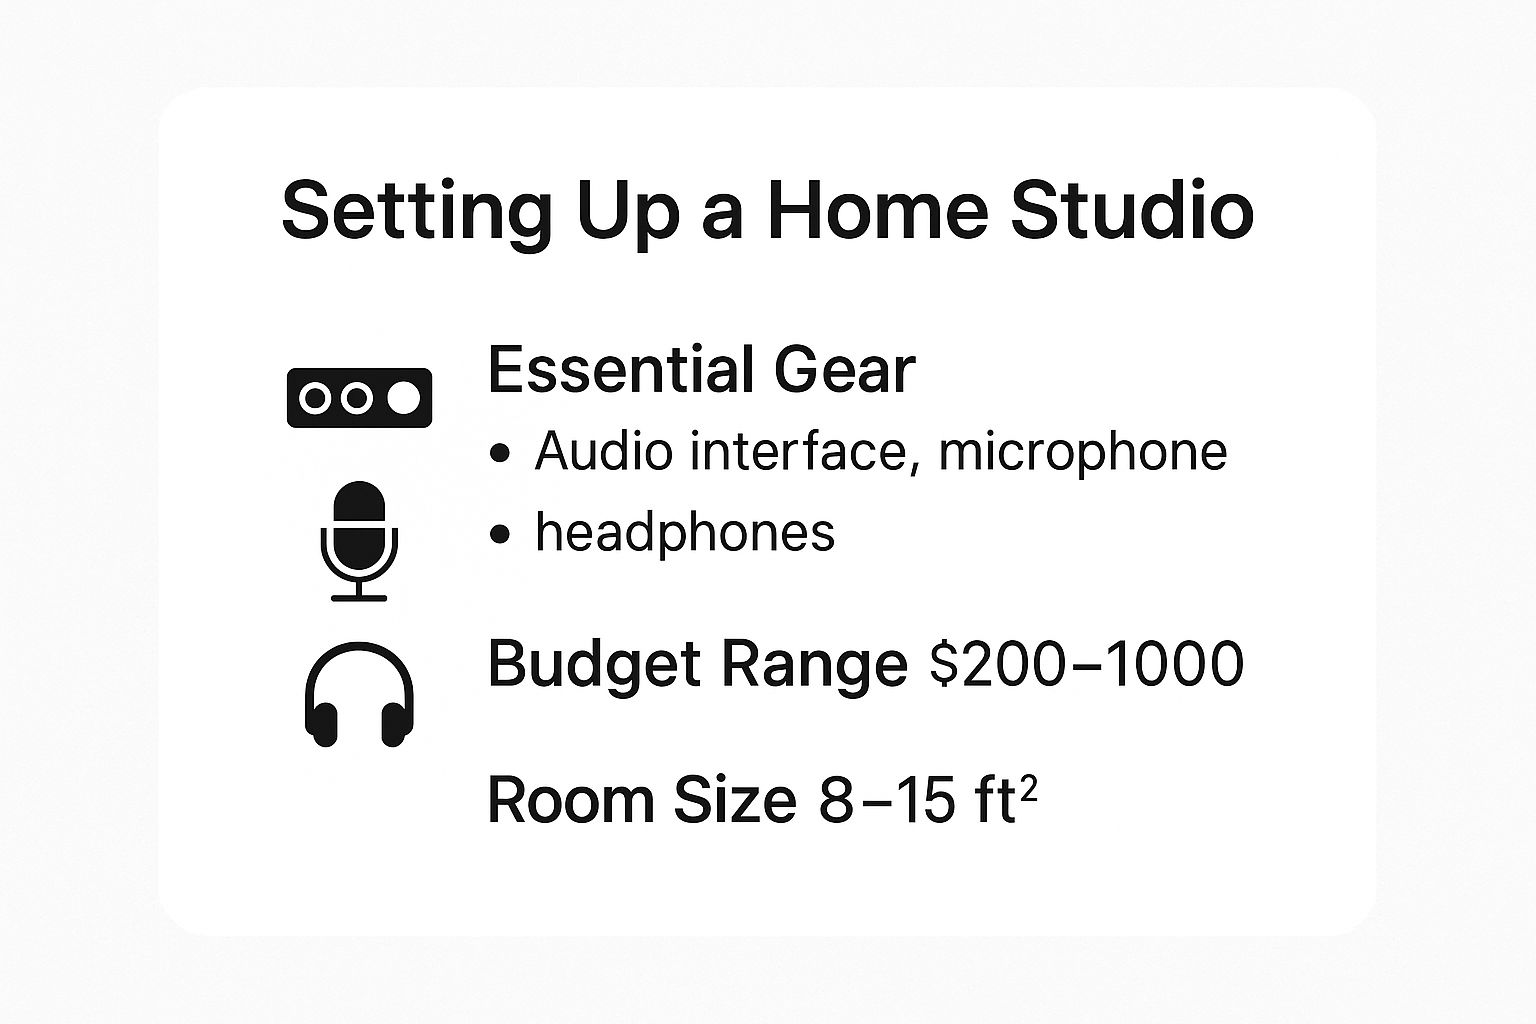
This infographic shows a basic home studio setup. It illustrates the essential gear, typical budget, and ideal room size. As you can see, starting with music production doesn’t require a huge investment.
The Importance of Sticking With It
The best DAW is the one you’ll consistently use. Download free trials, watch tutorials, and experiment. The music production software market is projected to reach $3 billion by 2033. This growth reflects the increasing accessibility of music production tools. Learn more about this market growth. This means more resources and communities are available, regardless of your DAW choice. Explore, trust your instincts, and find the DAW that empowers your creativity.
Making the Final Decision
Choosing a DAW is a personal journey. Try several options. Consider these tips:
- Watch Tutorials: YouTube offers a wealth of DAW tutorials. Watch beginner guides to get a feel for different interfaces and workflows.
- Join Online Communities: Connect with other producers online. Ask for opinions and learn from their experiences.
- Trust Your Gut: If a DAW feels intuitive and inspiring, that’s a good sign. The best DAW motivates you to create.
By researching and experimenting, you can choose a DAW that will support your growth as a music producer.
Recording Your First Professional-Sounding Tracks
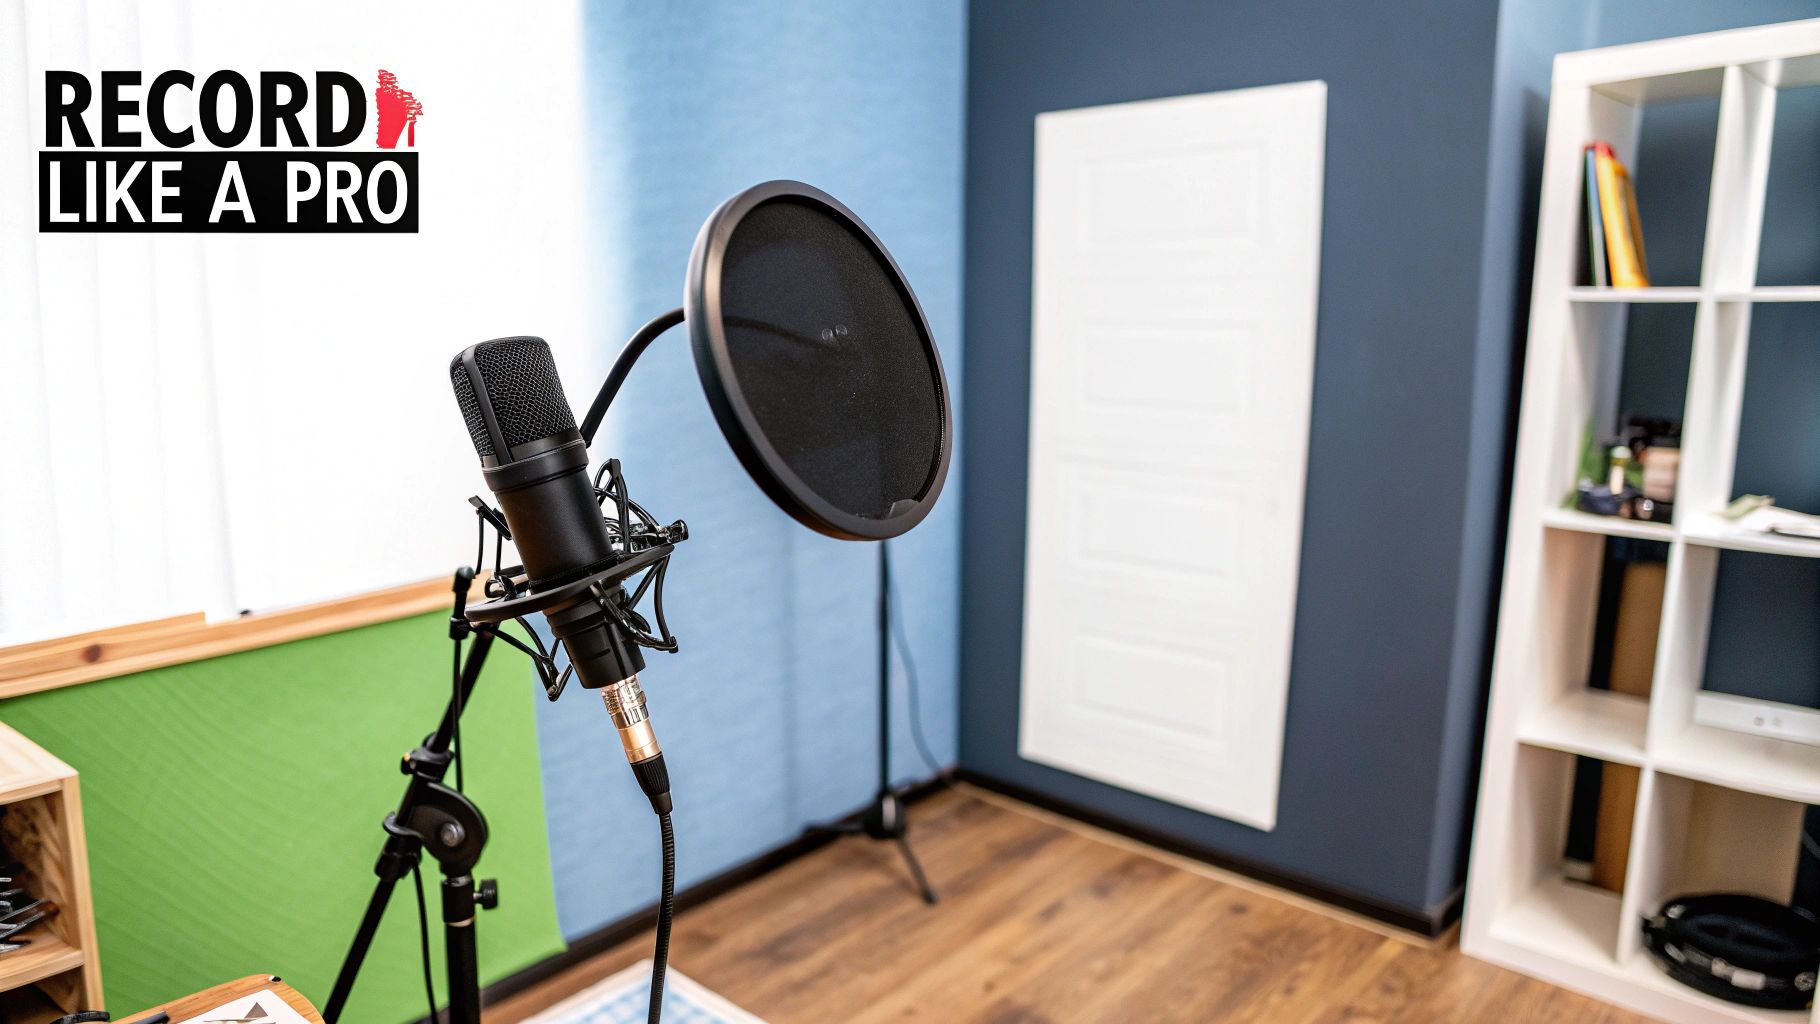
Turning your musical ideas into polished recordings is essential for aspiring music producers. This section explores practical recording techniques applicable in any space, from bedrooms to basements, without the need for a professional studio. Understanding microphone placement, gain staging, and basic acoustic treatment are fundamental to capturing professional-sounding recordings, regardless of your environment.
Microphone Placement for Vocals and Instruments
Microphone placement dramatically affects the quality of your recordings. For vocals, the proximity effect is key. This effect boosts bass frequencies when the microphone is close to the sound source. Experimenting with microphone distance is crucial. Too close, and recordings might sound overly boomy; too far, and they’ll lack clarity and presence.
Positioning the microphone slightly off-center can also minimize harsh “plosives” from consonants like ‘p’ and ‘b’. Additionally, consider your recording space. Recording vocals in a dry environment (one lacking natural reverb) provides more control during the mixing process. This allows you to add reverb and other effects later, shaping the sound to your liking. Similar principles apply to instrument recording; find the “sweet spot” that best captures each instrument’s unique character.
Gain Staging: The Foundation of a Clean Recording
Gain staging, the process of managing audio levels, is essential. It prevents digital distortion by carefully adjusting the input gain on your audio interface, the levels within your DAW (Digital Audio Workstation), and any other hardware in use. Setting levels too high introduces clipping, an irreversible form of audio damage.
Conversely, setting levels too low can increase noise. Gain staging is a balancing act: too much, and you overload the signal; too little, and it’s too weak. A good starting point is to aim for a strong signal without clipping, leaving enough headroom for the mixing and mastering stages.
Recording in Less-Than-Ideal Acoustics
Most beginners lack access to acoustically treated studios. However, you can still achieve great results. The first step is identifying problematic areas in your recording space. These could be corners where bass frequencies build up, or reflective hard surfaces. Simple DIY solutions, such as strategically placing blankets or mattresses against walls, can significantly improve the room’s acoustics.
- Use available materials: Household items like blankets, pillows, and even bookshelves can function as effective sound absorbers and diffusers.
- Strategic placement: Focus on treating areas with the most problematic sound reflections.
- Test and adjust: Record short test clips and listen back to evaluate the effectiveness of your acoustic treatment.
These practical steps create a much cleaner recording environment, even in a home studio setup.
MIDI Programming, Audio Recording, and Session Organization
Recording captures musical performances, either through live instruments or MIDI (Musical Instrument Digital Interface) programming. MIDI lets you control virtual instruments with a MIDI keyboard or controller, essentially programming musical notes. This is fundamental to electronic music production.
- Quantization: Correct minor timing inconsistencies in MIDI performances. Avoid over-quantizing, which can result in an unnatural, robotic sound.
- Layering: Combine different sounds for richer, more complex textures. For example, layer several virtual instruments to create a full-bodied synth pad.
Once your MIDI programming is complete, recording audio in your DAW is straightforward. Simply arm the track, set your levels, and start recording. Session organization is vital for managing your projects. Clear track labeling and color-coding prevent confusion, especially as projects grow in complexity. This organized approach ensures a smoother workflow and simplifies collaboration. Mastering these steps builds a solid foundation for polished, professional-sounding tracks.
Essential Production Techniques Every Beginner Needs
Music production can feel daunting for beginners. With so many tools and techniques, it’s easy to feel overwhelmed. This section breaks down the core production techniques you need to transform your initial recordings into polished, professional-sounding tracks. We’ll explore key tools like EQ, compression, and reverb, giving you the knowledge to shape your sound.
Shaping Your Sound With EQ
Equalization (EQ) is a fundamental tool in music production. Think of it as a sculptor’s chisel for audio, allowing you to boost or cut specific frequencies to shape the tonal balance of your instruments and vocals. For example, if a bassline sounds muddy and clashes with other instruments, EQ can clean it up. By reducing the low-end frequencies, you can create clarity and definition, allowing other instruments to shine through. Conversely, if vocals sound thin, a gentle boost in the higher frequencies can add airiness and presence.
- Boosting: Accentuates specific frequencies.
- Cutting: Reduces specific frequencies.
Ultimately, EQ helps to ensure each element in your mix has its own sonic space.
Controlling Dynamics With Compression
Compression is another crucial tool. It reduces the dynamic range of your audio, making the louder parts quieter and the quieter parts louder. This creates a more consistent and polished sound. Imagine a vocal performance with significant volume fluctuations. Compression smooths out these inconsistencies, creating a more even and impactful performance, essential for a professional, radio-ready sound.
- Threshold: The level at which compression begins.
- Ratio: Determines how much compression is applied.
- Attack: How quickly compression engages.
- Release: How quickly compression disengages.
These controls allow for precise adjustments, tailoring the compression to suit different instruments and vocals.
Adding Depth With Reverb
Reverb simulates the natural reflections of sound in a space, adding depth and dimension to your tracks. This creates a more realistic and engaging listening experience. A dry vocal recording can sound lifeless. Reverb places the vocal in a virtual space, adding ambiance and richness. Whether simulating a small room or a grand concert hall, reverb can dramatically alter the character of your sound, making it more immersive and emotionally resonant.
- Decay Time: How long the reverb lasts.
- Pre-Delay: The time before the reverb starts.
- Size: Simulates the size of the virtual space.
These parameters give you control over the type and amount of reverb applied.
Arranging Your Tracks for Maximum Impact
Effective arrangement involves strategically introducing and removing instruments, building tension and release, and crafting a narrative to keep listeners engaged. It’s more than just placing verses and choruses. Skilled producers use layering to create texture and depth. Layering an acoustic guitar with strings and subtle synth pads can create a rich, evocative soundscape.
- Intro: Captures the listener’s attention.
- Verse: Develops the story.
- Chorus: Delivers the main hook.
- Bridge: Provides a contrasting section.
- Outro: Offers a satisfying conclusion.
These elements, combined with smooth transitions, contribute to a dynamic and compelling listening experience.
Sound Design: Adding Character to Your Music
Sound design, even at a basic level, involves manipulating sounds to create unique textures. Think of it as adding spices to enhance a dish. Simple manipulations, such as adding a chorus effect to a synth or using a phaser on a guitar, can significantly enhance your tracks. Experimentation is key. Try different effects on various instruments to discover what works for your style, helping you establish your unique sonic signature. These core production techniques, combined with creativity, empower you to create professional-sounding music from your home studio. ChordX offers resources to refine these skills and explore more advanced techniques. Learn more with our in-depth tutorials on music production at ChordX.
Mixing and Mastering Your Music Like a Pro
After recording your music, the crucial next steps are mixing and mastering. Mixing blends individual instrument and vocal tracks into a cohesive song. Mastering is the final polish, preparing your track for distribution. This guide walks you through these essential processes, offering practical strategies and explaining when to consider professional help.
Mixing: Blending Your Tracks
Mixing is where your individual tracks take shape. This process involves balancing levels, using effects like EQ, compression, and reverb, and creating depth and space. Imagine painting a sonic landscape. Each track is a color, and mixing is the art of blending these colors into a vibrant and harmonious whole.
- Balancing Levels: This fundamental step involves adjusting each track’s relative volume. The goal is a clear, balanced mix where no instrument overpowers others, ensuring each element contributes to the overall sound.
- EQ for Clarity and Space: EQ helps carve out sonic space for each instrument. By adjusting specific frequencies, you can eliminate muddiness, enhance clarity, and ensure each instrument fits perfectly within the mix. This is key for a professional sound.
- Compression for Control and Punch: Compression evens out the dynamic range of your tracks, making them sound fuller and more controlled. It manages loud peaks and boosts quieter parts, adding punch and impact. This creates a professional, radio-ready sound.
- Reverb and Delay for Depth: Reverb and delay add dimension and a sense of space, making your music sound less sterile and more natural. Use these effects carefully to avoid a washed-out mix.
Mastering: The Final Polish
Mastering is the last step before releasing your music. It’s like adding a finishing coat, enhancing the shine and presentation. Mastering optimizes your track’s loudness, ensures consistent sound across different playback systems, and adds that final layer of professional polish.
- Loudness Optimization: Mastering engineers ensure your track’s loudness is competitive for commercial release, without sacrificing dynamic range. This is vital for a strong presence in the music industry.
- Sonic Consistency: Mastering ensures your track sounds its best on all systems, from headphones to car stereos, creating a reliable listening experience.
- Final Polish: Mastering engineers add subtle enhancements that bring out the best in your mix, enhancing clarity, warmth, and punch for a truly professional final product.
DIY vs. Professional Mastering
Many beginners handle basic mixing themselves, using tutorials and online resources like those on ChordX. While this is a valuable learning experience, professional mastering is recommended, especially for wide release. A professional mastering engineer brings an objective ear, specialized skills, and advanced tools, resulting in a significantly improved final product.
Additionally, North America dominates the music production software market due to its established software developers and high adoption rates by independent artists, record labels, and educational institutions. This concentration of resources contributes to the quality of professional mixing and mastering services. The expanding software tools and AI-driven innovations are lowering the entry barrier for beginners. Learn more about the music production software market. However, while these tools are powerful, a seasoned engineer’s expertise offers valuable nuance and experience.
A Beginner’s Workflow for Mixing and Mastering
- Start with a Rough Mix: Balance levels before adding any effects.
- Use EQ Strategically: Focus on reducing unwanted frequencies, avoiding excessive boosting.
- Compress Gently: Avoid over-compression, which can result in a lifeless sound.
- Add Reverb and Delay Subtly: Begin with small amounts and gradually increase to the desired effect.
- Consider Professional Mastering: For the best outcome, especially for commercial releases, professional mastering is a worthwhile investment.
By following these guidelines and practicing consistently, you can greatly improve your mixing and mastering abilities and produce higher quality music.
Next Steps For Growing As A Music Producer
Completing your first track is a huge milestone. But it’s really just the first step in your journey as a music producer. This section explores how to continue developing your skills, set achievable goals, and navigate the exciting challenges ahead. You’ve built a solid foundation; now it’s time to expand on it.
Expanding Your Musical Horizons
Discovering your unique voice as a producer involves exploring different genres and production styles. Think of it like a painter experimenting with various brushes and colors. As a music producer, you should also be experimenting with diverse sounds and techniques. Don’t be afraid to venture outside your comfort zone. If you mainly create electronic music, try incorporating acoustic instruments or explore a different electronic subgenre.
- Explore different genres: Actively listen to music outside your usual preferences and analyze the production techniques used.
- Experiment with new sounds: Try using new virtual instruments (VSTs) or sample packs to push your creative boundaries.
- Deconstruct your favorite tracks: Break down the elements of songs you admire to understand their creation.
Exploring diverse sounds broadens your musical palette and reveals new creative avenues.
The Power of Collaboration
Working with other musicians is an incredibly enriching experience. It opens you up to new perspectives, generates fresh ideas, and provides opportunities to learn from others. It’s like joining a band, but in the digital realm. You can collaborate remotely with musicians worldwide, exchanging ideas and building upon each other’s strengths.
- Find like-minded musicians: Connect with other producers and artists online through platforms like SoundCloud or in your local music scene.
- Share your work and seek feedback: Be receptive to constructive criticism and use it to refine your skills.
- Learn from others’ workflows: Observe how other producers approach their craft and incorporate new techniques into your own process.
Collaboration can significantly accelerate your growth and lead to exciting new musical discoveries.
Sharing Your Music With The World
Sharing your finished tracks can be both thrilling and nerve-wracking. Numerous platforms are available for sharing music, from established services like Spotify and SoundCloud to social media channels like YouTube and Instagram. Choose the platforms that best align with your genre and target audience.
- Choose the right platform: Research different platforms and select those that cater to your specific genre and goals.
- Build an online presence: Engage with your audience on social media to promote your music and build a following.
- Seek feedback and learn from the response: Use listener feedback to refine your production style and connect with your audience on a deeper level.
Sharing your music helps you gain valuable feedback and connect with a wider audience.
Building Sustainable Habits
Consistency is crucial for long-term development. Establish a regular practice routine, dedicating time each week to music production, even if it’s just for short periods. This helps you maintain momentum and progressively develop your skills. Just as an athlete trains regularly, a music producer needs consistent practice to hone their craft.
- Set realistic goals: Avoid overwhelming yourself. Begin with small, attainable goals and gradually increase complexity.
- Create a dedicated workspace: A dedicated space for music production, free from distractions, enhances focus and creativity.
- Schedule regular practice time: Short, focused practice sessions are more effective than infrequent, longer sessions.
This consistent approach builds discipline and fosters long-term growth.
Overcoming Creative Blocks And Technical Challenges
Every producer encounters creative blocks and technical difficulties. It’s an inherent part of the creative process. Don’t be discouraged by these challenges. When facing a creative block, try stepping away from your project temporarily. Engage in other enjoyable activities – listening to music, taking a walk, or spending time with friends. These mental breaks can refresh your perspective and spark new ideas.
- Take breaks: Stepping away from your project often leads to fresh insights and new perspectives.
- Experiment with new techniques: Exploring new approaches can reignite your creativity and lead to unexpected discoveries.
- Connect with other producers: Discussing challenges with fellow producers can provide solutions and support.
Overcoming these challenges is essential for continuous growth.
Connecting With The Producer Community
Engaging with other producers through online communities and forums, attending local meetups, or participating in online workshops offers invaluable support and motivation. Sharing your experiences, asking questions, and learning from others’ successes and failures can accelerate your growth.
- Join online forums and communities: Connect with other producers, share your work, seek feedback, and find support.
- Attend local meetups and workshops: In-person connections can foster collaboration and create valuable relationships.
- Stay updated on industry trends: Stay informed about new technologies and techniques in music production.
Connecting with the wider music production community broadens your horizons and provides valuable support.
Setting Expectations And Celebrating Progress
Music production is an ongoing journey, not a destination. Set realistic expectations and celebrate every step of your progress. Avoid comparing yourself to others, as everyone learns at their own pace. Focus on your own growth and development. Every track you finish and every new skill you acquire is a step forward.
- Focus on your own journey: Compare your progress only to your past self, not to others.
- Celebrate small victories: Acknowledge and appreciate every achievement, no matter how small.
- Embrace the learning process: View challenges as opportunities for growth and learning.
By focusing on continuous learning, embracing experimentation, and connecting with the producer community, you’ll navigate the exciting path of music production and achieve your creative goals.
Beginner To Intermediate Production Roadmap
This table outlines a general timeline and milestones for developing music production skills over your first year.
| Month | Focus Area | Key Skills | Practice Goals | Milestone |
|---|---|---|---|---|
| 1-3 | DAW Fundamentals | Basic navigation, audio recording, MIDI programming | Create simple loops and arrangements | Complete a basic track |
| 4-6 | Core Production Techniques | EQ, Compression, Reverb, Basic Mixing | Mix a simple song | Improve the sound quality of recordings |
| 7-9 | Arrangement and Song Structure | Intro, Verse, Chorus, Bridge, Outro | Arrange a complete song with multiple sections | Create a more dynamic and engaging song |
| 10-12 | Advanced Production and Mixing | Advanced EQ and compression techniques, automation, effects processing | Mix a complex song with multiple instruments | Polish and finalize a professional-sounding track |
This roadmap serves as a guideline, not a rigid schedule. Adapt it based on your learning pace and individual goals. Remember, consistency and dedication are key to your growth as a music producer. ChordX offers valuable resources and guidance for every stage of your journey.


