
Why Your Cable Chaos Is Costing You More Than You Think
That tangled mess of wires behind your desk isn't just ugly; it's a silent saboteur, actively working against your creative flow and your bottom line. Most of us push music studio cable management to the bottom of the to-do list, but that chaos is costing you right now. Remember the last time you spent 20 minutes digging for the right XLR cable while a client was waiting? That’s not just a moment of frustration—it's a direct hit to your professional image and your income.
This disorganization also creeps into your technical results. That annoying, low-frequency buzz that just ruined an otherwise perfect vocal take? It’s probably the infamous 60-cycle hum, a classic problem caused by power cables getting too cozy with your sensitive audio lines.
The Hidden Costs of Cable Clutter
The drain from poor cabling is about more than just lost time or irritating hums. Let's look at the real-world consequences of letting your cables run wild.
- Equipment Damage: When cables are tangled, they put constant tension on connectors and ports. One wrong move—a misplaced foot or a rolling chair—can yank a cable and damage not just the wire itself but the expensive gear it’s plugged into. Replacing a good cable is annoying, but fixing a busted input on your audio interface is a much bigger and costlier problem.
- Mental Fatigue: Trying to be creative in a cluttered, messy space is draining. Instead of focusing entirely on the performance or the mix, a part of your brain is always tied up dealing with the physical and visual chaos. This "cognitive load" is a creativity killer and makes troubleshooting a nightmare.
- Workflow Inefficiency: A messy setup is the enemy of momentum. When inspiration hits, you need to act fast. If your first move is untangling a cable, hunting for an adapter, or figuring out a mysterious connection issue, you risk losing that creative spark. A clean, organized setup lets you plug in, hit record, and stay in the zone.
Taming the Beast: More Than Just Tidiness
Proper cable management is a pillar of any serious studio, with a direct impact on sound quality, safety, and how smoothly things run. It’s about building a system you can rely on. Professional studio technicians estimate that well-organized cables can slash problem-solving and repair times by at least 30%—a huge deal when studio time is literally money.
A fundamental practice is separating power and audio cables to prevent interference. To learn more about how smart routing protects your sound, check out these helpful insights on audio cable management from Mixing Monster.
Ultimately, it’s about treating your cables with the same care as your microphones and monitors. It’s a shift in mindset—an investment in your professionalism, efficiency, and peace of mind. If you're just starting, building these habits early is a game-changer. Take a look at our guide on setting up a home studio to get it right from day one.
Designing Your Cable Layout Before You Buy Anything

It’s a classic mistake almost every new studio builder makes. You get excited, buy a rack full of amazing gear, and only then do you stare at the mountain of boxes and wonder, "how does this all connect?" The secret to a professional setup—one that avoids the tangled mess we all dread—is to flip that process around. Smart music studio cable management starts with a plan, not a purchase. Before you even think about adding to your cart, grab a pen and paper.
This isn't about being overly meticulous for no reason; it's about foresight. Spending an hour sketching out your studio can save you dozens of hours of headaches later. For example, that corner you picked for your gear rack might look perfect, but if it forces you to run a 50-foot cable across a doorway to reach your mixing desk, you’ve created a trip hazard and potentially introduced signal loss. A simple drawing helps you visualize these practical problems before they become a reality. Think of it as an architect's blueprint for your sound.
Mapping Your Signal Flow and Physical Space
Start by drawing a basic diagram of your room. Mark where your desk, monitors, and main equipment will live. Next, trace the path of your audio signal from start to finish.
- Microphone Input: Where will you typically record vocals or instruments? Think about how the mic cable will run to your preamp or interface without getting in the way or becoming a tripping hazard.
- Outboard Gear: If you have hardware like compressors or EQs, map the path from your interface's outputs to the gear's inputs, and then back to the interface's inputs. This simple exercise helps you figure out the number and length of patch cables you'll need.
- Monitor Path: Trace the line from your interface's main outputs to your speakers. Are the cables you have long enough? Can they be run cleanly along a wall or under your desk to stay out of sight?
This initial planning goes beyond just audio cables. You also need to consider your power needs. Can all your gear plug into a single power conditioner near the rack, or will you need several power strips? Using too many can create more potential for ground loop hum, which is a headache you want to avoid.
Planning for the Future
A great layout doesn't just work for today; it anticipates tomorrow's gear acquisitions. Always leave some extra space in your racks and any cable conduits you install. A pro tip is to document every connection in a simple spreadsheet, even noting the unused inputs and outputs. This makes adding a new synthesizer or microphone incredibly easy because you won't have to re-trace your entire system from memory.
Thinking systematically about cable organization isn't just a niche studio habit; it's a cornerstone of modern infrastructure. The global market for cable management systems was valued at around $23.5 billion in 2024 and is expected to grow significantly. While this figure includes massive data centers, the core principle is the same: organized cabling improves efficiency, reduces hazards, and protects signal integrity. For a deeper look into this expanding market, you can find more information on the cable management industry at Grand View Research. This trend shows just how vital a well-planned system is, whether for a corporate network or your personal creative space.
The Tools That Actually Make A Difference

Effective music studio cable management isn't about buying a bunch of expensive, specialized gadgets. It's about using the right tool for the right job. You’ll find that most seasoned engineers and producers rely on a small set of simple, affordable items to keep their creative spaces in order. Forget the marketing hype and focus on what actually works in a real studio.
The undisputed champion of the cable-taming world is the humble Velcro strap. Unlike single-use plastic zip ties that can pinch and even damage your cables if pulled too tight, reusable Velcro straps are gentle and completely adjustable. This makes them ideal for bundling cables behind your rack or securing a temporary run for a quick recording session. They’re cheap, forgiving, and let you change your setup without constantly reaching for a pair of cutters.
Core Essentials for Any Studio
Beyond basic ties, a few other items form the foundation of any solid cable management plan. These are the tools that solve the most common studio messes and give you the most bang for your buck.
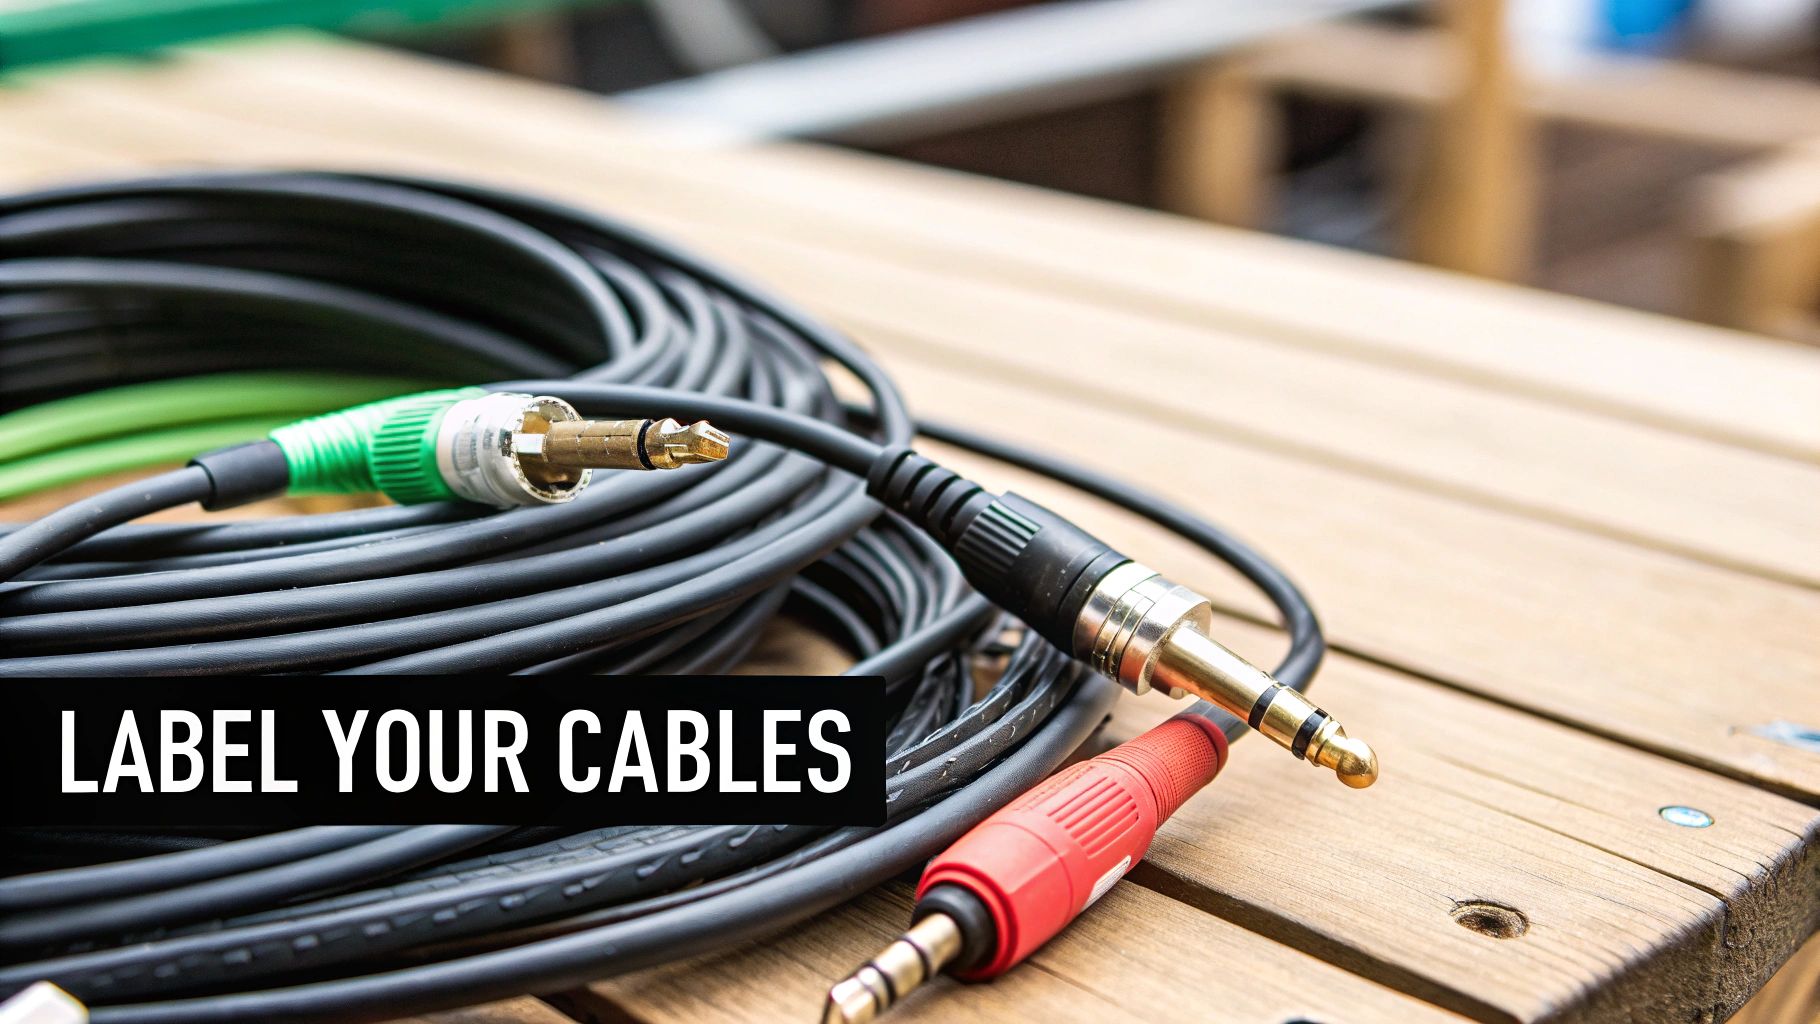
- Cable Labeler: This might feel a little obsessive at first, but it is an absolute lifesaver. Being able to glance at a cable end and read "Interface Out 3 -> Compressor In" saves an incredible amount of troubleshooting time. A simple label maker that prints on flexible, wrap-around tape is a fantastic investment. As one engineer wisely put it on a popular forum, "Every wire tells a story, you don't need to hunt for a list."
- Adhesive Cable Clips and Mounts: For running individual cables along the underside of a desk or the back of a rack, these little clips are invaluable. They keep critical lines—like your main monitor feeds or USB connections—securely in place and, importantly, separated from noisy power lines.
- Cable Sleeves: When you have a group of cables all heading in the same direction, like from your computer to your audio interface, a braided or fabric sleeve is perfect. It bundles them all into one neat package, instantly cleaning up the look and preventing that dreaded "spaghetti" nest from forming behind your gear.
To help you decide what's right for your studio, here’s a quick comparison of the essential tools and their typical uses.
| Tool Type | Price Range | Best For | Durability | Ease of Use |
|---|---|---|---|---|
| Velcro Straps | $ – $$ | Bundling multiple cables, temporary setups, frequent changes | High (reusable) | Very Easy |
| Cable Labeler | $$ – $$$ | Identifying specific connections, troubleshooting, complex setups | High | Easy |
| Adhesive Clips | $ | Securing individual cables to surfaces (desks, walls) | Medium (adhesive can wear) | Easy |
| Cable Sleeves | $ – $$ | Grouping multiple cables into one clean run | High | Easy to Moderate |
| Under-Desk Tray | $$ – $$$ | Hiding power strips and bulky adapters off the floor | Very High | Moderate (requires installation) |
This table shows that you can accomplish a lot with just a small investment. The most expensive items, like a labeler or a tray, solve very specific, high-impact problems, making them worth the cost in the long run.
When to Spend a Little More
While budget-friendly tools will handle 90% of the job, there are a couple of areas where a slightly larger investment pays off big time. An under-desk cable tray is a true game-changer. It's essentially a metal basket that screws to the bottom of your desk, creating the perfect spot to stash a power strip and all those bulky "wall wart" adapters, getting them completely off the floor. This single addition can drastically improve the look, safety, and functionality of your entire workspace.
Transforming Your Cable Nightmare Into An Organized System
Alright, this is where the magic happens. You've mapped out your dream setup and have all your gear ready. Now it's time to roll up those sleeves and build your music studio cable management system. The first move can feel like the biggest leap: unplugging everything. I get it, taking apart a studio that works feels counterintuitive and a bit scary, but trust me on this one. A complete teardown is the only way to build a truly clean and reliable system from the scratch.
If the thought of total studio downtime gives you hives, you can tackle this project in phases. For example, start with the gear in your main equipment rack. Get that wired, labeled, and looking sharp first. Next, you can move on to your desk, connecting your interface, computer, and monitors. This phased approach keeps some of your studio operational, which is perfect if you can't afford a full day offline. It also breaks the job into smaller, less daunting tasks—a huge psychological win.
The Order of Operations for Success
There’s a definite strategy for running cables, and getting it wrong is a recipe for a tangled mess. A common mistake is connecting everything to the gear first and then trying to deal with the leftover slack. This almost always leads to a bird's nest of wires. The better way is to work backward from the destination.
- Start with Power: Get your power strips and conditioners in place first. Under-desk cable trays are fantastic for this. Once they’re mounted, run all your power cords to them, bundling and securing them as you go.
- Run Signal Paths: After power is sorted, it's time for your audio and data cables. A great method is to route them along the paths you planned, using adhesive clips or Velcro ties to keep them in place. Crucially, run them separately from power cables to dodge that annoying signal interference and hum.
- Leave Some Slack: Finally, make sure to leave a small "service loop"—a gentle coil of extra cable—at each connection point. This simple trick prevents strain on your gear's ports and makes it so much easier to pull a piece of equipment out for maintenance without having to unplug half your studio.
This infographic shows just how straightforward installing an under-desk cable tray can be, which is a key step in getting all those bulky power supplies off the floor.
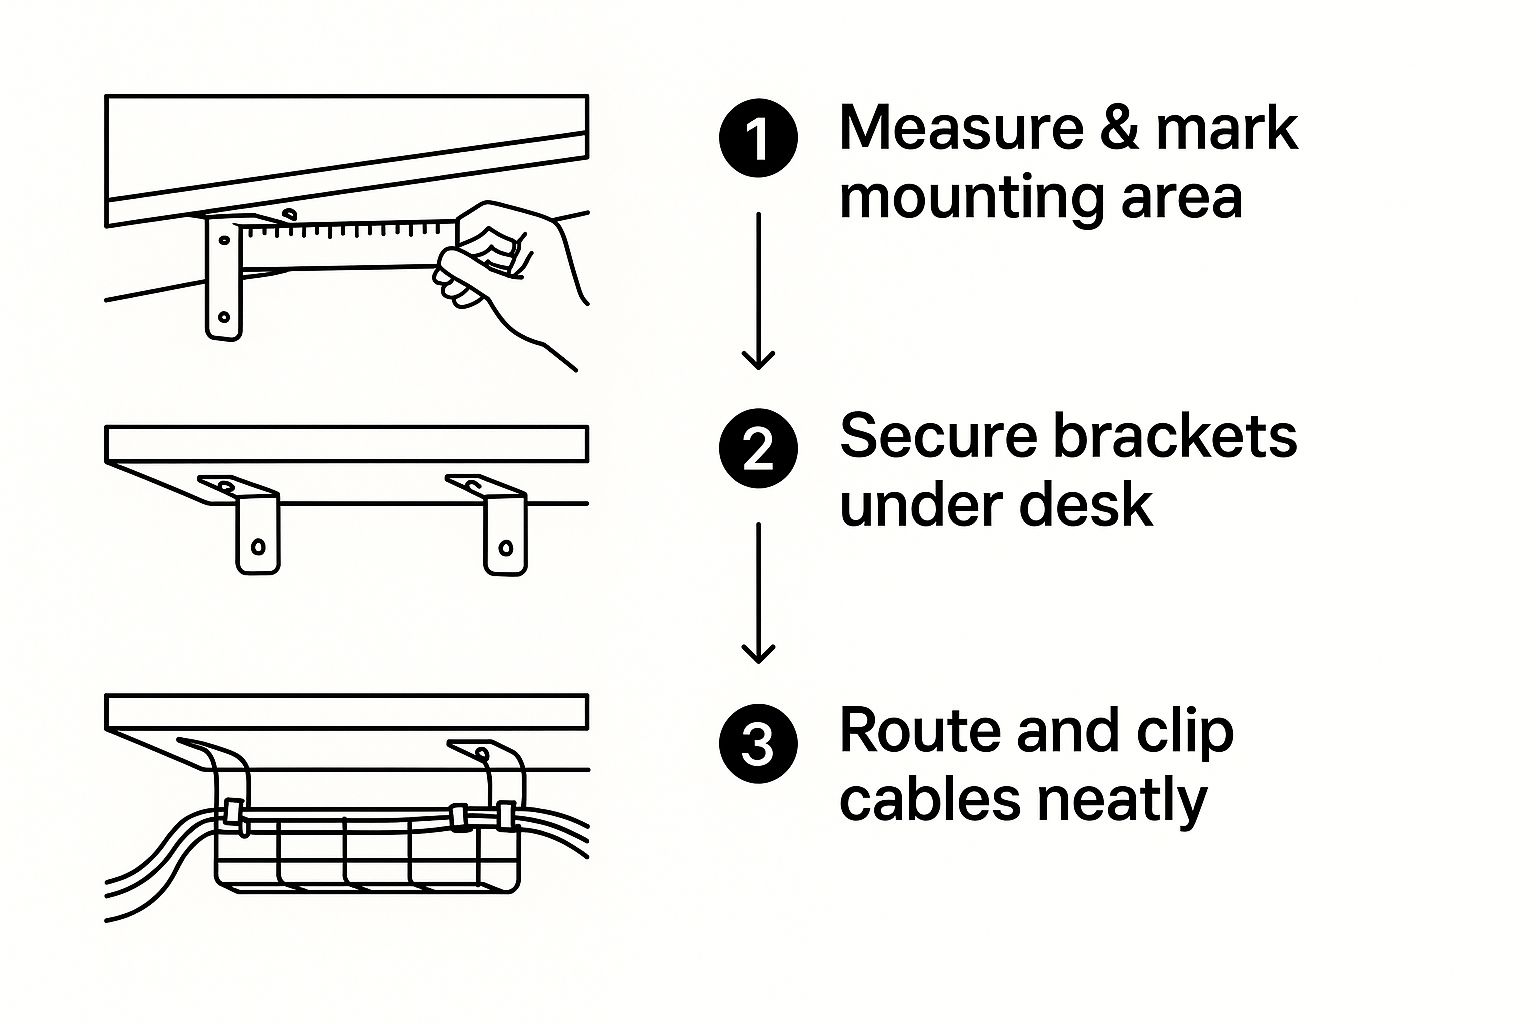
As you can see, a simple process of measuring, securing the tray, and then routing the cables creates a clean foundation for the rest of your wiring.
Testing Before Declaring Victory
Once every cable is plugged in, you're not quite done. Before you proudly slide that rack back against the wall, you have to test every single connection. Power up your gear one piece at a time. Send a signal through every input and every output. Can you hear the audio? Is it clean and free of noise? This careful check ensures you find any bad cables or wrong connections before they become a massive headache to fix later. A well-organized system is as much about reliability as it is about aesthetics. This is one of the most vital concepts for anyone learning about home recording studio essentials, as a solid setup prevents countless technical gremlins down the road.
This screenshot is a great real-world example of clean routing behind a desk, with different cable types kept apart.
See how the audio cables are bundled separately from the power and data lines? That's a key practice for maintaining a pure, high-quality signal.
Choosing Cables That Won't Let You Down
Let's cut through the marketing noise: you don't always need the most expensive studio cables, but constantly buying the cheapest ones is a surefire way to invite problems into your sessions. A great music studio cable management system is useless if the cables themselves are unreliable. The real skill is learning to spot what actually matters for your specific needs, separating genuine quality from flashy packaging and inflated price tags.
The quality of your cables directly impacts your sound, your workflow, and frankly, your sanity. Even the most organized setup can't save a signal that’s being degraded by poor shielding or a connector that's about to fail mid-take. It’s a delicate balance between budget and performance, and knowing where to invest makes all the difference.
Construction and Durability: What to Look For
When you hold a cable, its physical feel tells you a lot. A flimsy, thin outer jacket is a major red flag, suggesting it won't stand up to the normal rigors of studio life—like being stepped on or rolled over by a chair.
Look for these key features:
- Thick Outer Jacket: A robust PVC or rubber jacket is your first line of defense against physical damage.
- Effective Shielding: This is crucial for preventing unwanted noise. Braided shielding offers excellent protection against radio frequency interference (RFI), while foil shielding is good for stopping electrostatic hum. High-quality cables often use both for maximum protection.
- Solid Connectors: The solder points inside the connector are a common point of failure. Brands known for quality control, like Neutrik, use designs that secure the cable firmly, reducing strain on these delicate connections.
Before we dive deeper, it helps to understand the main players in the studio cable world. This table breaks down the common types you'll encounter, what they're best for, and other key details to keep in mind.
Studio Cable Types and Applications
Overview of different cable types commonly used in music studios, their specifications, and recommended applications
| Cable Type | Impedance | Best Use | Length Limit | Price Range |
|---|---|---|---|---|
| XLR | Low (30-100 Ω) | Microphones, balanced line-level signals (monitors, interfaces) | ~100 ft (30 m) | $15 – $75 |
| 1/4" TS | High | Guitars, basses, unbalanced synth outputs | ~18 ft (5.5 m) | $10 – $50 |
| 1/4" TRS | Low | Balanced line-level signals, stereo headphones, insert cables | ~50 ft (15 m) | $15 – $60 |
| RCA | High | DJ gear, consumer audio equipment (turntables, tape decks) | ~25 ft (7.5 m) | $10 – $40 |
| MIDI | N/A | Connecting synthesizers, drum machines, controllers | ~50 ft (15 m) | $5 – $25 |
This table shows why using the right cable for the job is so important. A long guitar cable (TS) can lose high-end frequencies, while a short, high-quality XLR is essential for a clean microphone signal.
Why Cable Quality Is an Industry Focus
The growing demand for high-quality audio isn't just a trend among creators; it's a global economic driver. The audio cable market, valued at $0.83 billion in 2024, is projected to climb as the music industry expands. This growth is fueled by a 10.2% surge in recorded music revenues in 2023, as reported in global market trends from The Business Research Company.
This data highlights the critical role cables play in delivering pristine sound, from major recording studios to home setups. The market's health shows why professional-grade materials and construction are essential for reliable audio delivery. It proves that investing in decent cables isn't just a preference; it’s an industry standard.
Ultimately, choosing the right cables is a foundational part of your studio's reliability. A cable that fails during a critical moment is more than an inconvenience; it's a disruption that can kill creative momentum. By focusing on durable construction and proven connector quality, you build a system you can trust, ensuring your carefully managed setup delivers clean, uninterrupted sound every time.
Keeping Your System Working Long-Term
Getting your studio perfectly organized feels incredible on day one, but the real challenge is keeping it that way six months down the line. Setting up a tidy system is only half the job; the maintenance part is where many of us fall short. A studio is a living, breathing workspace, not a museum. Gear gets swapped out, and new cables are always making an appearance.
The trick is to build simple maintenance habits into your regular workflow. This ensures your music studio cable management system can grow with you, rather than collapsing into a tangled mess. It’s not just about looks—it's about protecting your gear and stopping small annoyances from turning into session-killing headaches.
Building a Maintenance Routine
Being proactive with your cable management will always beat reacting to a mess. You don't need a complicated, color-coded calendar. Just a few straightforward, regular checks will keep everything running smoothly. Think of it like tuning your guitar before a session—a little bit of effort that saves you from much bigger problems later.
- The Quarterly Check-Up: Every three months, set aside 30 minutes to give your setup a once-over. Look for any cables that have slipped out of their ties or clips. Check for strain on connectors, especially for mics or instruments that you move often. This is your moment to spot potential issues before they lead to signal dropouts or, worse, equipment damage.
- The "One In, One Out" Rule: Whenever you bring a new piece of gear into your studio, integrate its cables properly from the very beginning. Don't just drape the new cable over everything else. Take the extra five minutes to run it through your established channels. Likewise, if a piece of gear leaves, remove its cables completely. Old, unused cables are the number one cause of future clutter.
Adapting to New Equipment
Adding a new synth or processor shouldn't mean tearing apart all your hard work. When that new toy arrives, fight the urge to just plug it in wherever you can. Go back to the plan you made initially. A great piece of advice from pro studio techs is to document all of your available inputs and outputs, including the ones you aren't using yet. As one tech wisely put it, "draw up all I/O available…Saves a lot of time down the road."
Having this simple document means you'll know exactly where the new equipment can fit into your system without having to unplug and re-trace everything. This kind of forward-thinking also supports the acoustic health of your room. Just as stray cables can create electrical noise, a messy layout can affect your room's sound. If you're looking to tighten up your space, our guide on how to soundproof a room for music offers some great tips that complement a well-organized studio.
Solving Problems When Things Go Wrong
Even with the most meticulous plan for your music studio cable management, things can still go sideways. Learning how to troubleshoot on the fly is a crucial skill for any producer or engineer. Problems usually pop up as mysterious audio artifacts, like a sudden buzz or a signal that drops out, which definitely weren't there yesterday. Before you hit the panic button and start pulling everything apart, a methodical approach can save you a world of frustration.
Identifying and Fixing Common Issues
Most of the time, these audio gremlins are tied to power and signal interference. A prime example is the dreaded ground loop hum, that persistent 60Hz buzz that can completely ruin a perfect take. This usually happens when different pieces of gear are plugged into separate power outlets, which creates more than one path to the electrical ground.
- The Quick Test: First, try a simple fix. Plug all your interconnected equipment into a single, high-quality power conditioner or surge protector. This alone often silences the hum.
- Isolate the Culprit: If the buzz continues, it's time to play detective. Start unplugging your signal cables one by one from your interface or mixer. The moment the hum stops, you’ve found the cable or device causing the problem.
- When to Get Help: If you’ve gone through these steps and the hum is still there, or if you notice it gets louder when you touch a metal part of your gear, you might be looking at a more serious electrical issue. This is the point where it’s best to call a qualified technician instead of risking damage to your equipment or yourself.
Another frequent headache is simple physical damage to the cables themselves. Take a moment to visually inspect your connections. A frayed cable jacket or a bent pin on a connector is an obvious red flag. For a quick fix to get through a session, you can just swap out the bad cable. For a more permanent solution, you can either replace it entirely or, if you're handy with a soldering iron, repair the connector.
Preventing Future Failures
Every troubleshooting session is a learning opportunity. Did a cable fail because it was constantly being stepped on? Think about rerouting it or protecting it with a floor cable cover. Was that ground loop caused by a new synth you just bought? Make a mental note to always plug new additions into your main power conditioner. Performing regular checks and being proactive are the best ways to keep your organized setup running smoothly for years to come.
For artists and producers who want to build a bulletproof studio from the start, ChordX offers a wealth of in-depth guides and expert advice. Dive into our resources to get your studio in order so you can focus on making professional-quality music.


