
Ready to Record? Essential Gear for Beginners
Starting your recording journey can feel overwhelming. This listicle cuts through the noise, providing a curated list of essential recording equipment for beginners. We'll cover seven must-have items, offering practical tips and real-world insights from industry pros at ChordX. Learn how to choose the right gear and produce amazing sound right from the start.
This guide focuses on value and implementation, providing more than just generic descriptions. You'll learn the strengths and weaknesses of each piece of recording equipment so you can make informed decisions. We'll also cover practical use cases for each item, helping you understand when and how to use them effectively.
This listicle explores:
- USB Microphones: Simple and versatile options for capturing vocals and instruments.
- Audio Interfaces: The bridge between your instruments and your computer.
- Digital Audio Workstations (DAWs): The software heart of your recording setup.
- Studio Headphones: Essential for accurate monitoring and mixing.
- Handheld Digital Recorders: Capture audio on the go with ease.
- Pop Filters and Acoustic Treatment: Improve your recording quality with these key accessories.
- MIDI Controllers: Expand your creative possibilities with versatile input devices.
Choosing the right recording equipment for beginners can be the difference between frustration and creative flow. This guide gets you started on the right foot.
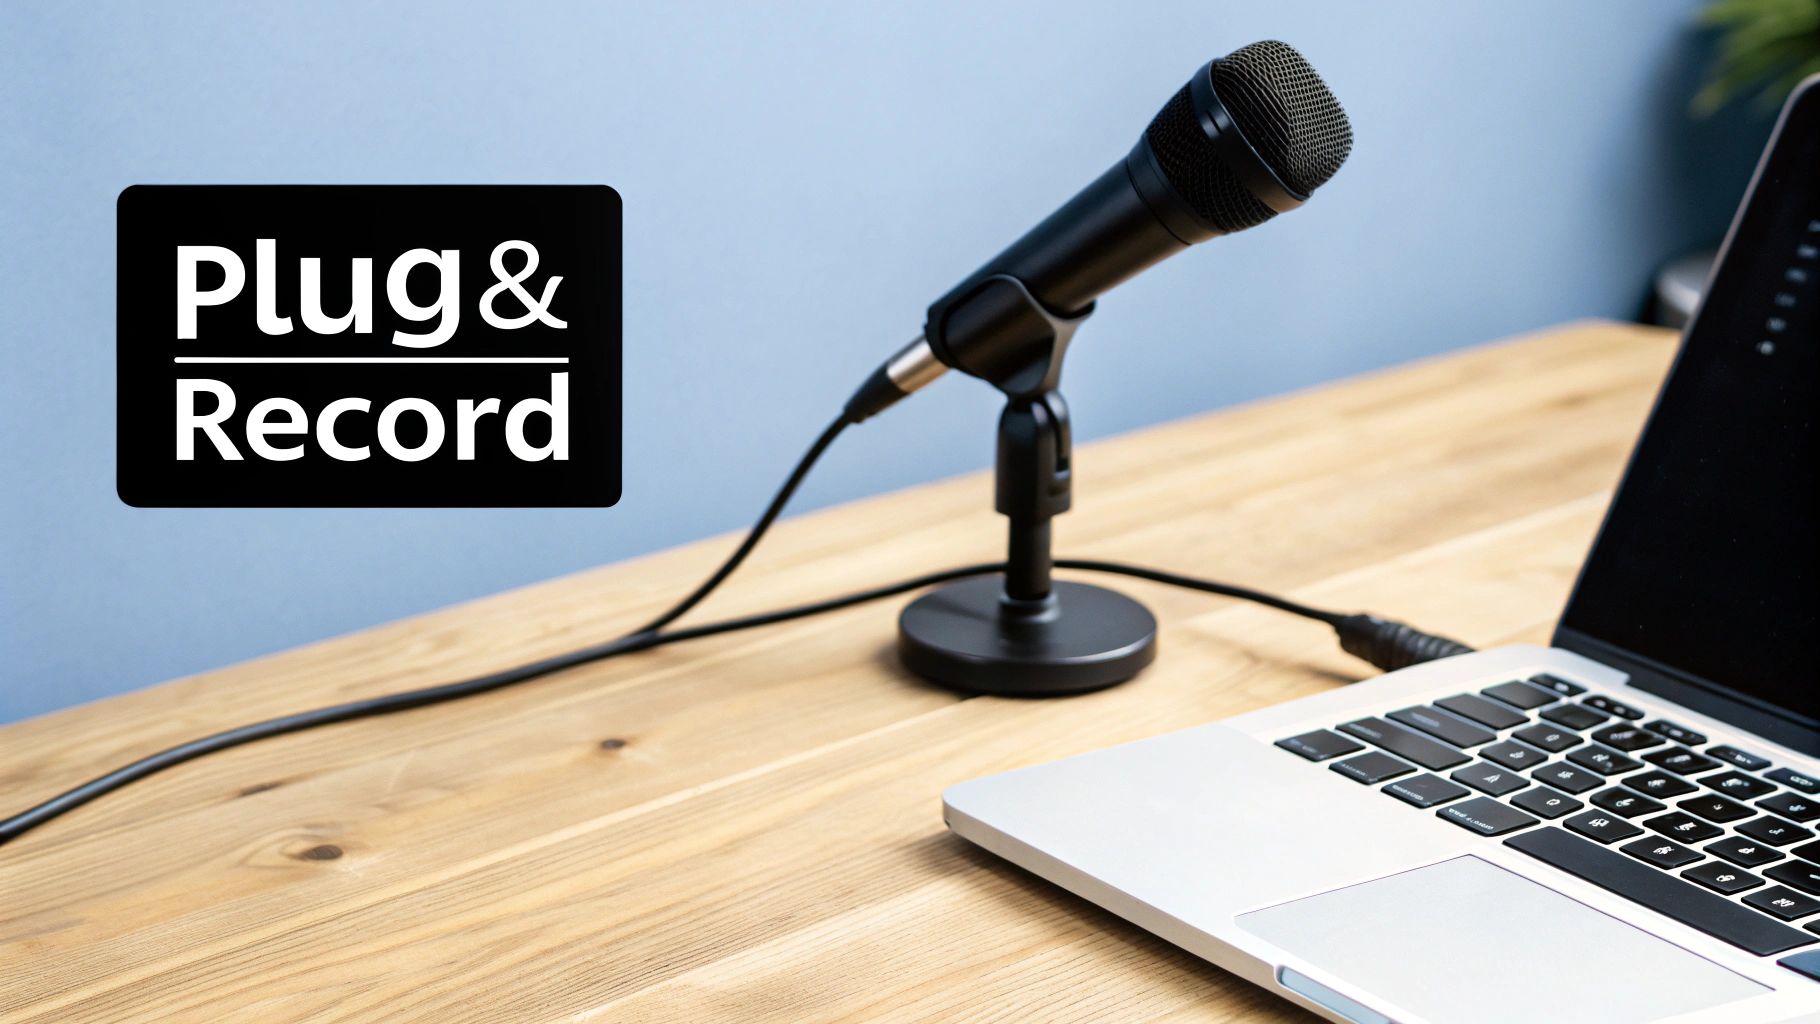
1. USB Microphones
For beginners dipping their toes into the world of recording, USB microphones offer an incredibly accessible entry point. These microphones bypass the need for a separate audio interface, connecting directly to your computer via USB. This plug-and-play functionality makes setup a breeze, allowing you to start recording almost instantly. They are perfect for podcasting, voiceovers, streaming, and even basic music demos.
Why Choose a USB Microphone?
Simplicity is the key advantage. If you're just starting out and don't want to grapple with audio interfaces, gain staging, and phantom power, a USB microphone is your best friend. They’re also generally more budget-friendly than their XLR counterparts, making them ideal for beginners investing in recording equipment for beginners.
Popular and Proven Models
Several USB microphones have gained significant traction and are used by professionals and beginners alike. The Blue Yeti, known for its versatility, is a favorite among YouTubers and podcasters. NPR affiliates have adopted the Audio-Technica ATR2100x-USB for its broadcast-quality sound. Even the Rode PodMic USB has found its place in professional settings like the Joe Rogan Experience podcast. And the Samson Q2U, with its XLR and USB outputs, offers flexibility as you grow.
Practical Tips for Optimal Recording
- Positioning: Place the microphone 6-8 inches from your mouth. This proximity captures a clear, focused sound while minimizing background noise.
- Pop Filter: Invest in a pop filter. This inexpensive accessory reduces plosive sounds (like "p" and "b" sounds) that can create unpleasant pops in your recordings.
- Room Acoustics: Record in a quiet, treated room. Minimizing background noise and reverberation dramatically improves the quality of your recordings.
- Pickup Patterns: Experiment with different pickup patterns if your microphone offers them. Cardioid mode is usually the best for single-person recordings, while omnidirectional can be useful for group interviews.
- Cable Length: Keep your USB cable under 10 feet to avoid signal degradation. Shorter cables ensure a cleaner, more reliable signal transfer.
When to Consider Upgrading
While USB microphones are excellent for beginners, there comes a time when you might outgrow their capabilities. If you're looking for more advanced sound customization, require multiple microphone inputs, or want to integrate higher-end preamps and compressors, then an XLR microphone and audio interface setup is the logical next step. However, for starting your recording journey, a quality USB microphone provides an unparalleled combination of convenience, affordability, and satisfactory results, proving why it's essential recording equipment for beginners.
2. Audio Interfaces
For beginners ready to elevate their recordings beyond the basics, an audio interface is the next logical step. These devices act as the bridge between your microphones, instruments, and computer, converting analog audio signals into digital format. They provide higher-quality preamps than those found in USB microphones, offering cleaner recordings and more headroom. Audio interfaces also open up a world of possibilities for more complex recording setups with multiple inputs and outputs.
Why Choose an Audio Interface?
Audio interfaces unlock a level of control and quality that USB microphones can't match. The improved preamps result in a lower noise floor and cleaner signal. Multiple inputs allow you to record several instruments or microphones simultaneously. They also facilitate the use of professional XLR microphones, known for their superior sound quality and durability.
Popular and Proven Models
The Focusrite Scarlett series is a staple in professional studios worldwide, renowned for its pristine preamps and user-friendly interface. Berklee College of Music students often use the PreSonus AudioBox, a testament to its reliability and educational value. Major podcast networks have adopted the Zoom PodTrak P4 for its multi-track recording capabilities and portability. Even the budget-friendly Behringer U-Phoria series has found a home in countless home studios globally.
Practical Tips for Optimal Recording
- Input Gain: Set the input gain correctly to avoid clipping while capturing a strong signal. Too low, and your recording will be faint; too high, and it will distort.
- XLR Cables: Use balanced XLR cables to minimize noise and interference, ensuring a clean signal path.
- Latency: Ensure your computer has sufficient processing power for low-latency recording, which minimizes delays between playing and hearing your performance.
- Drivers: Download and install the manufacturer's drivers and software for optimal performance and compatibility.
- Input Selection: Start with a 2-input interface unless you plan to record multiple sources simultaneously. This simplifies your setup and keeps costs down.
The following decision tree will help beginners choose the right audio interface based on their needs and budget:
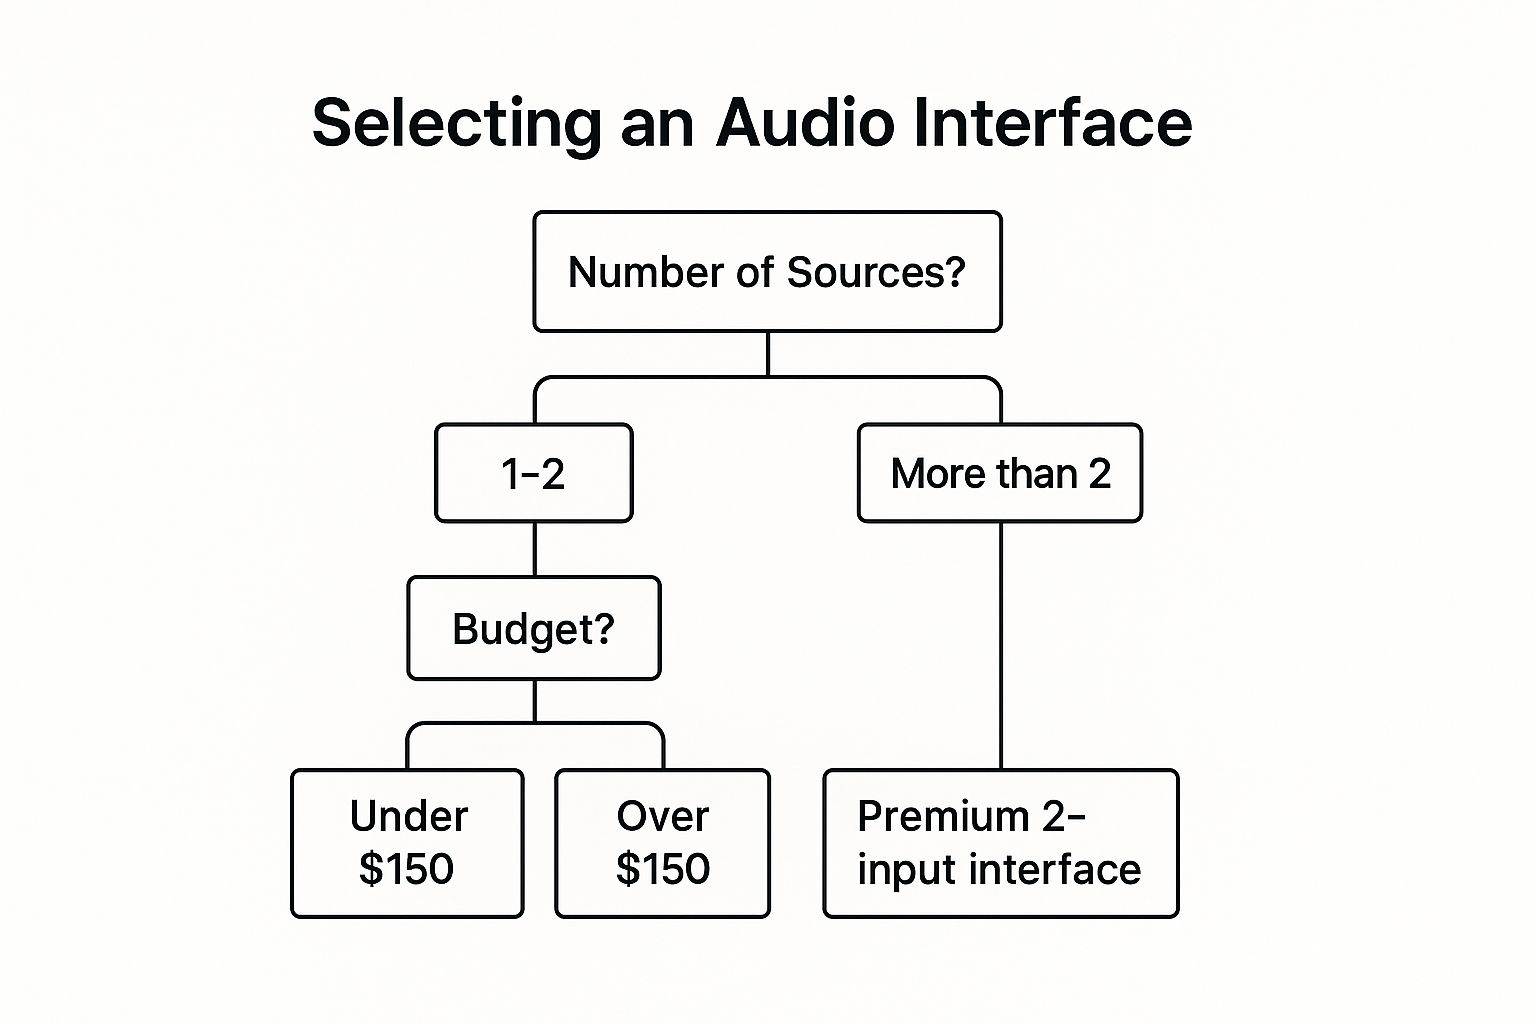
This infographic helps beginners choose an audio interface by considering the number of simultaneous inputs required and their budget. The visualization makes it clear that even on a smaller budget, you can get a suitable audio interface whether recording one or two sources at the same time. For more in-depth guidance, learn more about Audio Interfaces.
When to Consider Upgrading
While a basic 2-input interface is sufficient for many beginners, you might need to upgrade if you start recording drums, multiple vocalists, or a full band simultaneously. At that point, interfaces with more inputs and advanced features, like onboard DSP and digital mixing capabilities, become essential recording equipment for beginners evolving into intermediate recordists.
3. Digital Audio Workstations (DAW)
For beginners venturing into recording, a Digital Audio Workstation (DAW) is absolutely essential. DAWs are software applications designed for recording, editing, mixing, and mastering audio. They are the central hub of your recording process, providing all the tools you need to capture and shape your sound. From multi-track recording and virtual instruments to built-in effects and professional mixing tools, a DAW empowers you to bring your creative visions to life.
Why Choose a DAW?
A DAW is your all-in-one music production command center. Instead of juggling separate tools for recording, editing, and mixing, a DAW integrates everything into a streamlined workflow. This is crucial for recording equipment for beginners, as it simplifies the process and lets you focus on creativity. They offer a vast array of virtual instruments, allowing you to experiment with different sounds even if you don't own the physical counterparts. Moreover, DAWs offer robust editing tools for fine-tuning your recordings and creating polished, professional results.
Popular and Proven Models
Numerous DAWs cater to diverse needs and budgets. Industry giants like Pro Tools, used in major film and music productions like Marvel movies, set the standard for professional mixing. Logic Pro X, favored by artists like Calvin Harris and Disclosure, offers a powerful and intuitive environment for Mac users. Reaper, a favorite among indie game developers like Nolan Bushnell, provides remarkable flexibility and customization. And for budget-conscious beginners, Audacity offers a surprisingly robust free platform used by educators and podcasters worldwide. You can learn more about other free DAWs available for aspiring artists.
Practical Tips for Optimal Use
- Start Simple: Begin with basic projects. Don't try to tackle complex productions right away. Start with recording a single instrument or vocal track, then gradually add layers.
- Tutorials: Watch manufacturer tutorials. Most DAWs offer comprehensive tutorials that walk you through the software's features and functionalities.
- Keyboard Shortcuts: Learn keyboard shortcuts. These can dramatically speed up your workflow, saving you valuable time and effort.
- File Organization: Maintain organized file structures. As your projects become more complex, organized files are crucial for efficient project management.
- Regular Saving: Save your projects frequently. This prevents data loss and ensures you can always revert to previous versions.
When to Consider Upgrading
While free DAWs like Audacity and GarageBand offer a great starting point, you might eventually outgrow their limitations. If you require more advanced features, plugins, or greater processing power, upgrading to a professional DAW like Pro Tools, Logic Pro X, or Reaper is the next logical step. For a wider selection, consider checking out our guide to the best free DAWs Learn more about…. However, for starting your recording journey, a free or entry-level DAW provides everything you need to explore the world of audio production and discover what is possible with recording equipment for beginners.
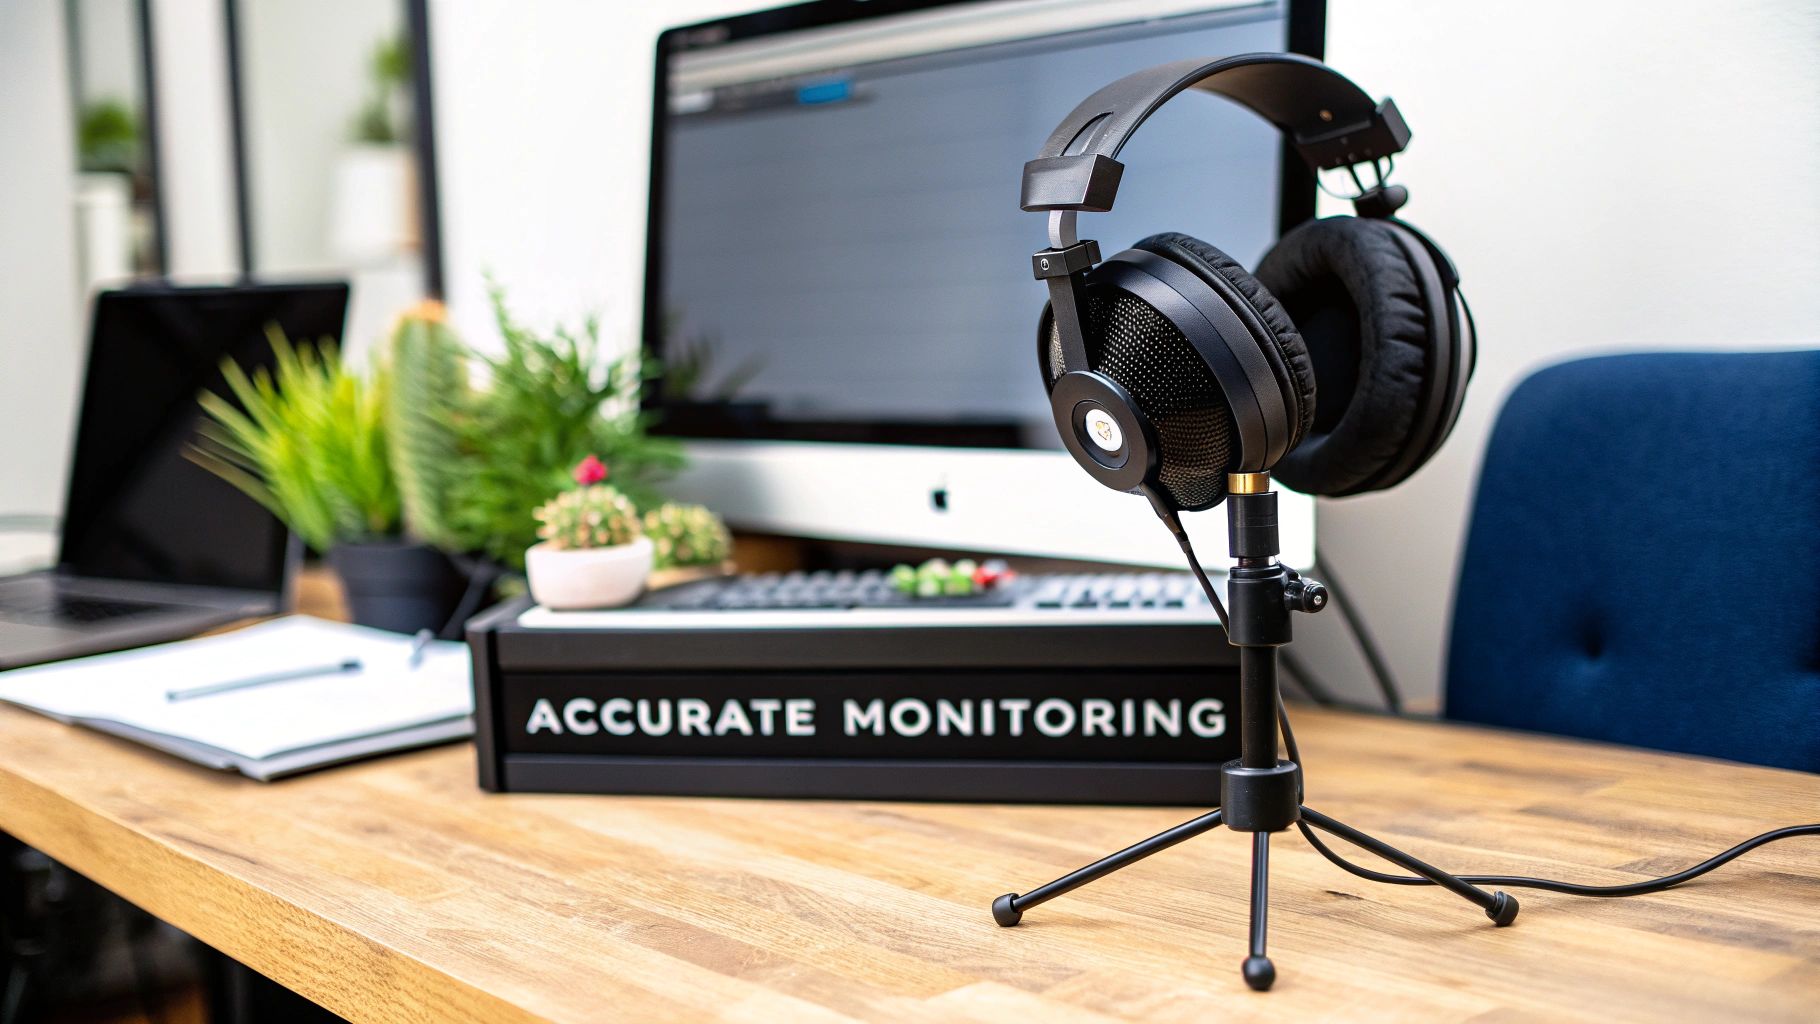
4. Studio Headphones
For crafting a polished recording, accurate monitoring is paramount. Studio headphones provide the precision required for critical listening during recording and mixing. Unlike consumer headphones designed for enhanced bass or treble, studio headphones prioritize a flat, neutral frequency response. This accuracy reveals every nuance of your audio, allowing for informed decisions about EQ, compression, and other mixing processes, which is key when assembling recording equipment for beginners.
Why Choose Studio Headphones?
The primary benefit is their uncolored sound reproduction. This neutrality ensures that what you hear in your headphones reflects the true character of the audio signal. This accurate representation is invaluable when making mixing decisions and vital for recording equipment for beginners. Closed-back designs isolate the sound, preventing audio from bleeding into microphones during recording sessions.
Popular and Proven Models
The industry standard Sony MDR-7506 headphones, used in professional studios for over 30 years, are renowned for their detailed sound and durability. The Audio-Technica ATH-M50x, adopted by major record labels, offers excellent clarity and a comfortable fit. The Beyerdynamic DT 770 Pro, a staple in studios like Abbey Road, is praised for its spacious soundstage and deep bass response. The AKG K240 Studio, favored by film composers and audio engineers, delivers a balanced and accurate listening experience.
Practical Tips for Optimal Recording
- Closed-Back for Recording: Use closed-back headphones during recording to prevent sound leakage into your microphone.
- Ear Fatigue: Take frequent breaks to avoid ear fatigue, as prolonged listening sessions can skew your perception of sound.
- Cross-Referencing: Check your mixes on multiple playback systems (speakers, car stereo, etc.) to ensure they translate well across different environments.
- Maintenance: Keep your headphones clean and replace ear pads when they wear out to maintain optimal sound quality and hygiene.
- Impedance Matching: If using a headphone amplifier or audio interface, ensure its impedance matches your headphones for optimal performance.
When to Consider Upgrading
While entry-level studio headphones offer excellent value, higher-end models provide even greater detail, wider frequency response, and improved soundstage. As your ears become more trained, you might appreciate the nuances that premium headphones reveal. However, for beginners building their first recording setup, affordable yet reliable studio headphones offer a crucial tool for monitoring and mixing, solidifying their position as essential recording equipment for beginners.
5. Handheld Digital Recorders
For beginners seeking a portable and versatile recording solution, handheld digital recorders are an excellent choice. These self-contained devices pack high-quality microphones, onboard storage, and simple controls into a compact form. This makes them ideal for capturing audio on the go, whether it's a live musical performance, an interview in a bustling city, or the subtle sounds of nature. They are truly valuable recording equipment for beginners.
Why Choose a Handheld Digital Recorder?
Portability and ease of use define the appeal of handheld recorders. Unlike setting up a complex studio with microphones and interfaces, these recorders are ready to capture audio within seconds. They're perfect for situations where mobility is key, allowing you to record wherever inspiration strikes. Their simple operation makes them perfect recording equipment for beginners.
Popular and Proven Models
The Zoom H1n is a staple for journalists and documentary filmmakers, revered for its compact size and clear audio capture. The Tascam DR-40X, with its robust build and XLR inputs, is a favorite among field recording enthusiasts and podcasters. Musicians often turn to the Sony PCM-A10 for capturing rehearsals and songwriting ideas. The Zoom H5, with its interchangeable microphone capsules, provides flexibility for film students and independent filmmakers.
Practical Tips for Optimal Recording
- Batteries: Always carry spare batteries or a power bank. Nothing ruins a recording session faster than a dead battery.
- Wind Noise: Use a windscreen when recording outdoors. This minimizes the distracting rumble of wind interference.
- Recording Levels: Set your recording levels manually. This ensures consistent volume and avoids clipping.
- File Formats: Record in WAV format for the highest quality audio. Use MP3 format for longer recording times when storage space is limited.
- Pre-Record Check: Always test your recording levels and microphone positioning before important sessions. This prevents unexpected issues during crucial moments.
When to Consider Upgrading
While handheld recorders are fantastic for beginners, limitations arise when recording in controlled studio environments. If you need precise control over microphone placement, require multiple inputs for complex recordings, or desire advanced mixing capabilities, then a dedicated audio interface and microphone setup offer more flexibility. However, for capturing audio on the go and for quick, convenient recording, a handheld digital recorder offers unparalleled portability and ease of use, making it essential recording equipment for beginners.
6. Pop Filters and Acoustic Treatment
For beginners, achieving professional-sounding recordings often hinges on more than just a good microphone. Pop filters and acoustic treatment are essential accessories that drastically improve recording quality by addressing two common issues: plosives and room reflections. These tools are recording equipment for beginners seeking polished, professional results.
Why Use Pop Filters and Acoustic Treatment?
Pop filters, typically made of mesh or metal, diffuse bursts of air from plosive sounds like "p" and "b," preventing these sounds from overloading the microphone diaphragm and causing distortion. Acoustic treatment, ranging from foam panels to bass traps, minimizes sound reflections within a room. This creates a cleaner recording by reducing reverberation and background noise.
Popular and Proven Solutions
Professional studios, including Abbey Road, rely on Auralex foam for acoustic treatment. Home recording enthusiasts frequently use the sE Electronics Reflexion Filter for a portable vocal booth solution. Stedman Proscreen pop filters are a staple in major recording studios, while budget-conscious indie musicians often turn to thick moving blankets for effective DIY acoustic treatment.
Practical Tips for Optimal Results
- Pop Filter Placement: Position the pop filter 4-6 inches from your microphone. This distance provides adequate protection without compromising clarity.
- Bass Traps First: For acoustic treatment, start with corner bass traps to address low-frequency buildup. This often yields the most significant initial improvement.
- Budget-Friendly Acoustics: Use thick moving blankets as a cost-effective way to dampen reflections. Hang them strategically around your recording space.
- Room Selection: If possible, record in smaller rooms with softer furnishings. These spaces naturally absorb sound, reducing the need for extensive treatment.
- Microphone Placement: Experiment with microphone placement before investing heavily in acoustic treatment. Sometimes, simply moving the microphone can significantly improve the sound.
When to Consider Upgrading
While basic pop filters and DIY acoustic treatments are excellent starting points, you might consider upgrading as your needs evolve. Dedicated vocal booths, higher-end bass traps, and professional diffuser panels offer superior sound control for more demanding recording scenarios. Learn more about Pop Filters and Acoustic Treatment. However, even for beginners, incorporating simple pop filters and acoustic treatment significantly elevates recording quality, making them valuable additions to any beginner's recording equipment for beginners setup.
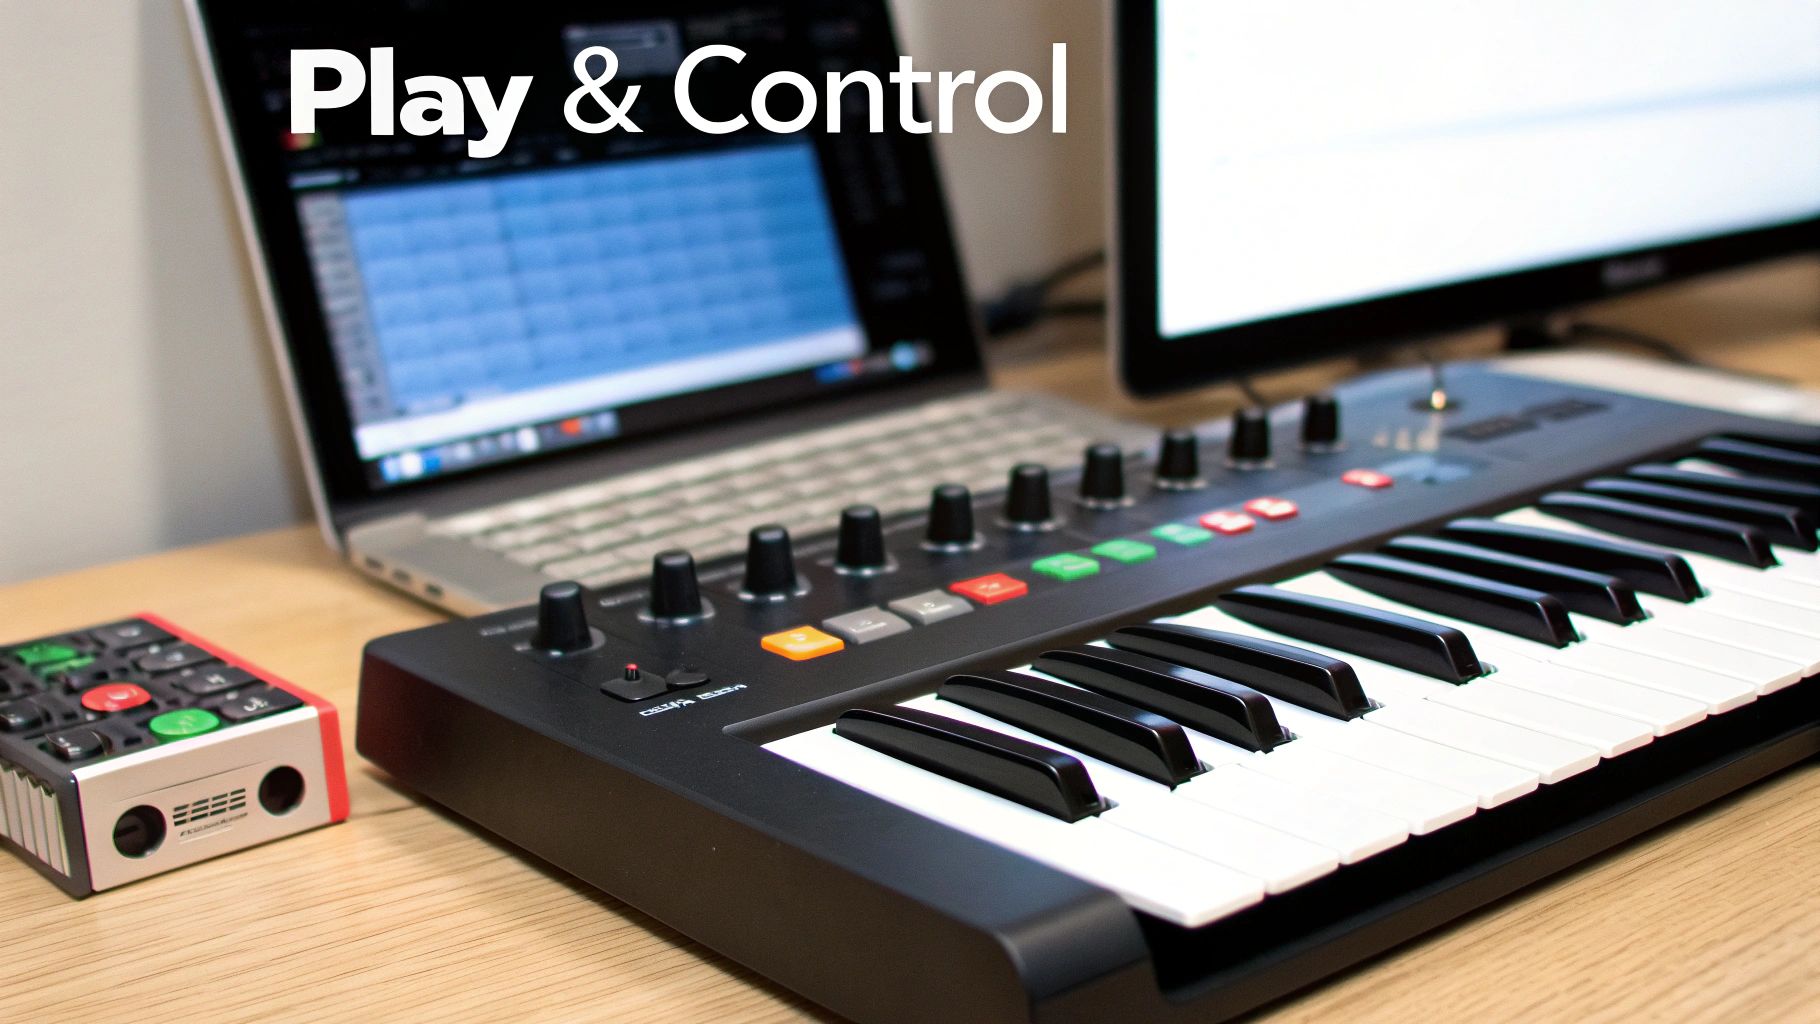
7. MIDI Controllers
For beginners venturing into electronic music production, songwriting, or beat-making, MIDI controllers are indispensable tools. These devices don't produce sound themselves but act as control hubs for virtual instruments, software synthesizers, and your digital audio workstation (DAW). They provide a tactile and expressive way to create music on your computer. Imagine playing a piano keyboard that triggers a vast array of sounds, from orchestral strings to synthesized basslines – that's the power of a MIDI controller. They are crucial recording equipment for beginners exploring digital music creation.
Why Choose a MIDI Controller?
Hands-on control is the primary benefit. Manipulating virtual knobs, faders, and pads offers a more intuitive and engaging experience than clicking around with a mouse. MIDI controllers unlock a world of expressive possibilities, allowing you to shape sounds in real-time and capture nuanced performances. They streamline your workflow, making it easier to translate musical ideas into tangible recordings.
Popular and Proven Models
The Akai MPK series, favored by producers like Timbaland and Just Blaze, is renowned for its responsive keybeds and extensive pad controls. Novation's Launchkey is another popular choice, known for its seamless integration with Ableton Live. For those seeking a premium experience, Native Instruments Komplete Kontrol offers deep integration with their vast library of virtual instruments. Arturia's KeyLab controllers, with their vintage-inspired design, are popular among synthwave and electronic artists. The M-Audio Oxygen series provides budget-friendly options for beginners.
Practical Tips for Optimal Recording
- Key Count: Choose a keyboard with a key count that suits your playing style and available space. 25 keys are portable, while 49 or 61 keys provide more range.
- Bundled Software: Look for models that include quality bundled software, such as virtual instruments or DAWs, to get you started quickly.
- Mapping Controls: Learn to map the controller's knobs and faders to your most-used DAW functions for efficient workflow.
- Start Simple: Begin with a basic model and upgrade as your needs and skills grow.
- Pad Controllers: If your focus is on beat-making, consider a pad controller for triggering drum samples and loops.
When to Consider Upgrading
As you delve deeper into music production, you might find yourself wanting more advanced features. If you need more control surfaces, motorized faders, or aftertouch capabilities, upgrading to a higher-end MIDI controller can enhance your creative workflow. However, for starting your recording journey, a basic MIDI controller is more than enough to bring your musical ideas to life, demonstrating its importance as recording equipment for beginners.
Beginner Recording Gear: Key Features Comparison
| Item | Core Features ✨ | User Experience ★★★★☆ | Value Proposition 💰 | Target Audience 👥 | Unique Selling Points 🏆 |
|---|---|---|---|---|---|
| USB Microphones | USB plug-and-play, built-in ADC, zero-latency monitoring | Easy setup, portable, compatible | $50-$300, affordable beginner choice | Beginners, podcasters, streamers, basic musicians | No interface needed, travel-friendly |
| Audio Interfaces | Multi XLR/1/4" inputs, high-quality preamps, MIDI I/O | Professional sound, expandable setup | $100-$500, investment for quality | Intermediate to pro users, multi-track recording | Supports multiple sources, studio-grade preamps |
| Digital Audio Workstations (DAW) | Multi-track recording/editing, plugins, MIDI sequencing | Feature-rich, steep learning curve | Free to $600, wide range options | All skill levels, music producers, editors | Complete production hub, virtual instruments |
| Studio Headphones | Flat frequency response, closed-back, comfortable | Accurate monitoring, portable | $50-$300, budget to mid-range | Recording engineers, mixers, budget-conscious users | Accurate sound, prevents bleed in recording |
| Handheld Digital Recorders | Portable, built-in mics, battery-powered, XLR input | Easy field recording, no PC required | $100-$400, versatile audio capture | Journalists, filmmakers, field recorders | Portable standalone recording |
| Pop Filters & Acoustic Treatment | Mesh screens, foam panels, bass traps, reflection filters | Improves vocal quality, controls room acoustics | $10-$300, cost-effective sound treatment | Home studios, podcasters, budget-conscious recordists | Essential for clear vocals, easy setup |
| MIDI Controllers | Velocity-sensitive keys/pads, assignable controls, USB | Expressive control, software integration | $100-$500, beginner to intermediate | Electronic musicians, producers, DAW users | Hands-on DAW and instrument control |
Level Up Your Sound: Next Steps for Beginners
This journey through essential recording equipment for beginners has covered a lot of ground. We've explored key tools like USB microphones, audio interfaces, DAWs, studio headphones, handheld recorders, and even touched on crucial accessories and MIDI controllers. Each piece of equipment plays a vital role in capturing high-quality sound and shaping your creative vision. Remember, the best recording equipment for beginners is the gear that inspires you and fits your budget.
Mastering Your Workflow
One of the most crucial takeaways for beginners is understanding how these tools interact. A powerful DAW is useless without a decent audio interface to connect your microphone. Similarly, top-tier headphones lose their value if your room's acoustics are poor. Investing time in learning your workflow – from setting up your DAW to optimizing your recording environment – is as important as the equipment itself. This knowledge unlocks your creative potential and helps avoid technical roadblocks.
Refining Your Recording Techniques
Beyond the equipment, consider these practical tips:
- Microphone placement: Experiment to find the sweet spot that captures your sound source best. Small adjustments can drastically alter your recordings.
- Gain staging: Properly setting input levels on your audio interface prevents clipping and ensures a clean signal.
- Acoustic treatment: Even simple DIY solutions can significantly improve your room's acoustics, leading to clearer recordings.
These seemingly small details are what separate amateur recordings from professional-sounding tracks. Mastering these fundamental recording techniques is essential for any aspiring artist or producer.
Embracing Continuous Learning
The world of audio recording is constantly evolving. New technologies, software updates, and creative techniques emerge all the time. Embracing continuous learning is key to staying ahead of the curve. Experiment with different microphone techniques, explore new DAW features, and research advanced mixing and mastering principles. This ongoing exploration keeps your creative process fresh and allows you to develop your unique sonic signature.
For beginners, understanding the core principles discussed in this article is a strong foundation. From setting up your first USB microphone to configuring a more complex recording setup with an audio interface, every step you take brings you closer to achieving professional-sounding results. Remember, the journey is as important as the destination. Enjoy the process of learning, experimenting, and creating.
Want to take your recording skills further? Explore ChordX for in-depth tutorials, expert advice, and curated resources specifically designed for beginners. ChordX can help you master your recording setup, produce professional-quality tracks, and unlock your full creative potential.


